This Kidkraft kitchen mini makeover is a great DIY project to tackle over a weekend. Plus, the end result is hours of fun for little ones!
This post contains some affiliate links for your convenience. Click here to read my full disclosure policy.
I’ve been eyeing play kitchens for a while. From mom friends to reviews online, the general consensus is that a play kitchen is one of those toy investments that will pay off in hours of entertainment for your toddler. In other words, a sanity saver.
While I’m under no illusion that my two year old is all of a sudden going to play quietly by herself for more that 5 minutes, I can definitely see how it has all the elements for potential toddler success:
- Things that open and close
- Something that looks like what adults use
- Endless imaginative play scenarios
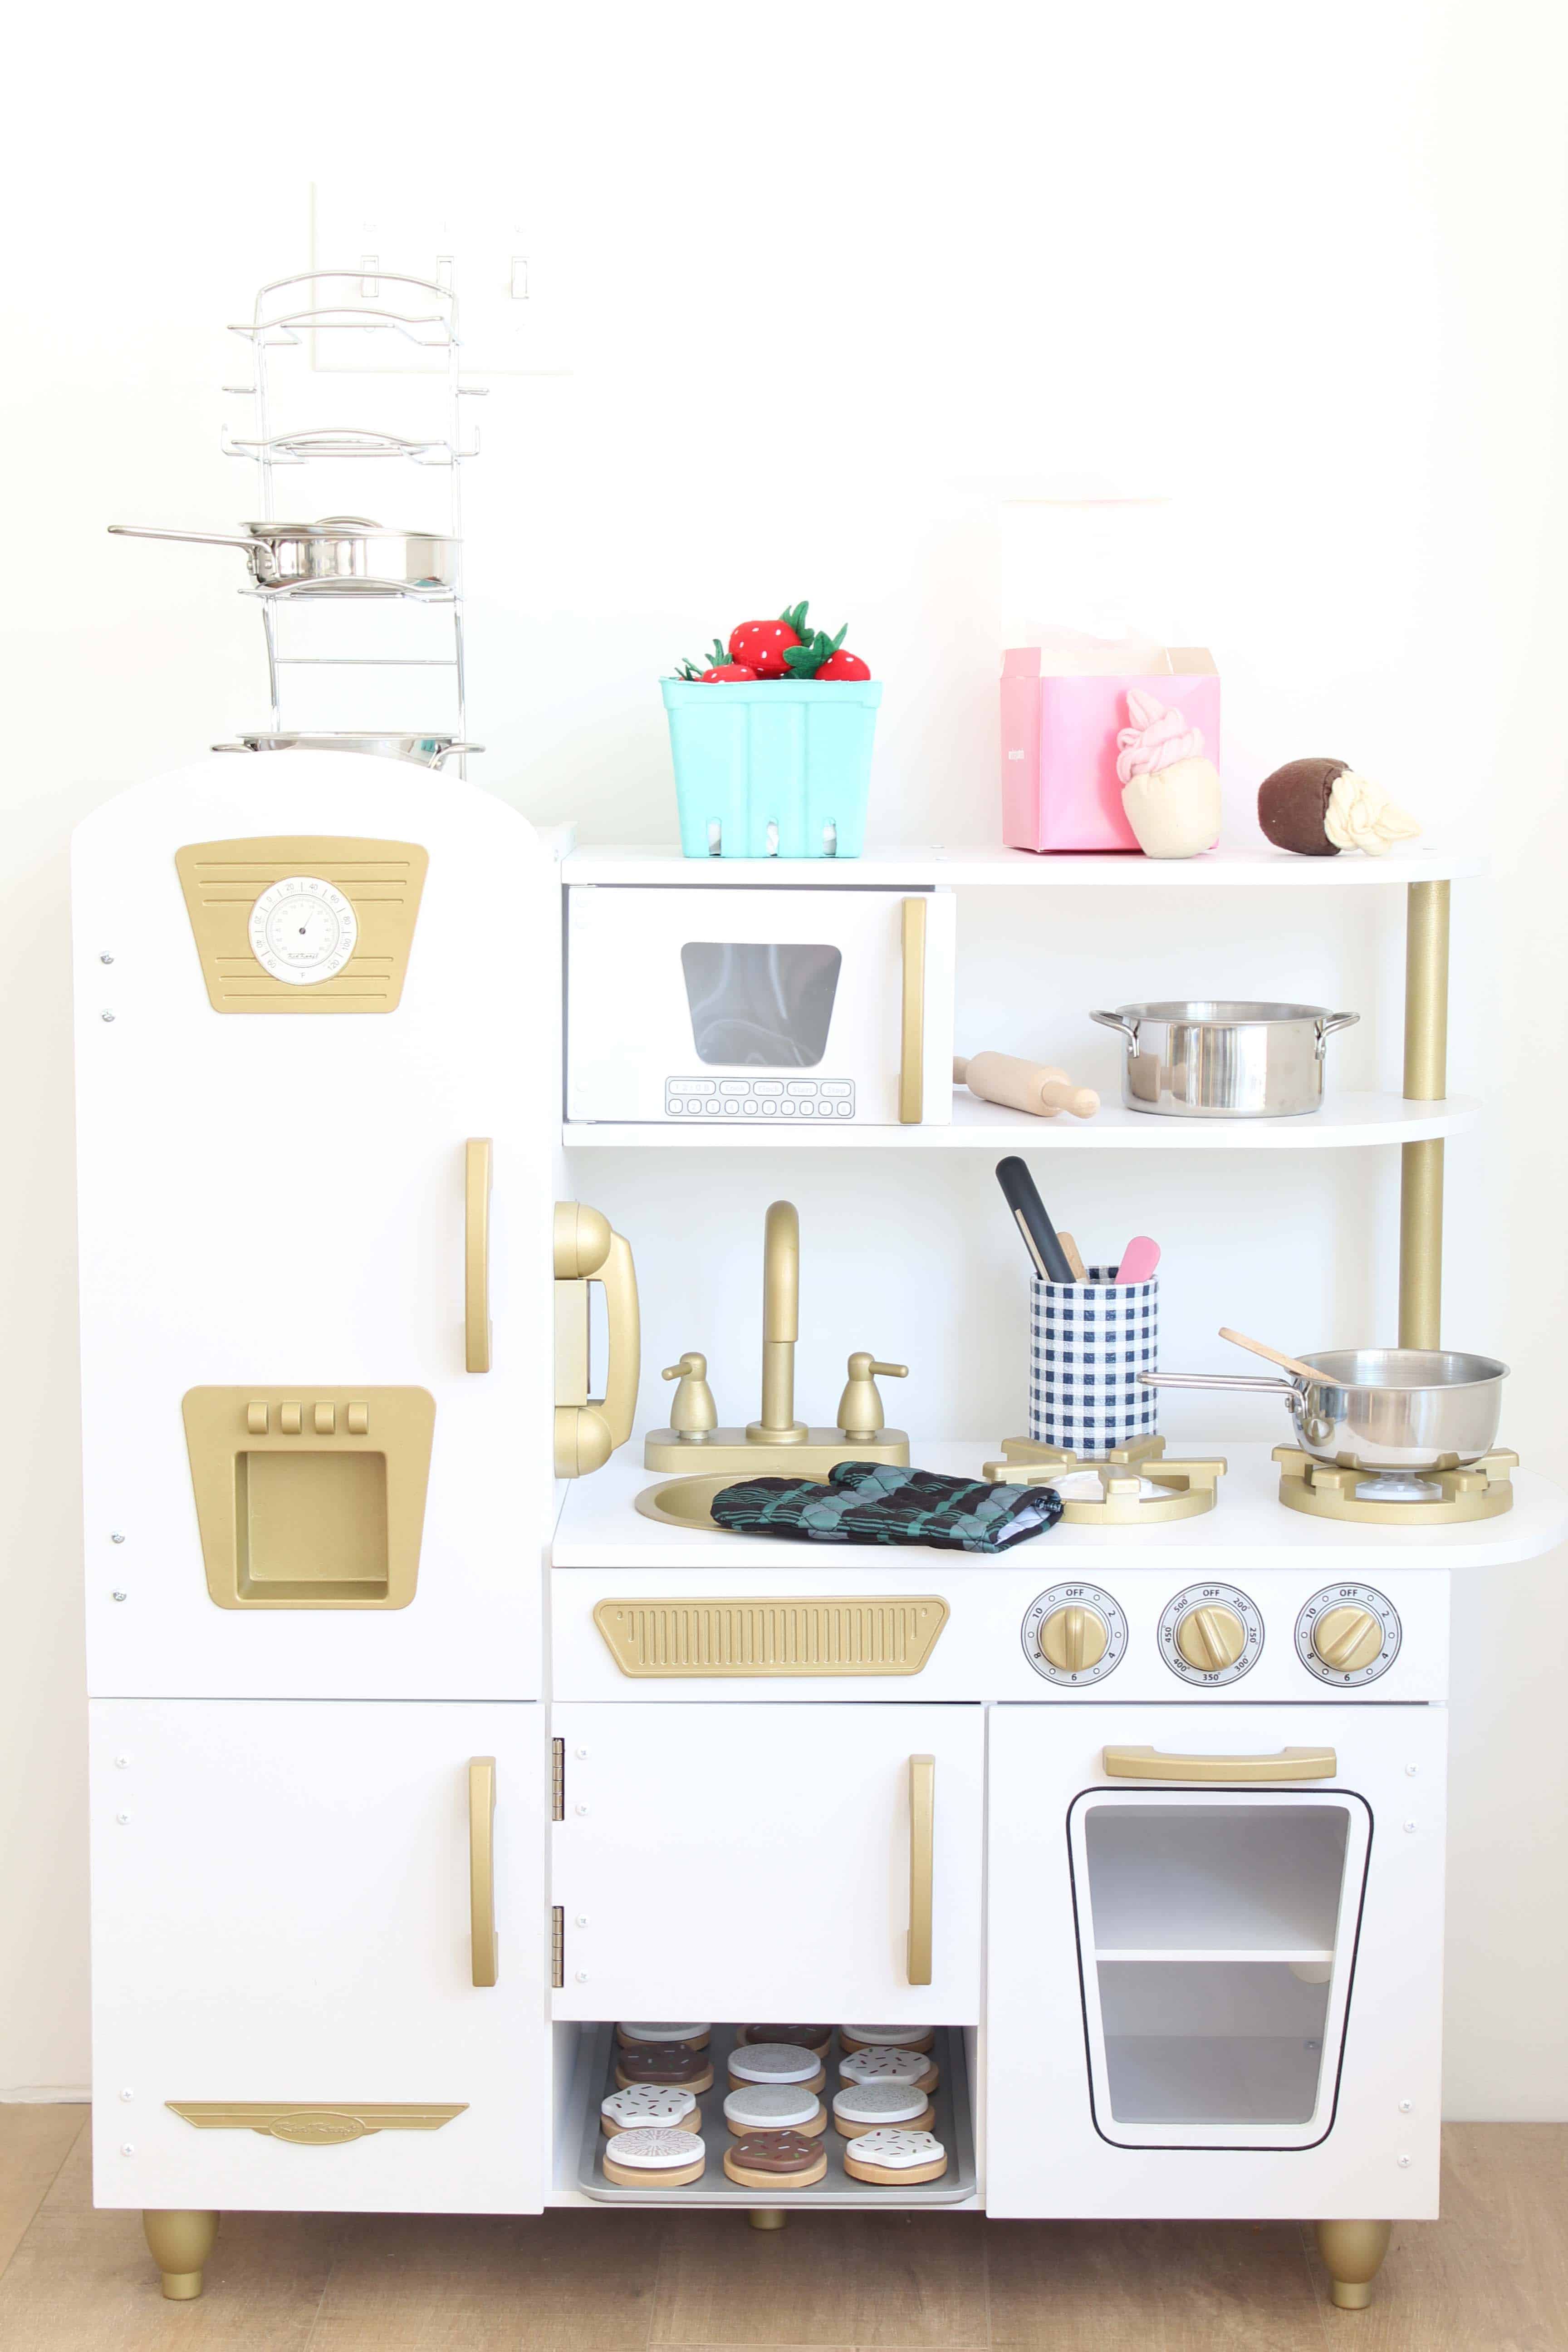
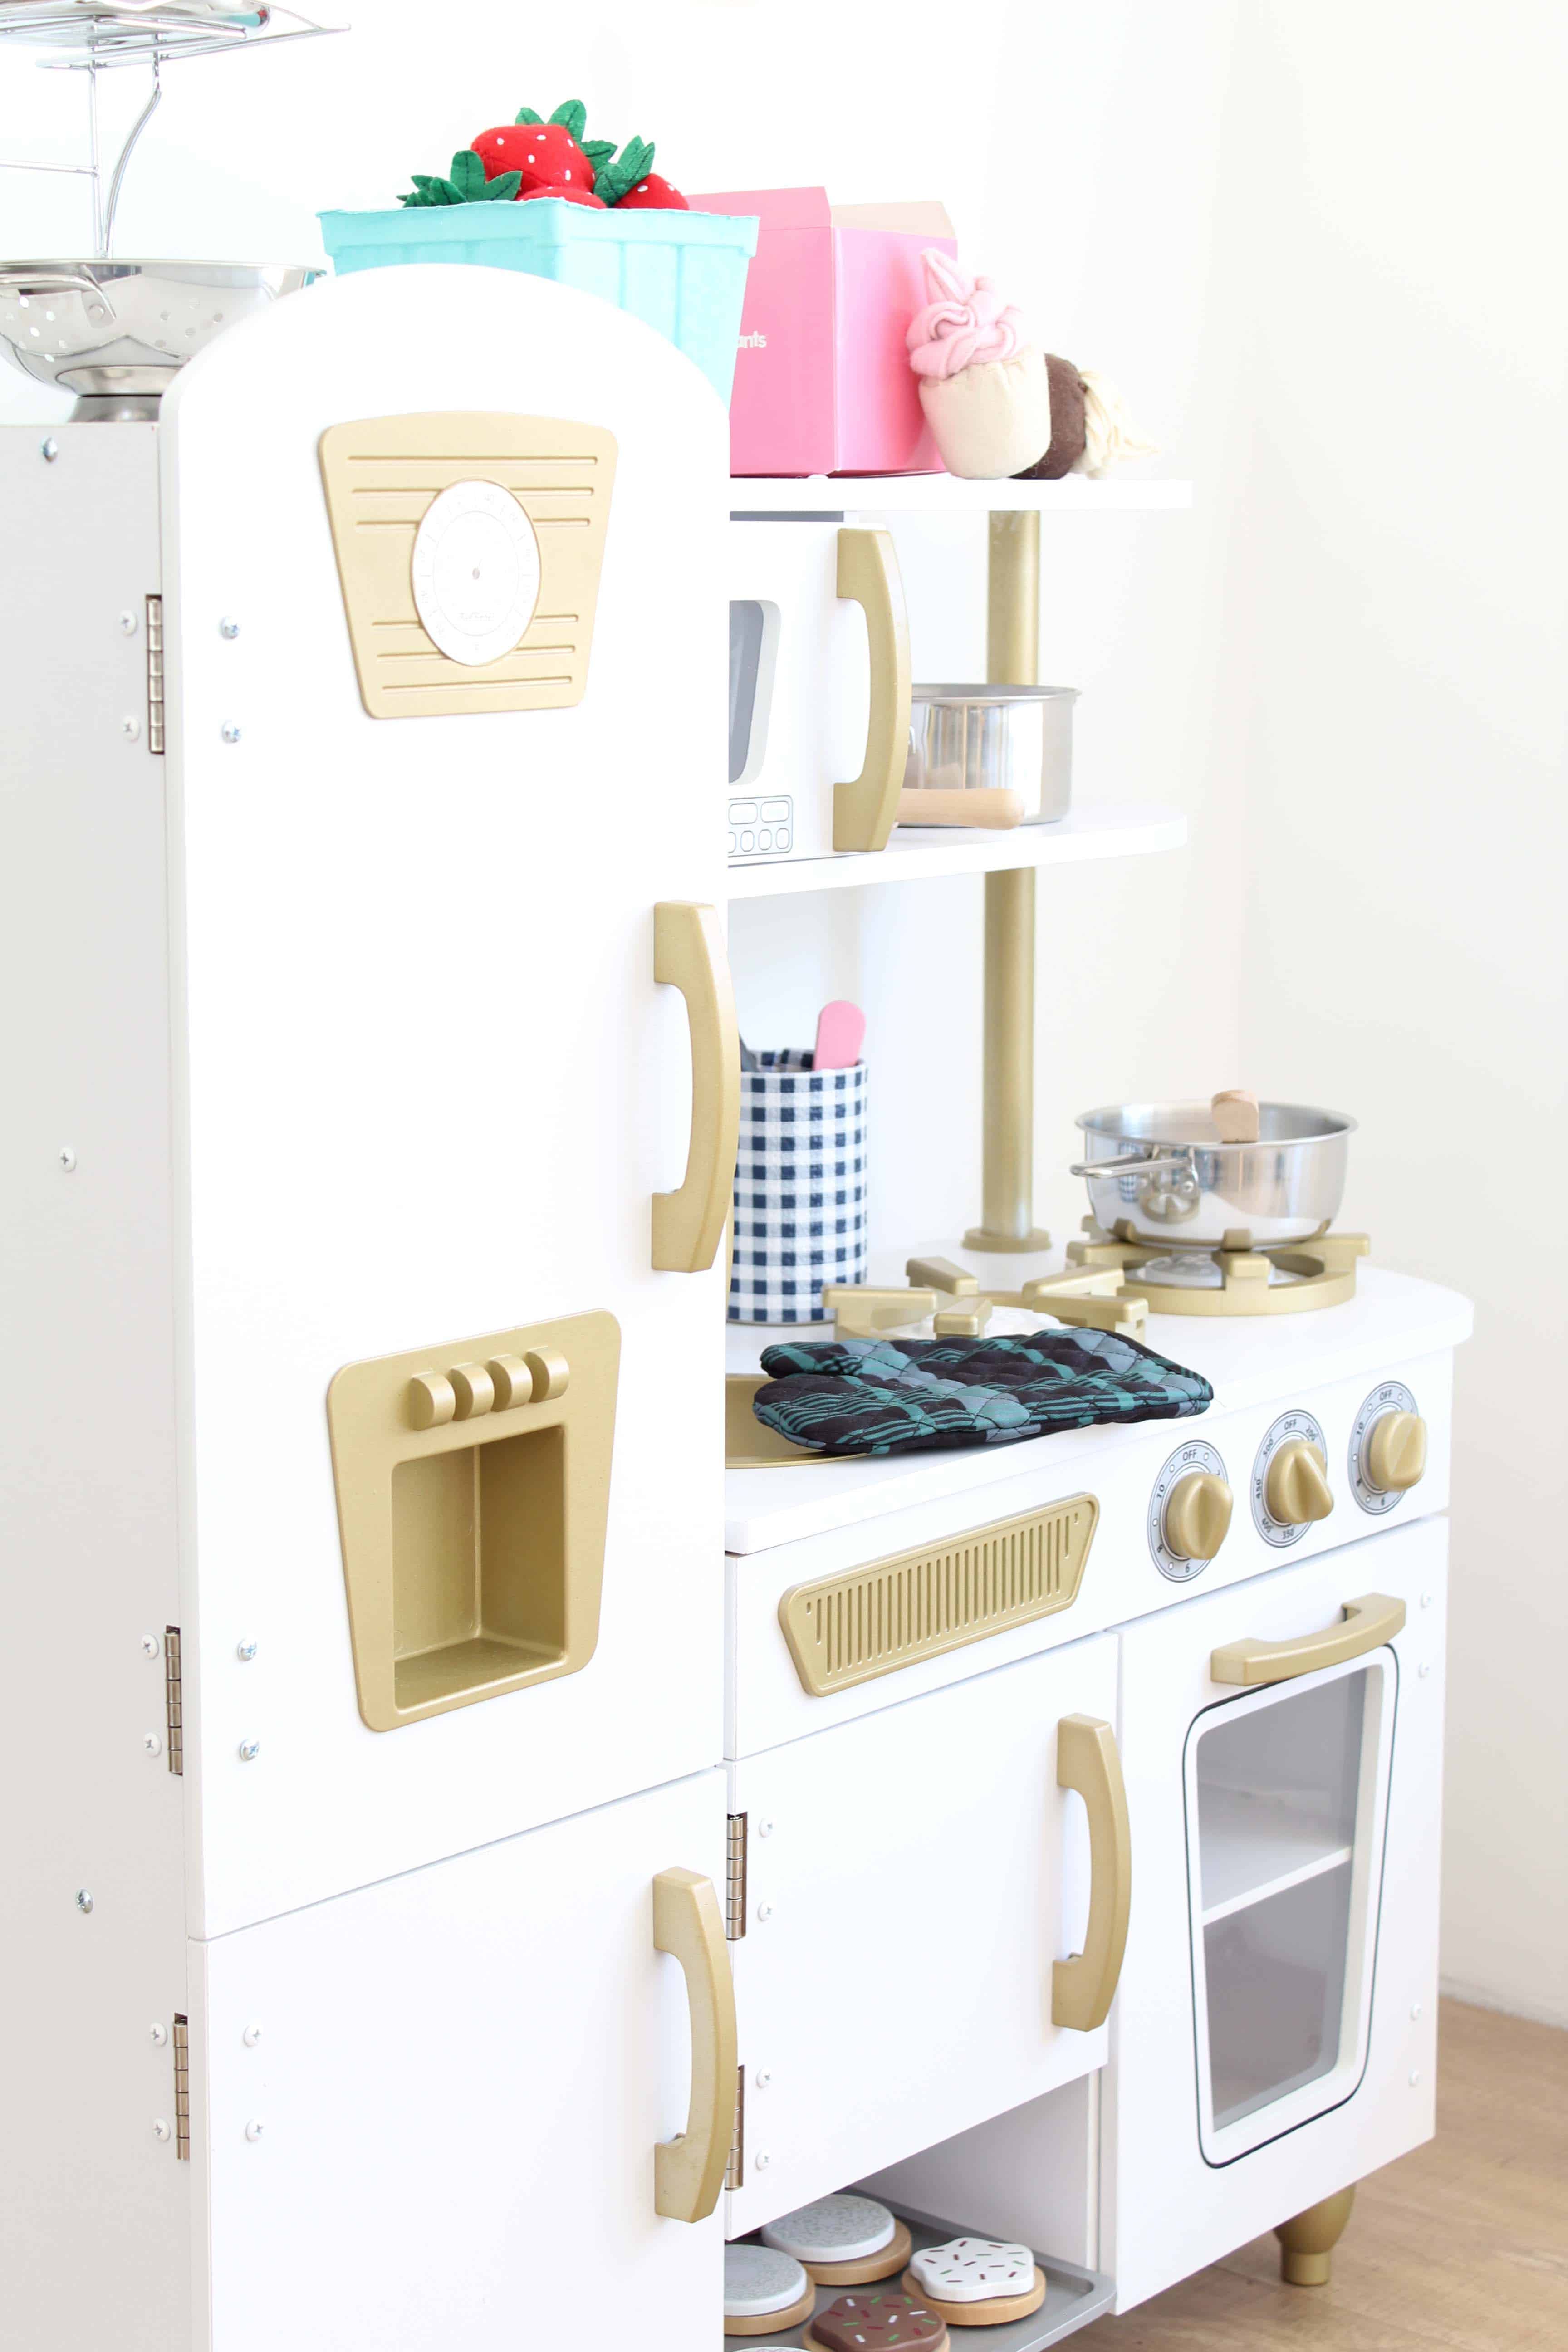
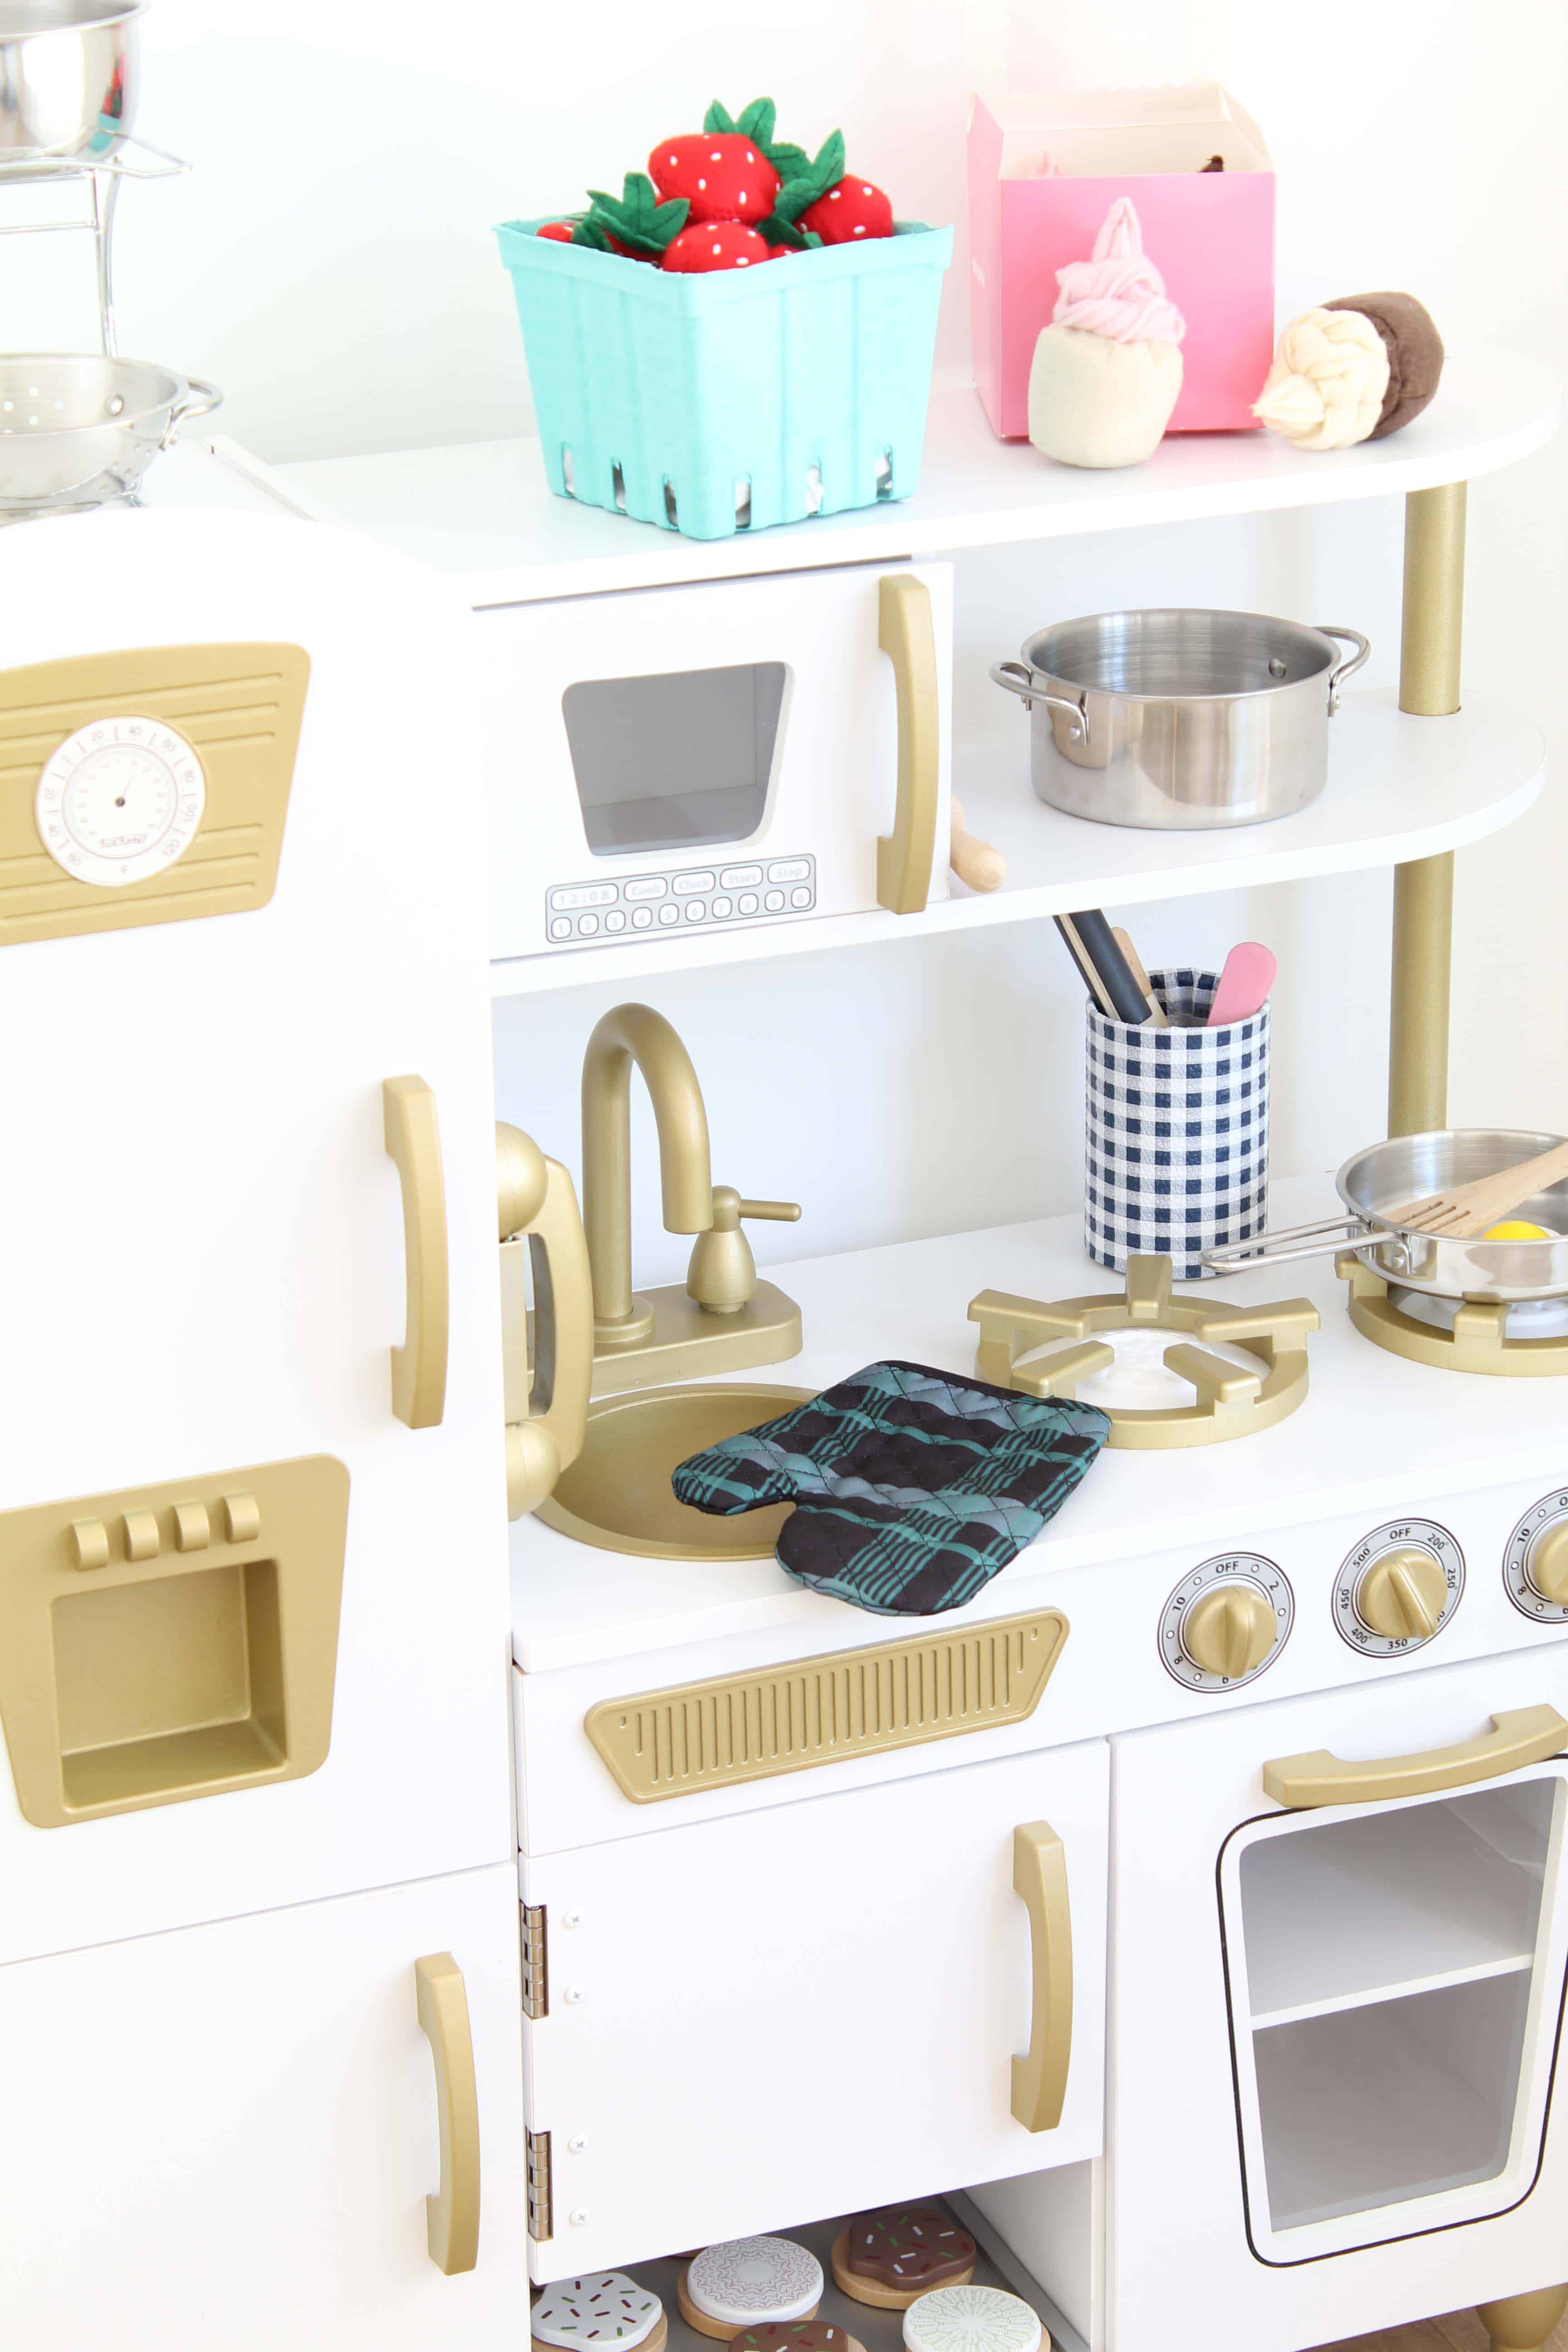
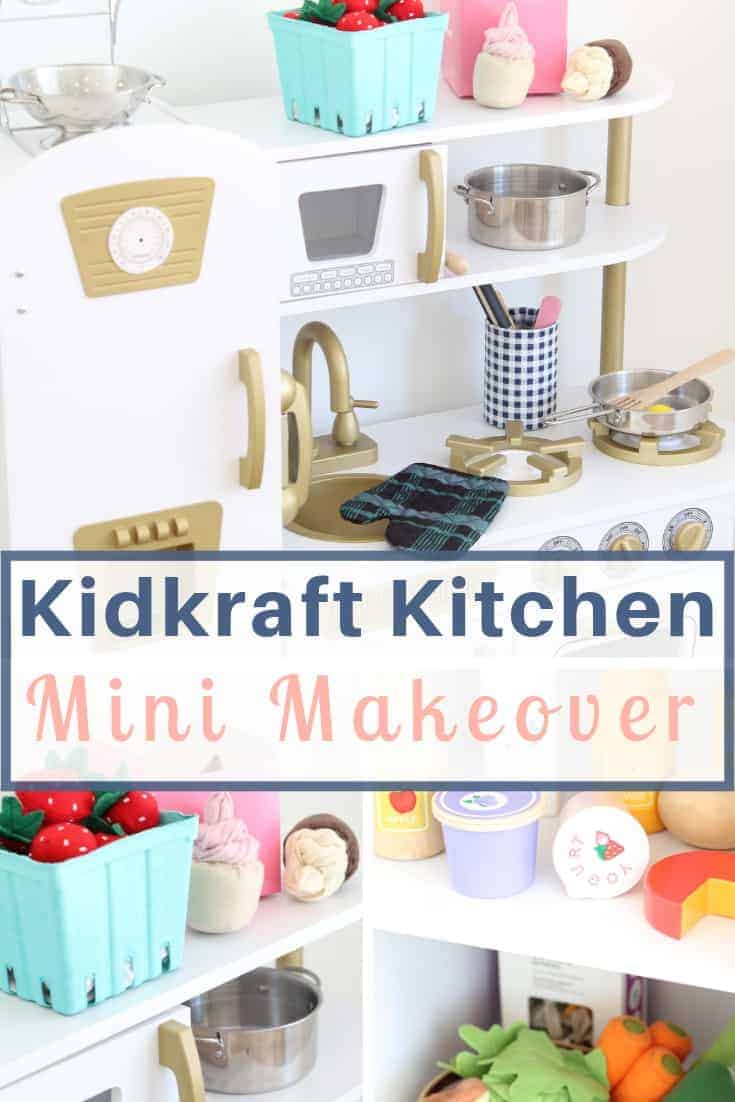
Or maybe I’m just living vicariously through my daughter because I never had a play kitchen growing up 😉 Either way, last month I bit the bullet and purchased this one for her second birthday. I love the vintage vibe and simple lines, which is important to me since I’ll be looking at it everyday in our living room. While I thought is was super cute as is, I wanted to add a little something to make it extra special. I settled on painting the fixtures and accents a metallic gold to add some warmth and a pop of personality to it.
Honestly, I hesitated to even call this a makeover when I was writing this post because it’s a really simple one – but a really simple one with a big impact (in my opinion). If you’re looking for a weekend project that doesn’t involve power tools or anything too complicated, this one’s for you!
I will say that the hardest part of this project is actually putting the play kitchen together….So. Many. Pieces. It definitely had and ikeaesqe quality to it when I was putting it together. When all was said and done it took me about two hours to put the actual play kitchen together plus about an hour of painting prep the day before. Here’s how I did it:
Kidkraft Kitchen Makeover Steps
- Start by unpacking all of the kitchen pieces (there will be a lot!)
- Separate out all of the handles, knobs, and fixtures.
- Lay them out and spray paint them evenly on all sides.
- Wait 3 hours and then spray them with 2 coats of protective enamel spray. This is an important step! If you don’t do this the paint will start to chip or rub off the fist time it’s used. This will leave you with a toddler covered in gold paint 😉
- Wait 24 house for the paint and top coat to cure. Then you’re ready to start putting your kitchen together!
- The key to this being an easy DIY project is to paint all of the fixtures before you put everything together. You could do it after, but I’m guessing it would be ridiculously hard.
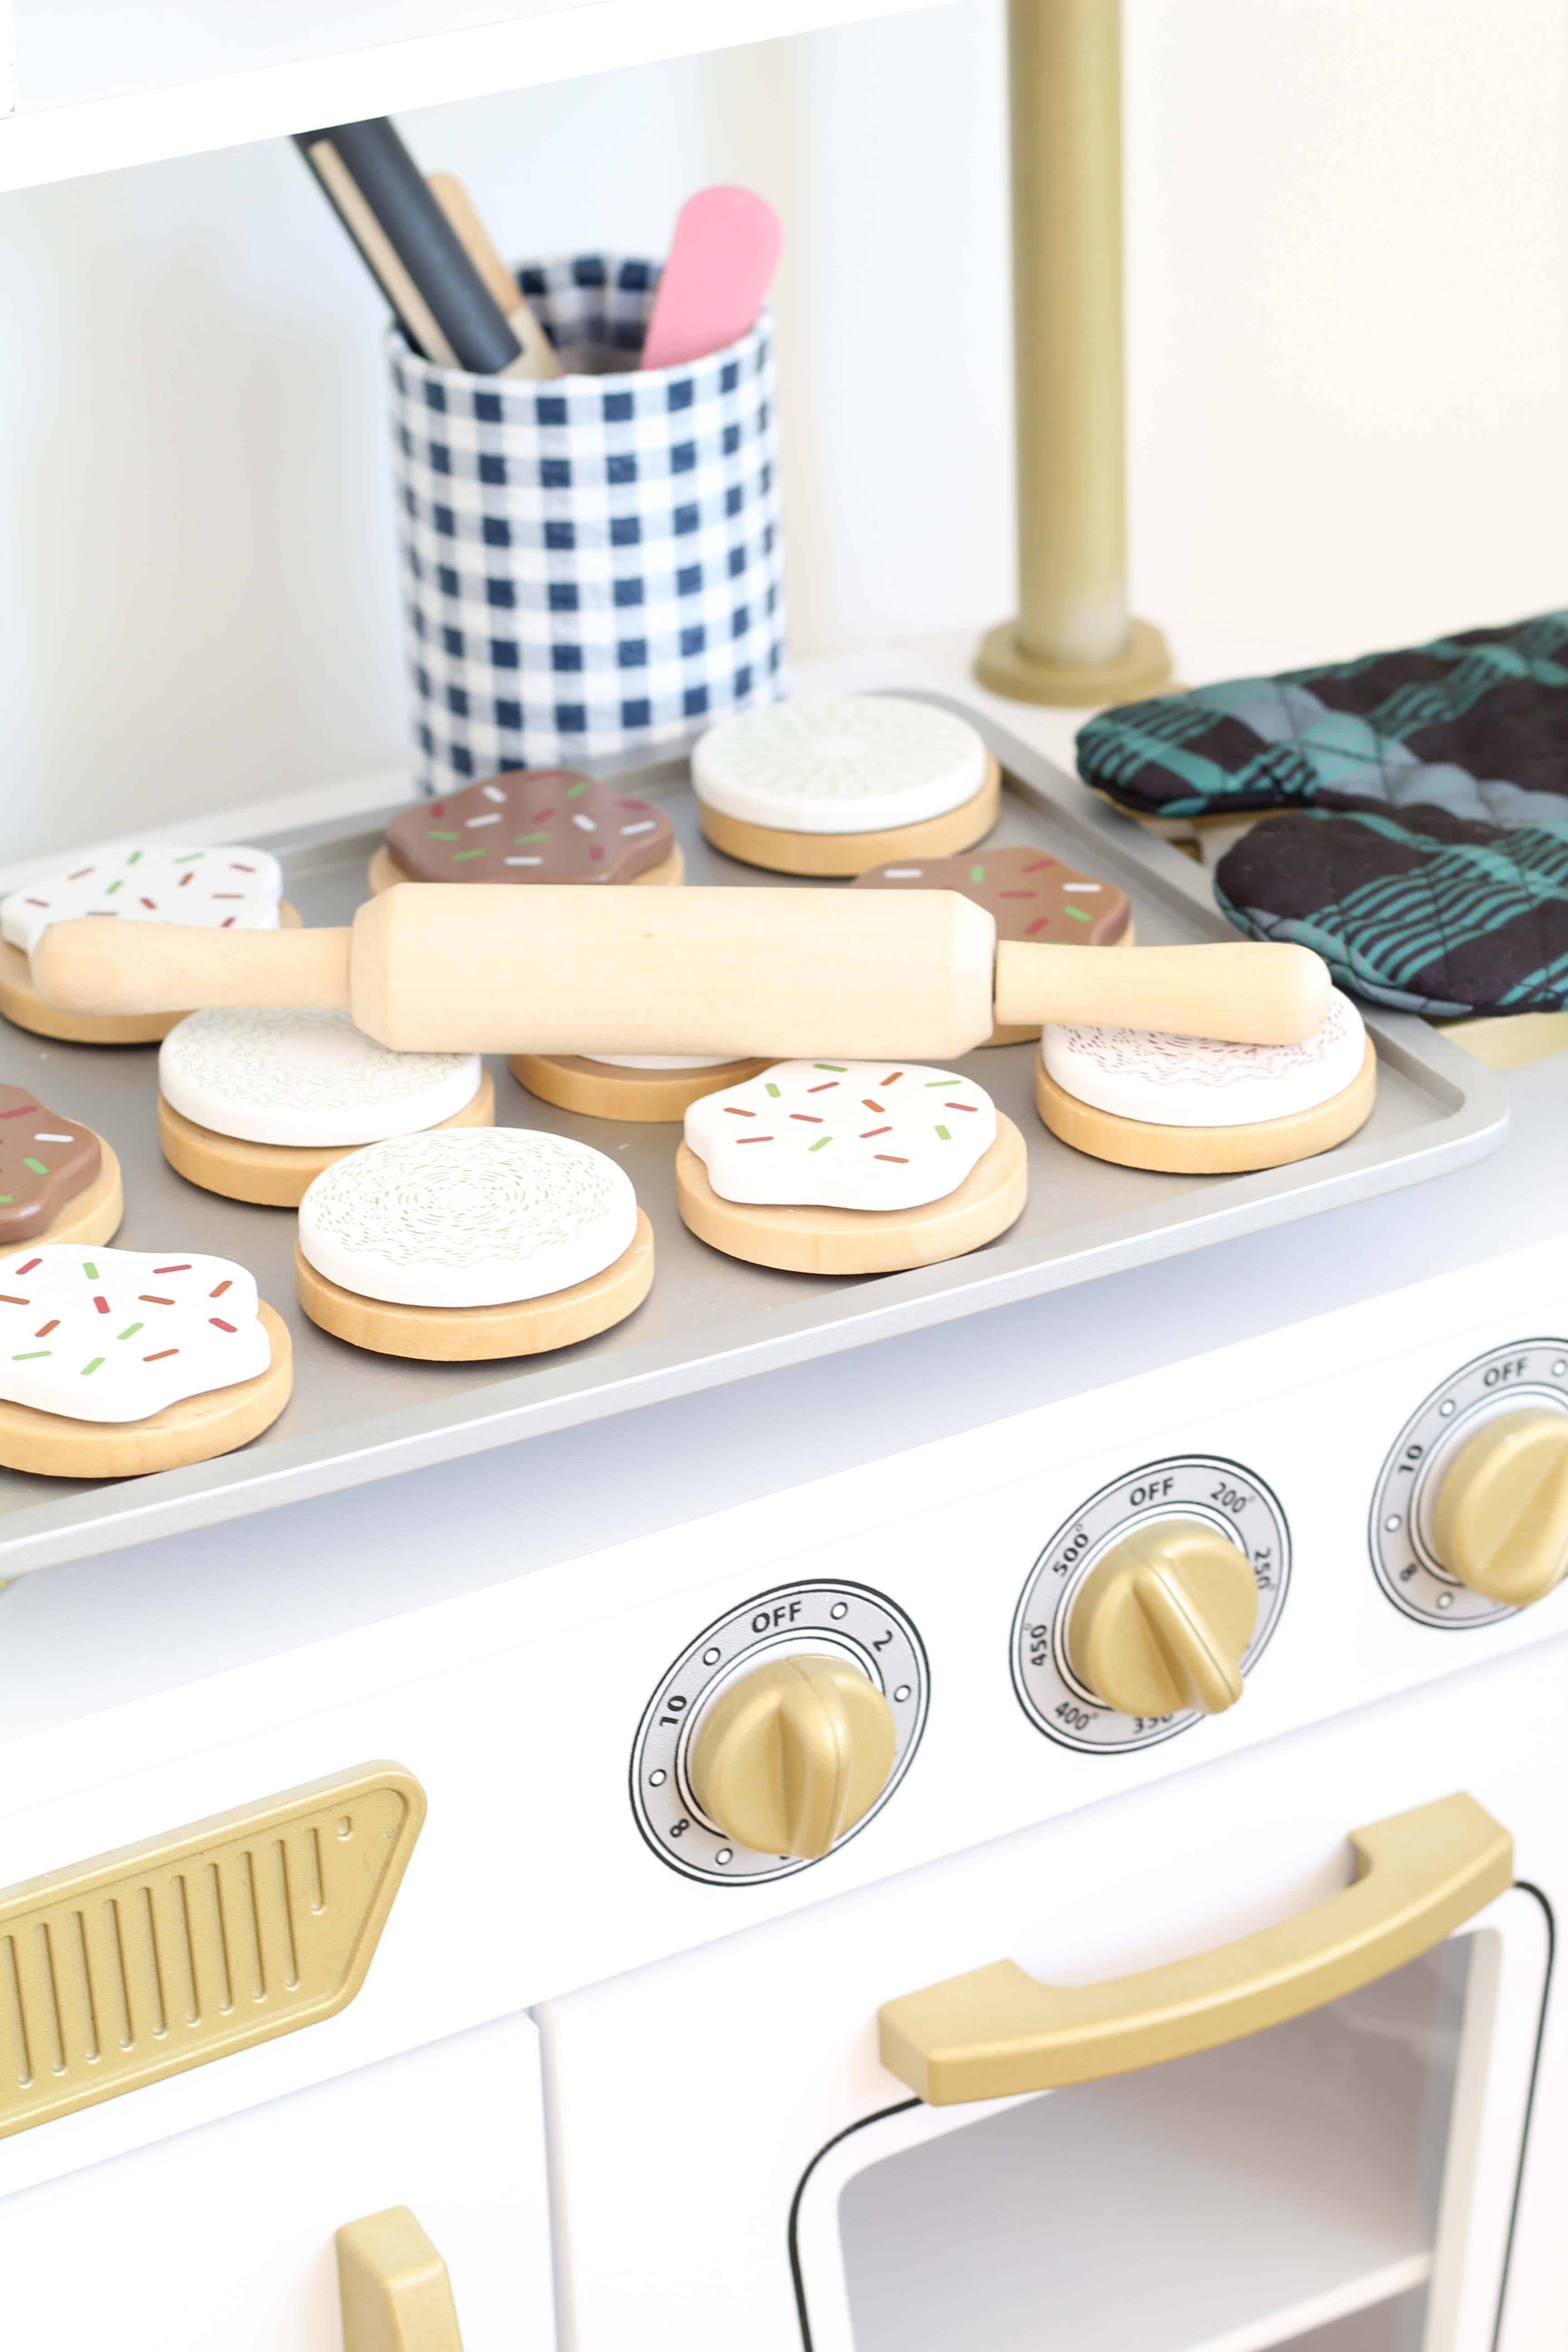
Play Kitchen Accessories
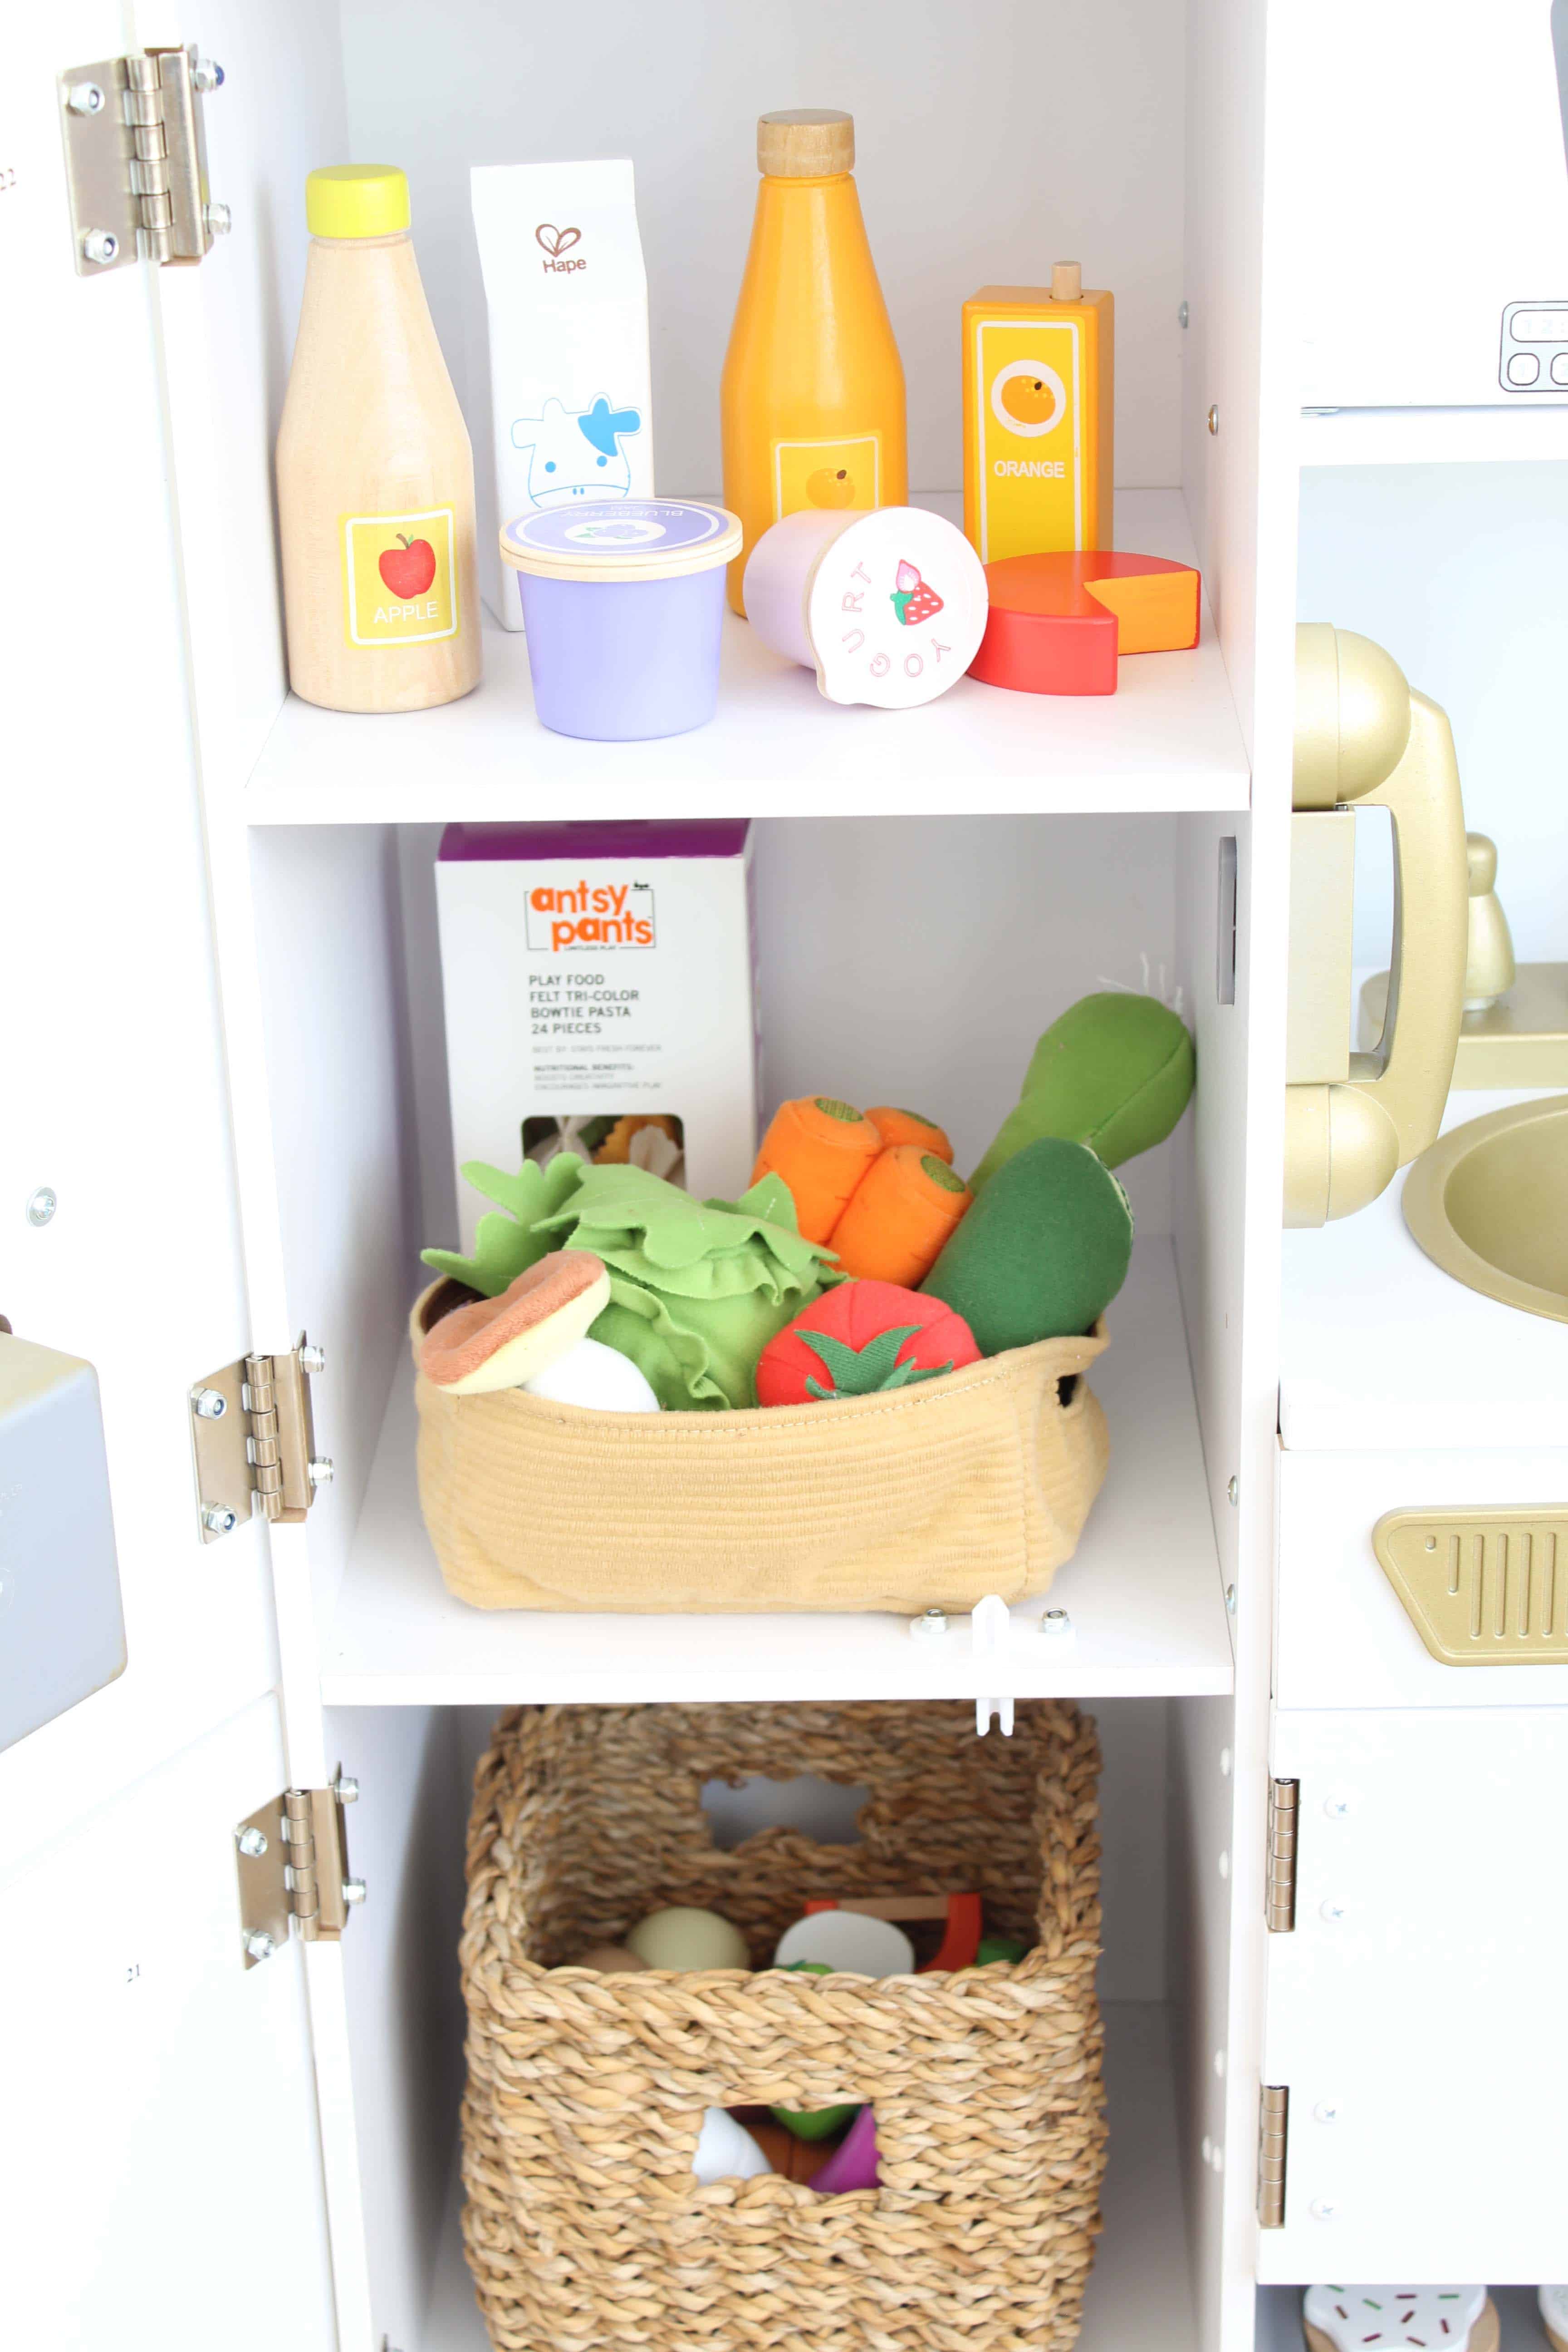
Once I had the play kitchen assembled it was time for the fun stuff, the accessories! Our family chipped in and bought her some fridge food as part of her birthday present. The little jam and yogurt cups are so cute, they get me every time!
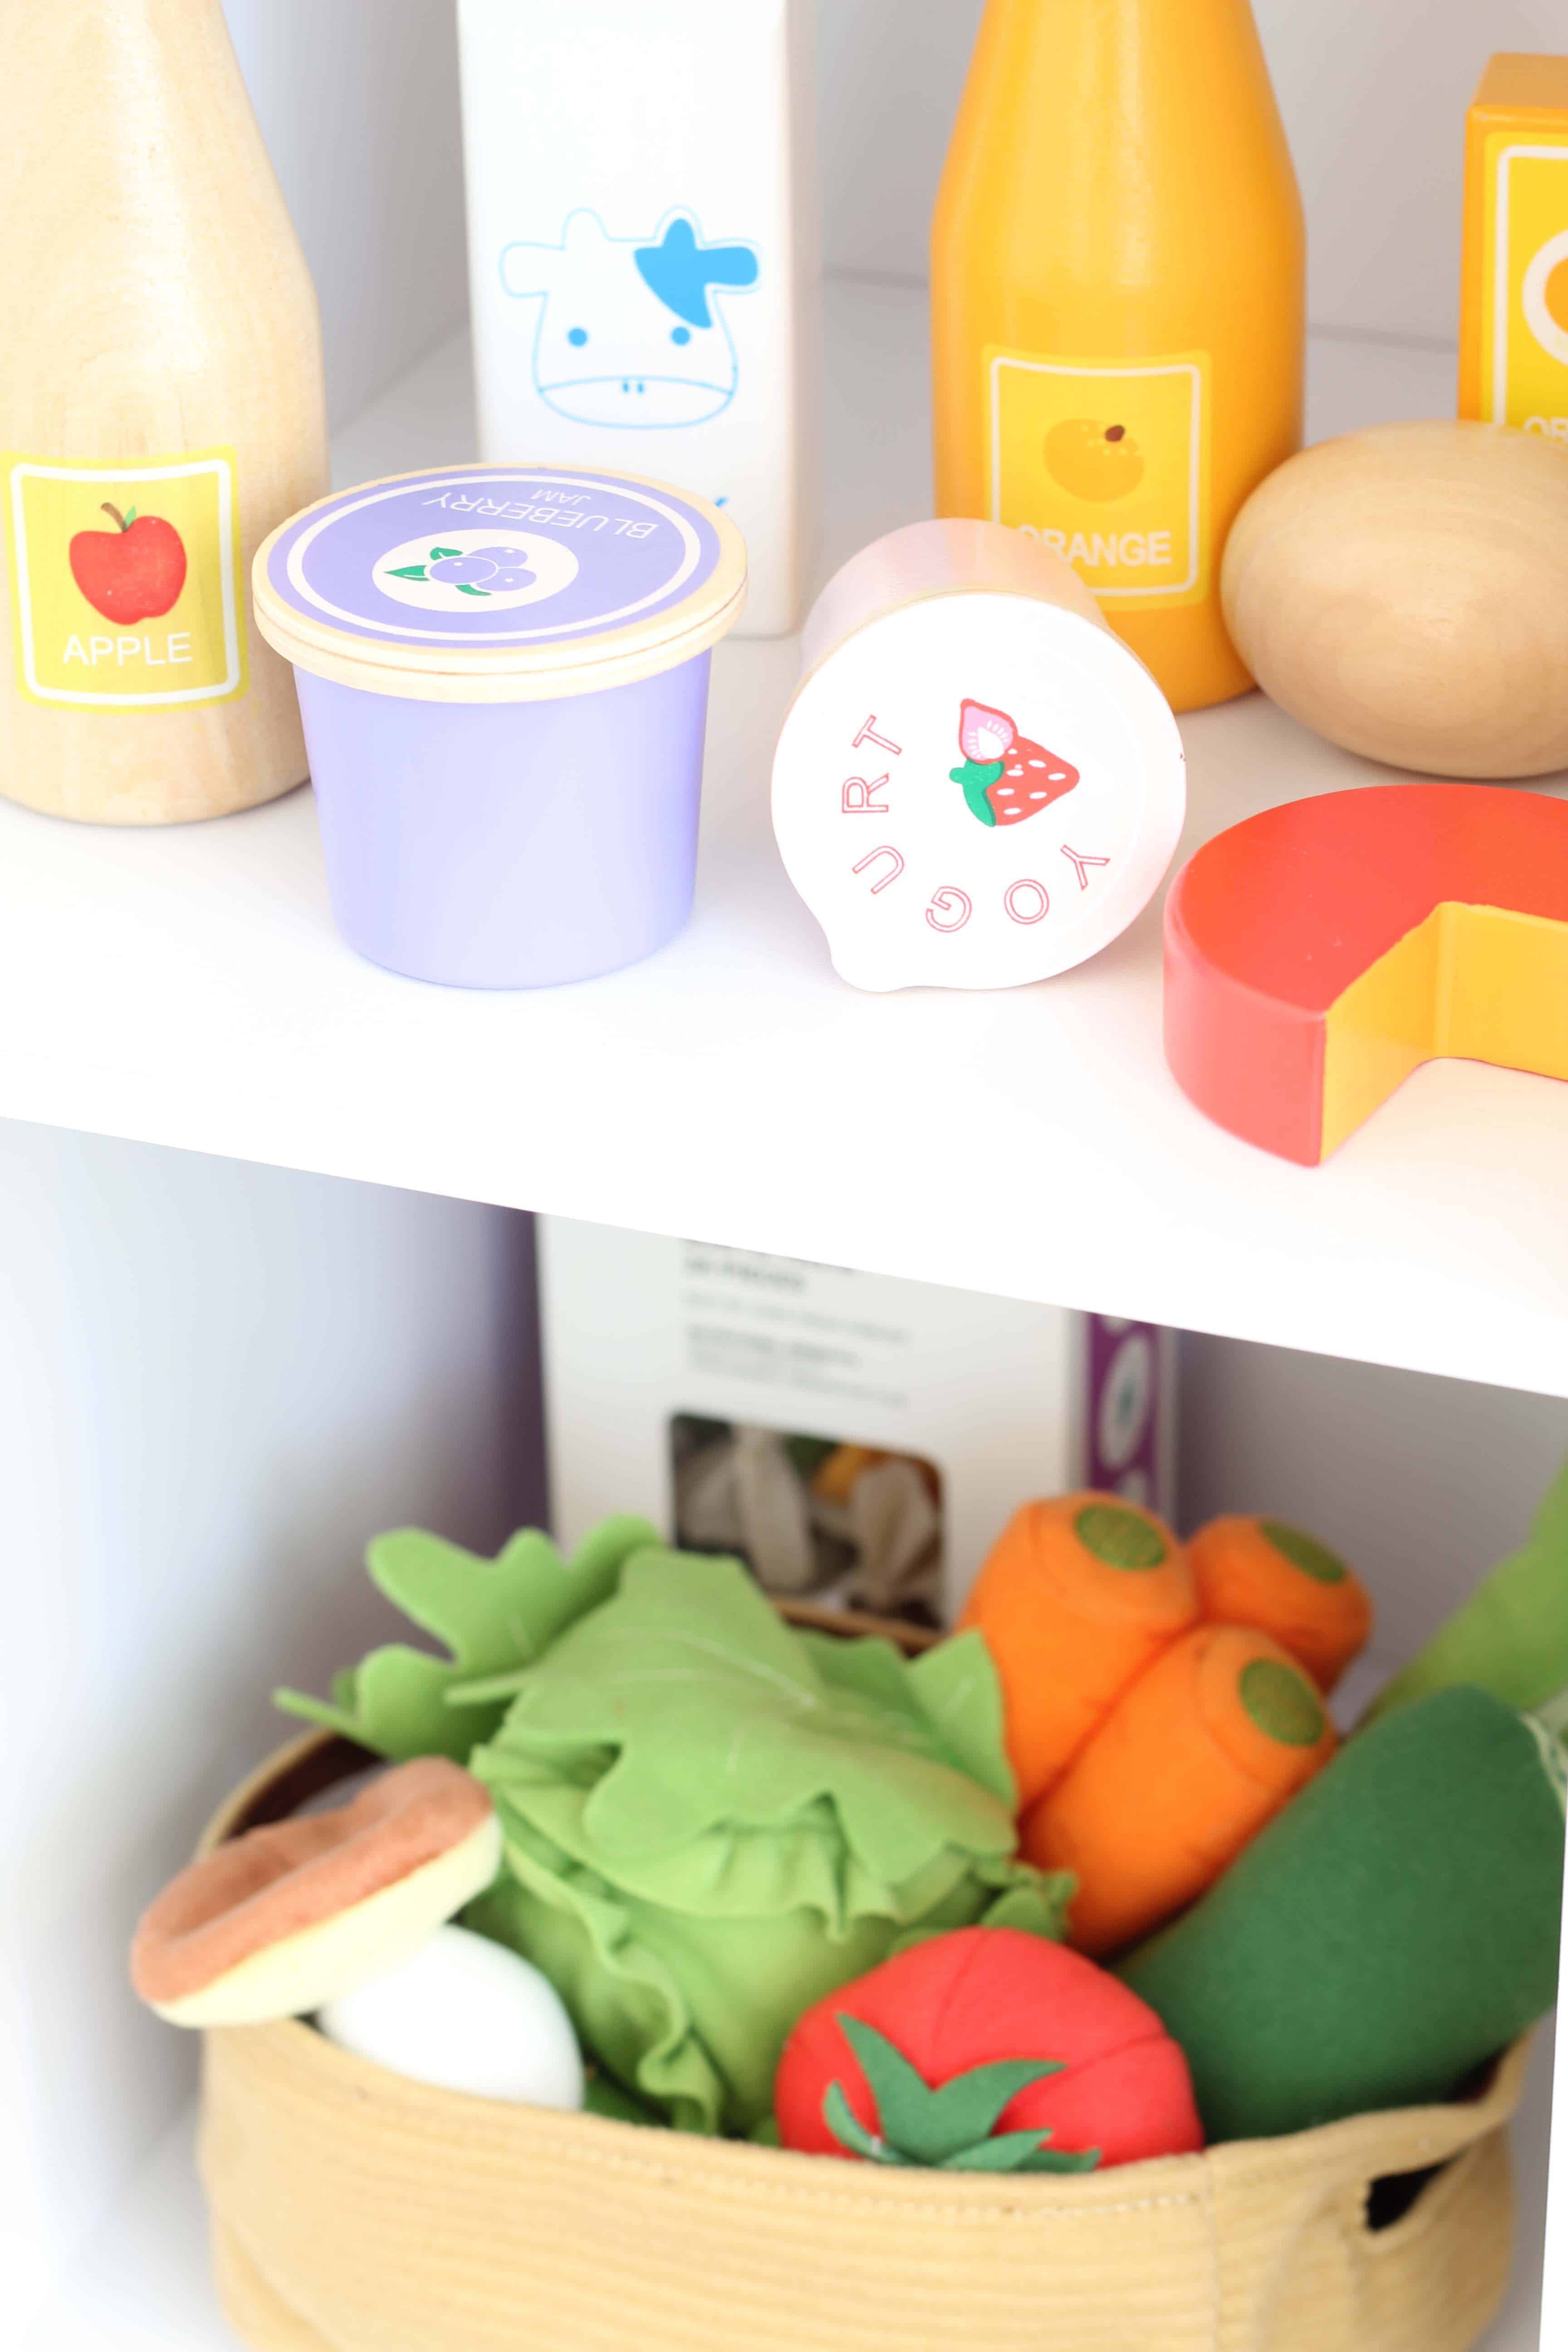
I bought the felt vegetables at Ikea six months ago (since I knew we were moving away from the only one near us) in anticipation of getting a play kitchen. Neurotic? Maybe, but planning ahead never hurt anyone, right?
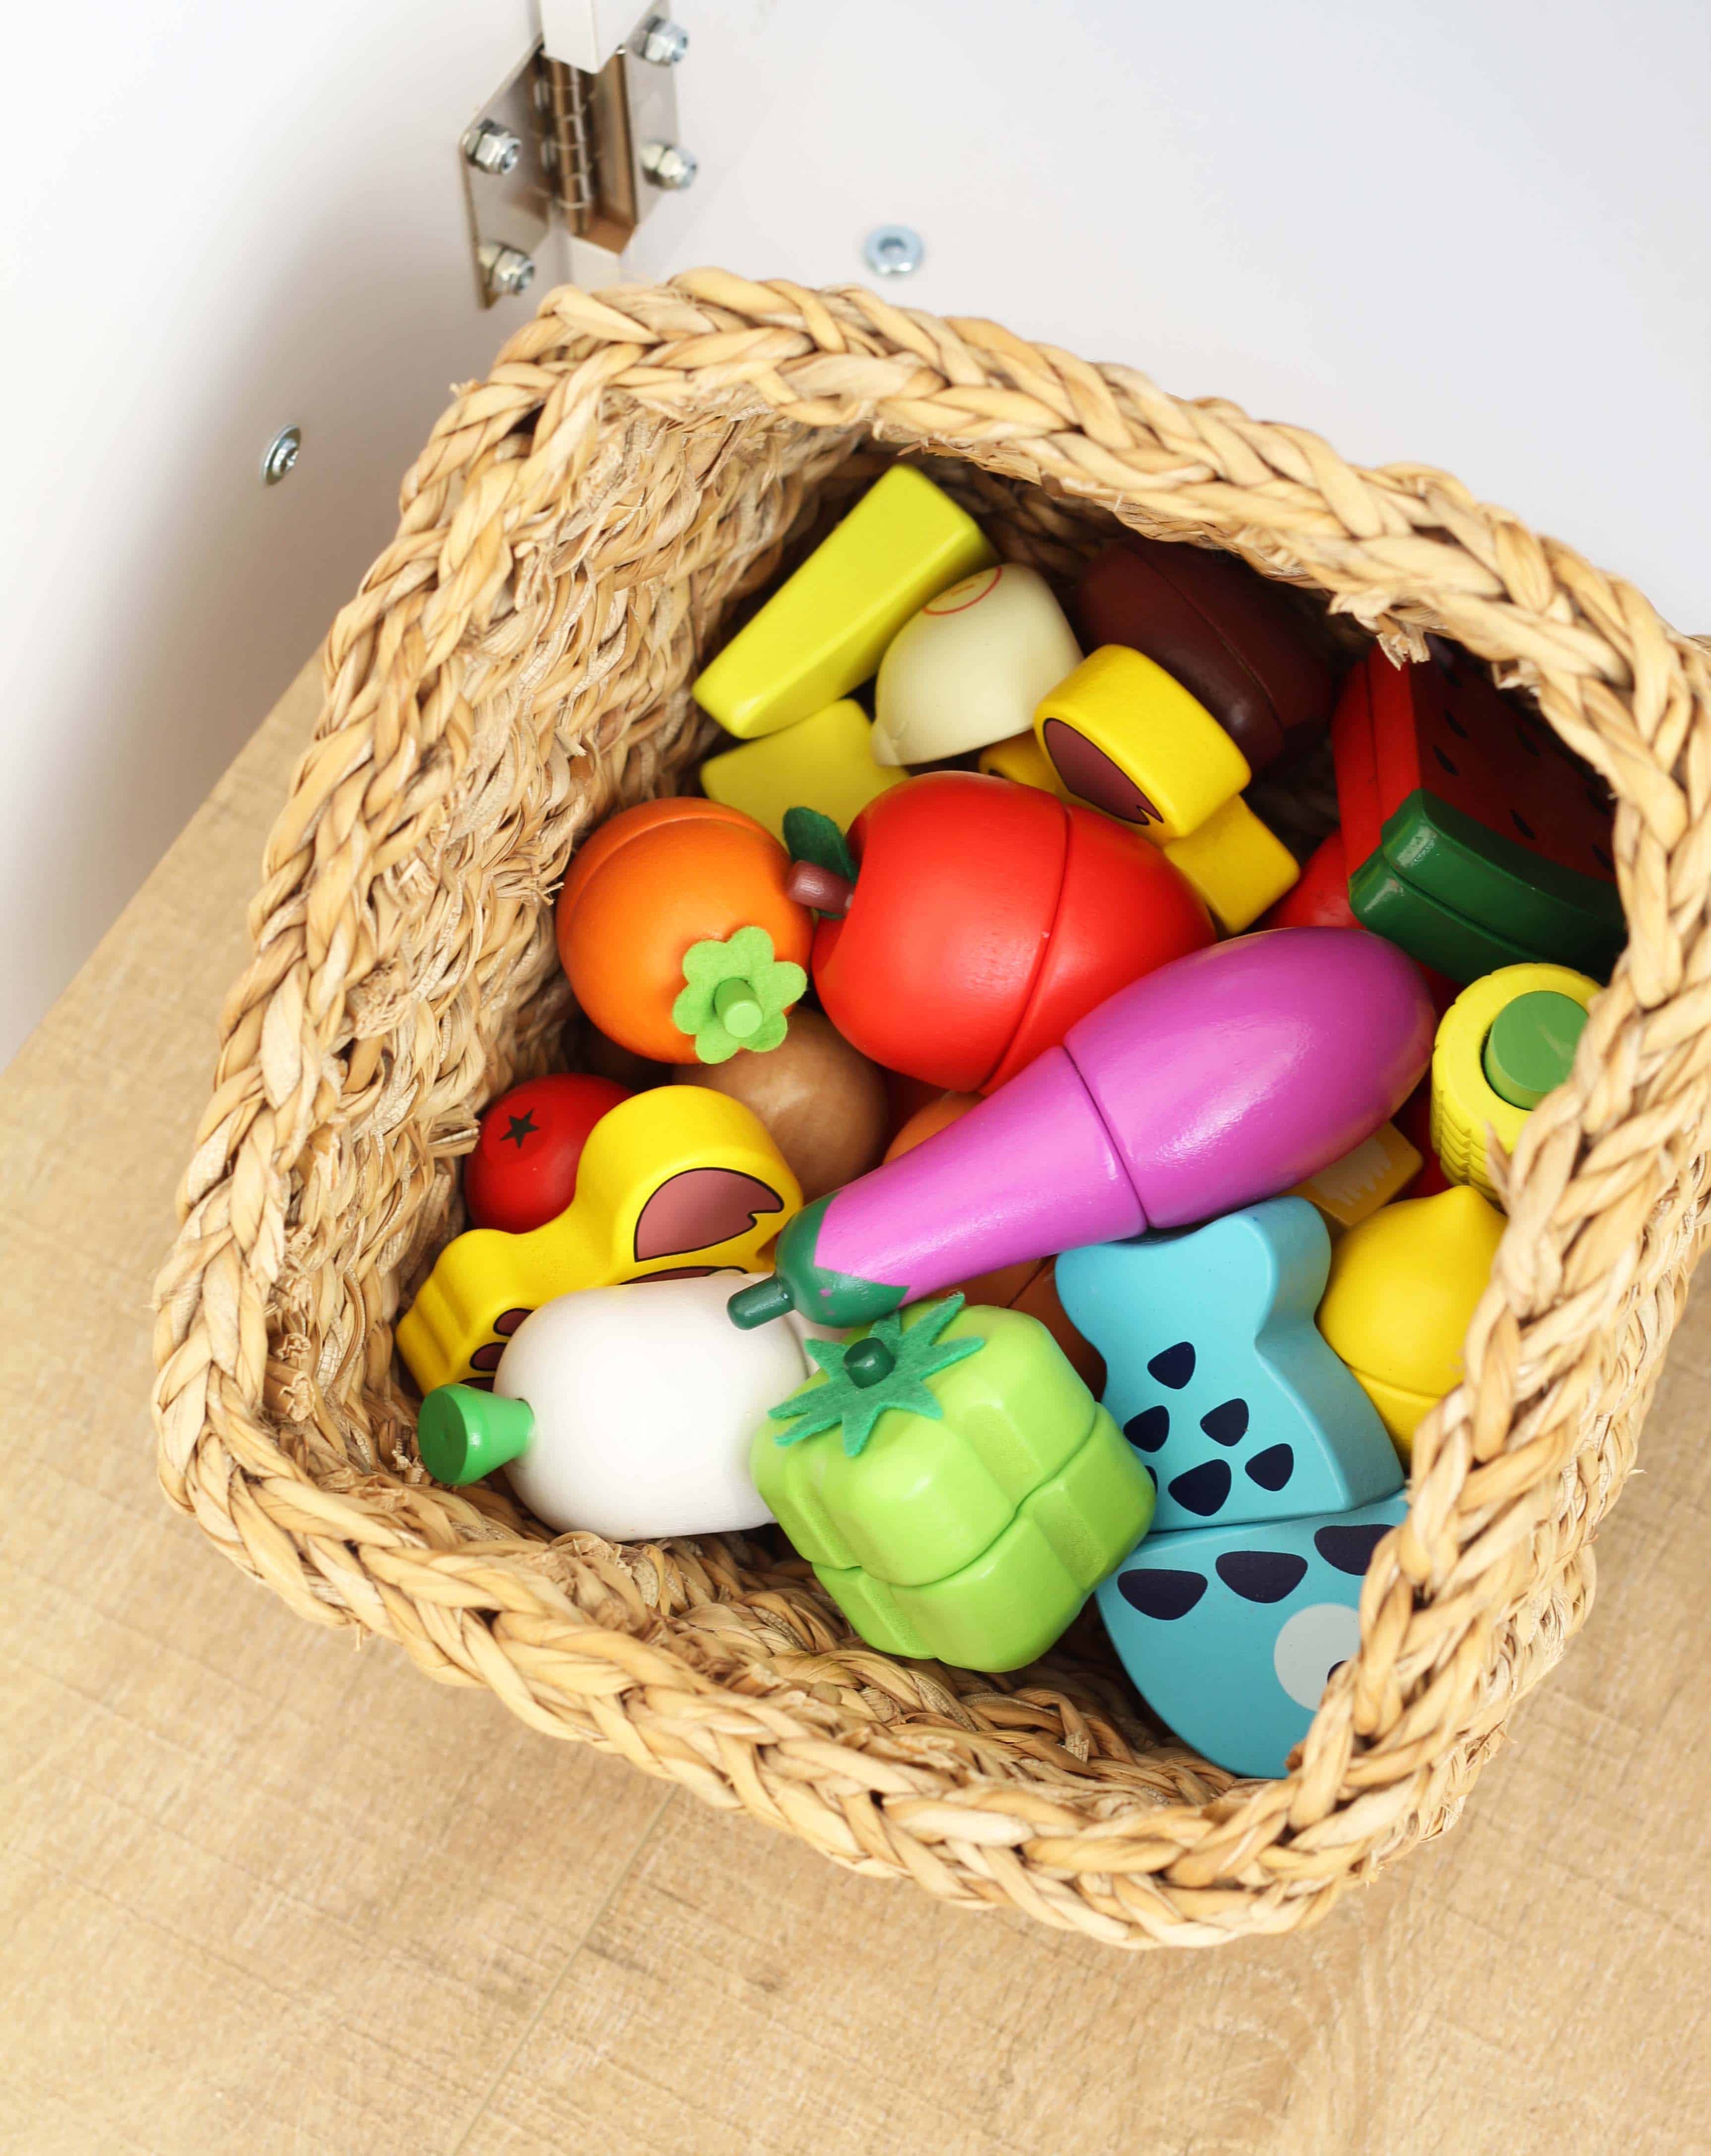
This wooden cutting food set is adorable, with the added bonus of actually being able to cut the food (it goes together with magnets). It also seems to hold up quite a bit better than the felt food which has velcro that loses its stick after a while.

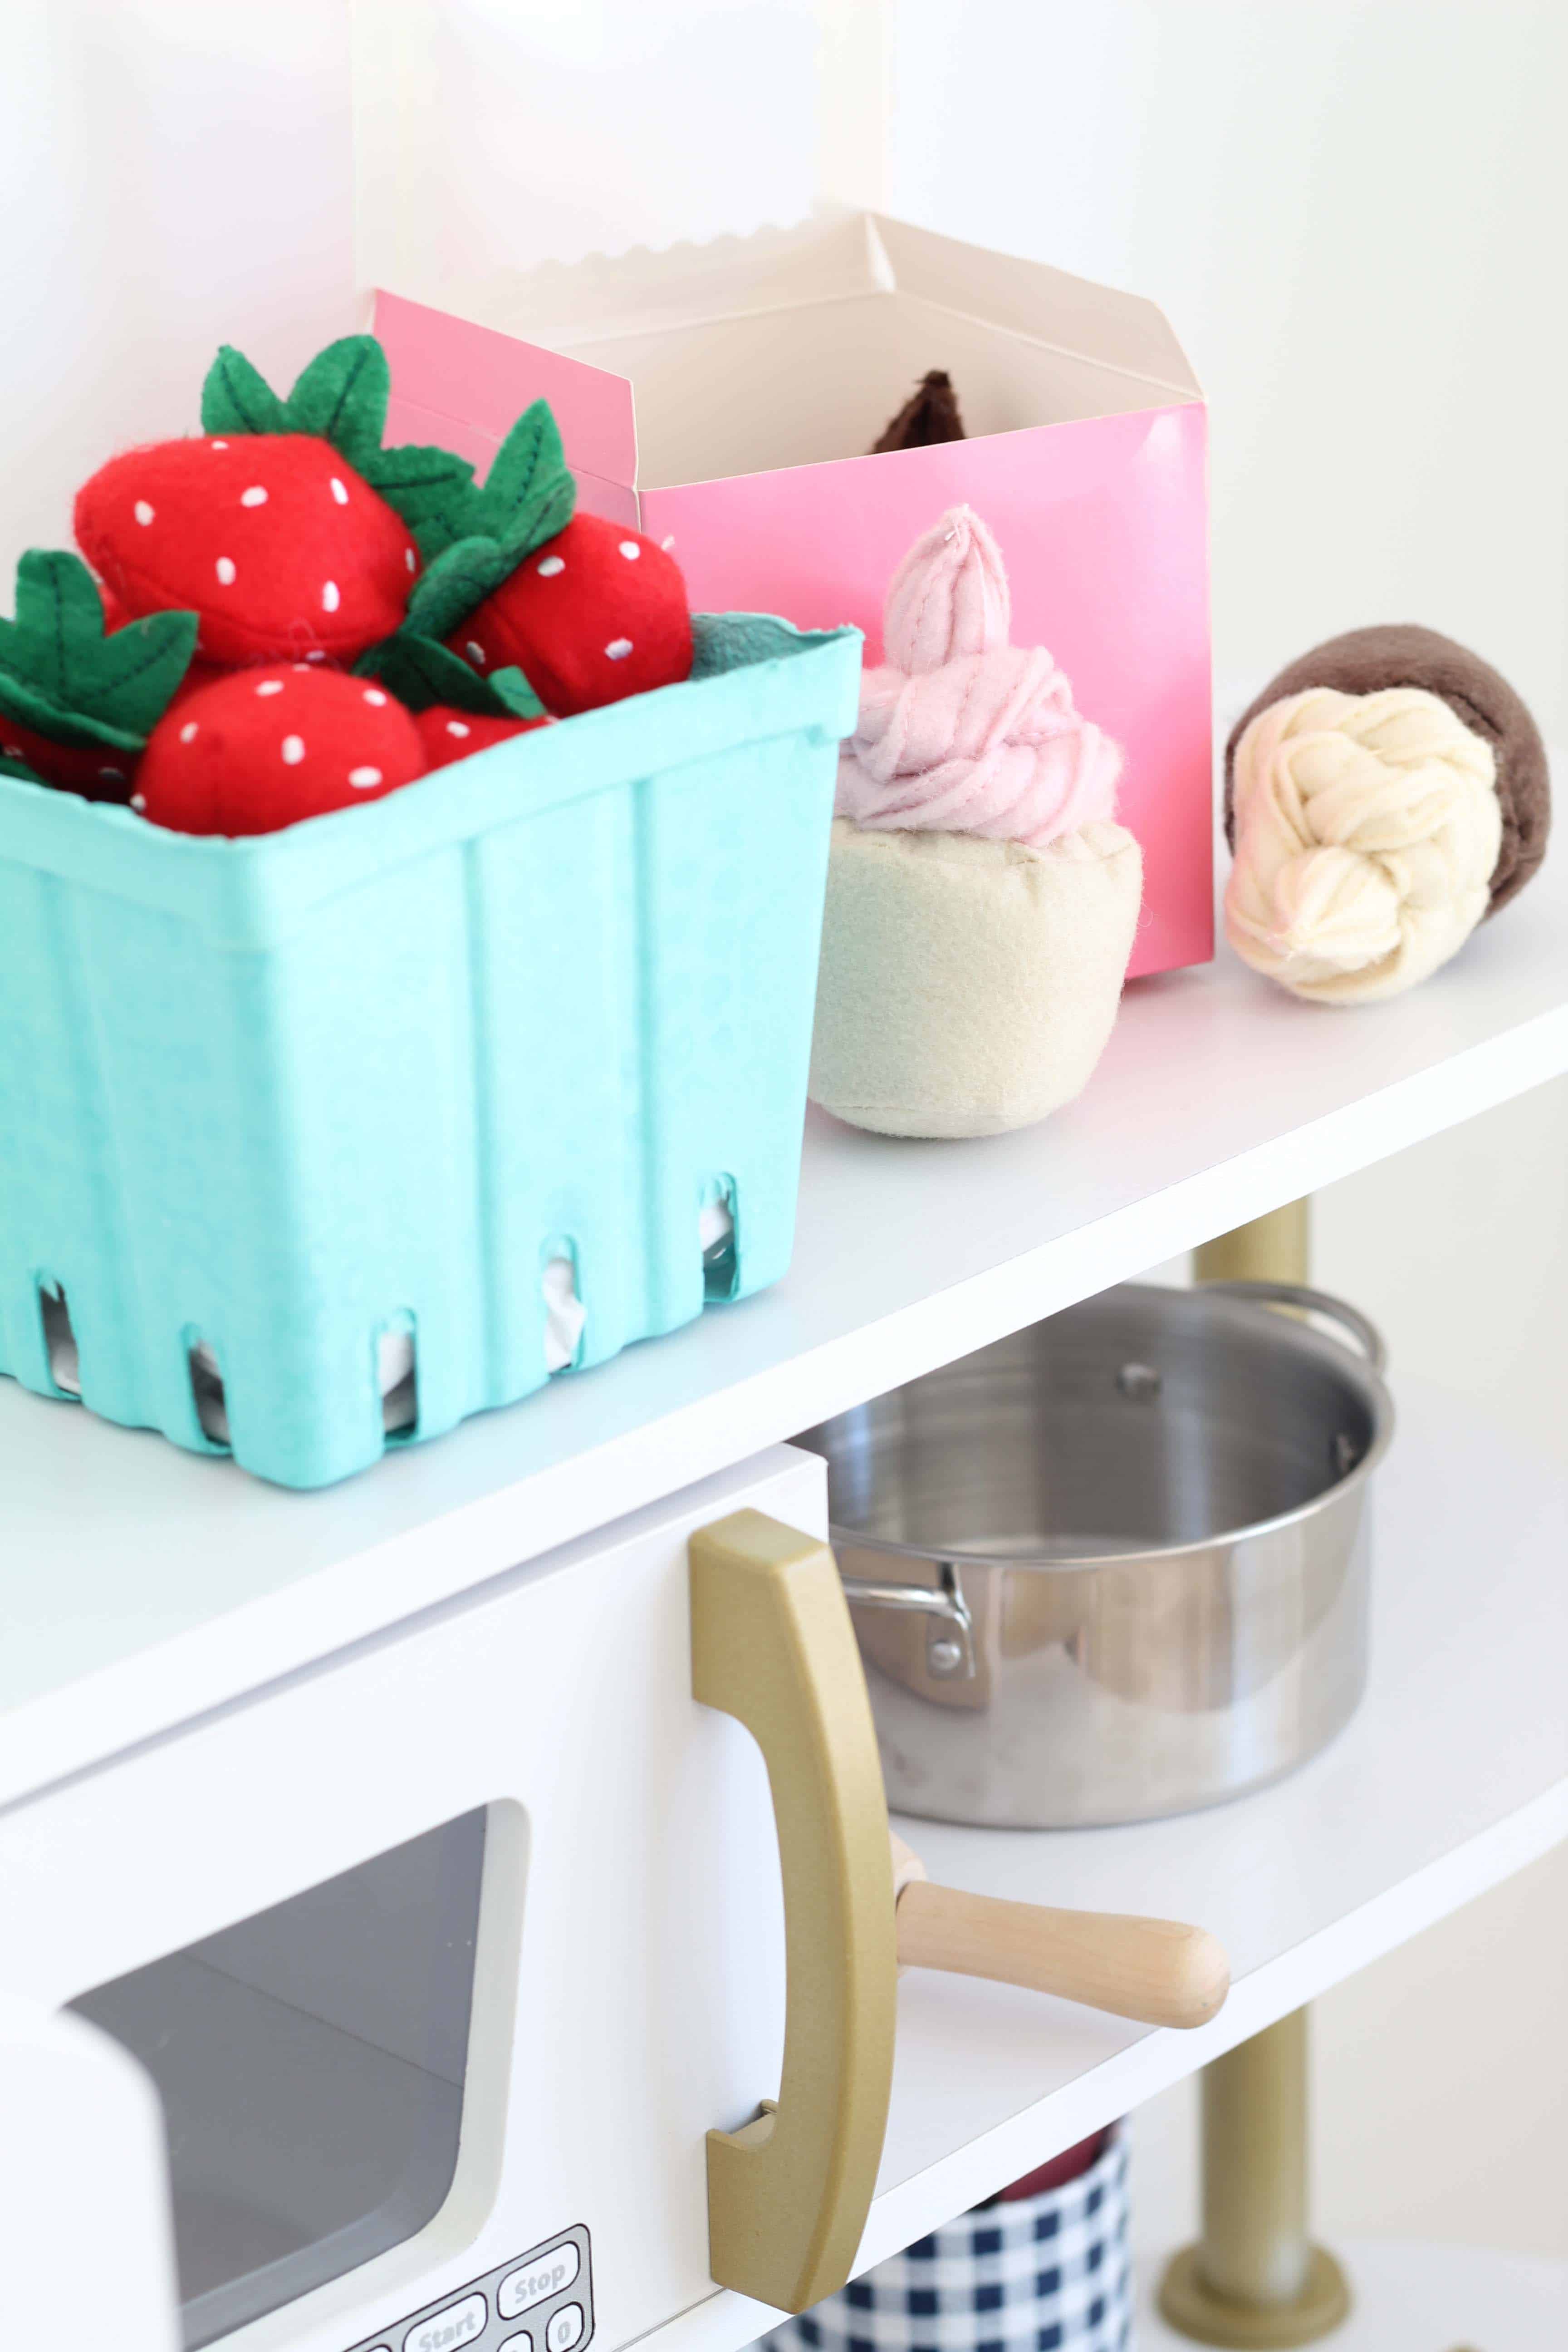
I couldn’t resist adding a little bit of whimsy with the cupcakes and strawberry pint. Don’t they just look good enough eat? 😉

I made the little utensil holder out of an empty soup can. I used some leftover drawer liner in a gingham print, wrapped it around the outside of the can and secured it with tape on the seams.
While this play kitchen hasn’t bought me hours of uninterrupted time 😉 , it has lived up to the hype. It’s the first thing our daughter checks out in the morning and it’s so fun to watch her play with all the different types of foods while she makes “meals”.
Post Sources:
Kidkraft Vintage Kitchen \\ Wooden Cutting Food \\ Strawberry Pint \\ Stainless Steel Pots & Pans \\ Felt Cupcakes \\ Felt Vegetable Basket \\ Cookies (last seen at Target originally) \\ Wooden Fridge Food \\ Felt Bow Tie Pasta \\ Gold Spray Paint \\ Protective Top Coat Spray
Want to save this post? Pin it here!


Oh this is the cutest play kitchen!! Your little one will play with this forever, my girls are bigger now, but have enjoyed their kitchen to the fullest for years!! And I love how some spray paint can make such a difference. It looked great before already, but the golden accents really make it beautiful.
Thanks so much, Katrin! That’s my hope – lots of play time 😉
thanks for this! i just scored this same secondhand kitchen but in pink for cheap and was looking for a simple makeover. love the play food too! was wondering whether to paint the whole thing a more neutral color since i have 2 girls and a boy…but the pink with some copper spray paint will look great! maybe some desert themed acessories since we live in NV and that might neutr-ify it a bit 😉
Oh, that’s so fun! Ours is still going strong and has definitely become our most used toy! The pink with copper spray paint would look super cute too! I hope your kids enjoy it and get lots of play time 🙂