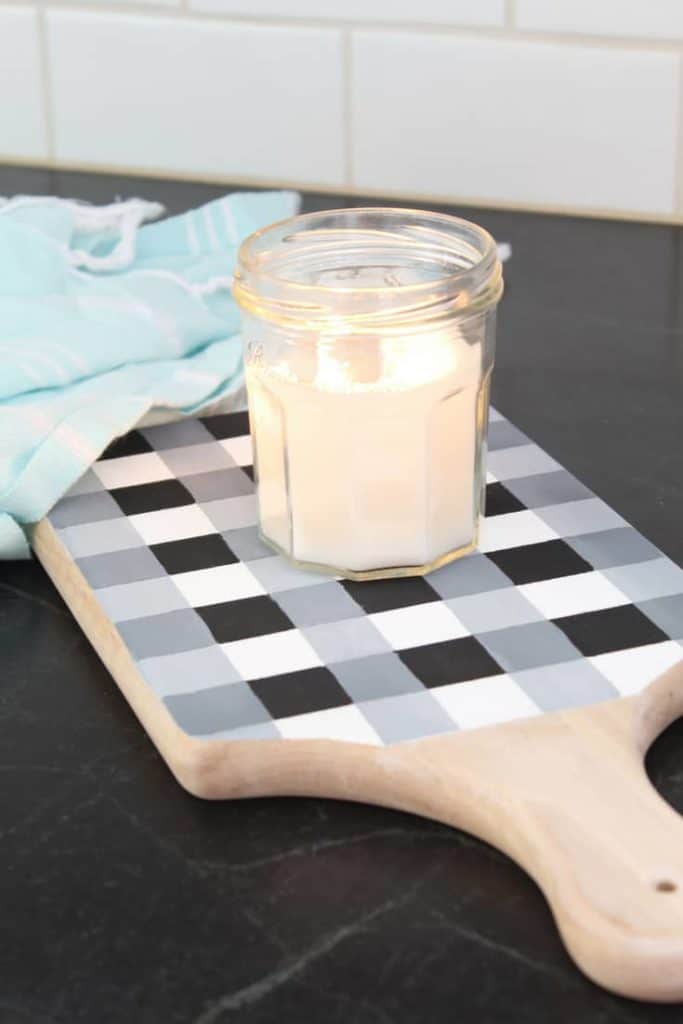
Try making this DIY painted buffalo check tray for a fun way to add a little dose of fall or winter to your home!
This post contains some affiliate links for your convenience. Click here to read my full disclosure policy.
Buffalo check is hands down one of my top 5 favorite patterns. I have always loved the look, but struggled on where to incorporate it into our home; Paint a wall? Bedding? Throw pillows? I was stumped because it’s kind of a bold pattern and it didn’t really feel like it went with what was already in our home.
Then I had an epiphany – why not add it in small doses around the house? After all, small touches throughout your home can add up to big impact when it comes to getting it ready for a change of season. Though I’m tempted, I try not to buy every fall decor item I see (fall decorating is my weakness) when I walk into a craft or home store in early September – because all of that stuff adds up. Adds up in money spent, adds up in storage, and adds up in clutter. But the struggle is real.
Which leads to this painted buffalo check tray. This tray is my way of adding some cozy seasonal touches to our home using a breadboard we already had on hand, and some simple acrylic paint. These techniques could be applied to any number of items you want to paint a buffalo check pattern on, so give it a try!
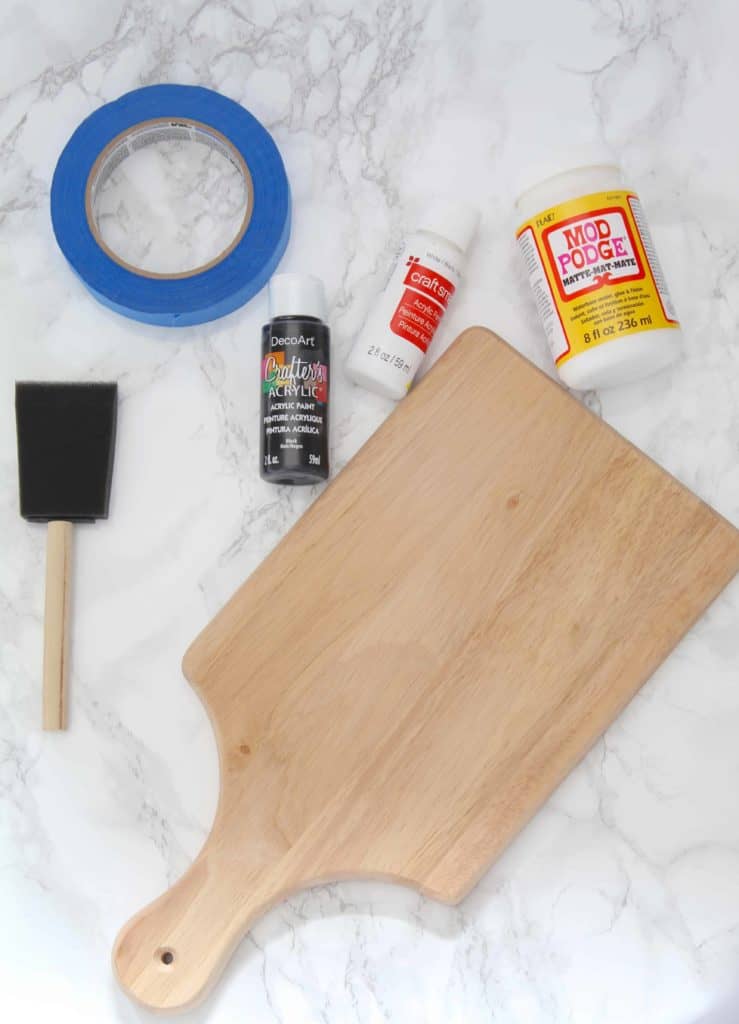
What You’ll Need
- Wood tray of your choice (option 1, option 2)
- Matte finish mode podge
- Painters tape (a note on painters tape – use good tape! I used a generic brand and mine had a few bleed lines when I pulled it up, which is always a bummer.)
- Foam brush
- Acrylic paint*
*In order to create a buffalo check pattern you’ll need 4 colors. The best way to do this (in my opinion) is to use white and whatever other color you want (I used black in this case) and blend them together to get the two other colors you need for the pattern. I made a lighter gray and a darker gray by combining my white and black paint. This allowed me to keep the color pallet similar but distinct, which is the key to a buffalo check pattern.
Step 1
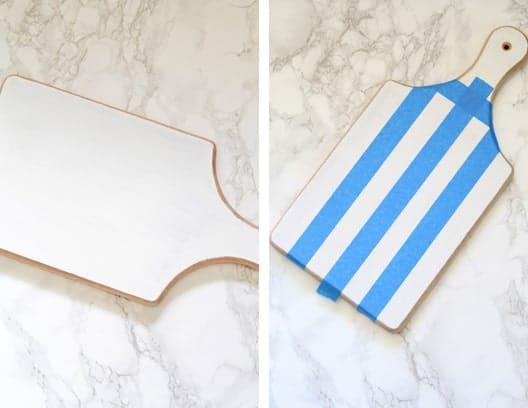
Start by painting your board or tray completely in your base color. This is generally your lightest color, in this case, white. Remember to decide how far you want your pattern to go – I didn’t do this ahead of time and ended up having to scrub the paint off the handle when I realized it was not going to look right.
Also, remember to include dry time for each layer of paint to cure before you apply your painters tape.
Step 2
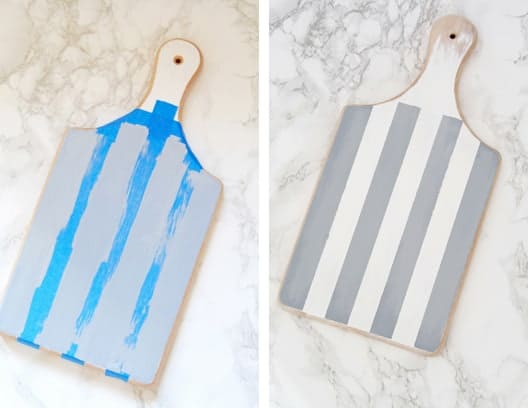
Next it’s time to add your first set of stripes. Use your next lightest color to make this set of vertical stripes. Measure your tray and use your painters tape to apply even strips of tape to your tray. For this board I used 1 inch painters tape and my stripes ended up being just over an inch in width.
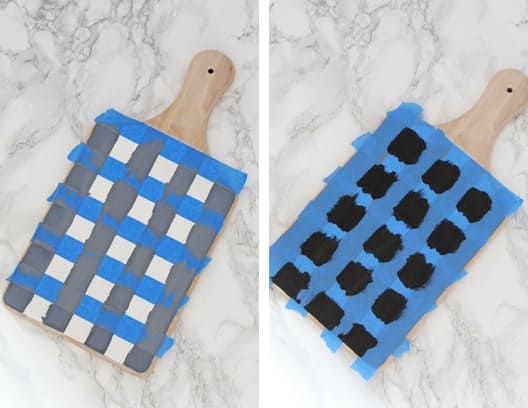
Steps 3 & 4
Then it’s time to add your third darkest color. Tape off stripes with your painters tape going in the opposite direction (horizontal) of the ones you just did. Where the second set of light stripes intersect with your painters tape, paint over them in the third darkest color (top left picture).
Last, you’re going to add your final set of painters tape. This set will directly cover the dark gray lines you just painted, you then paint all of the white squares that are left open with your darkest color (black in this case.)
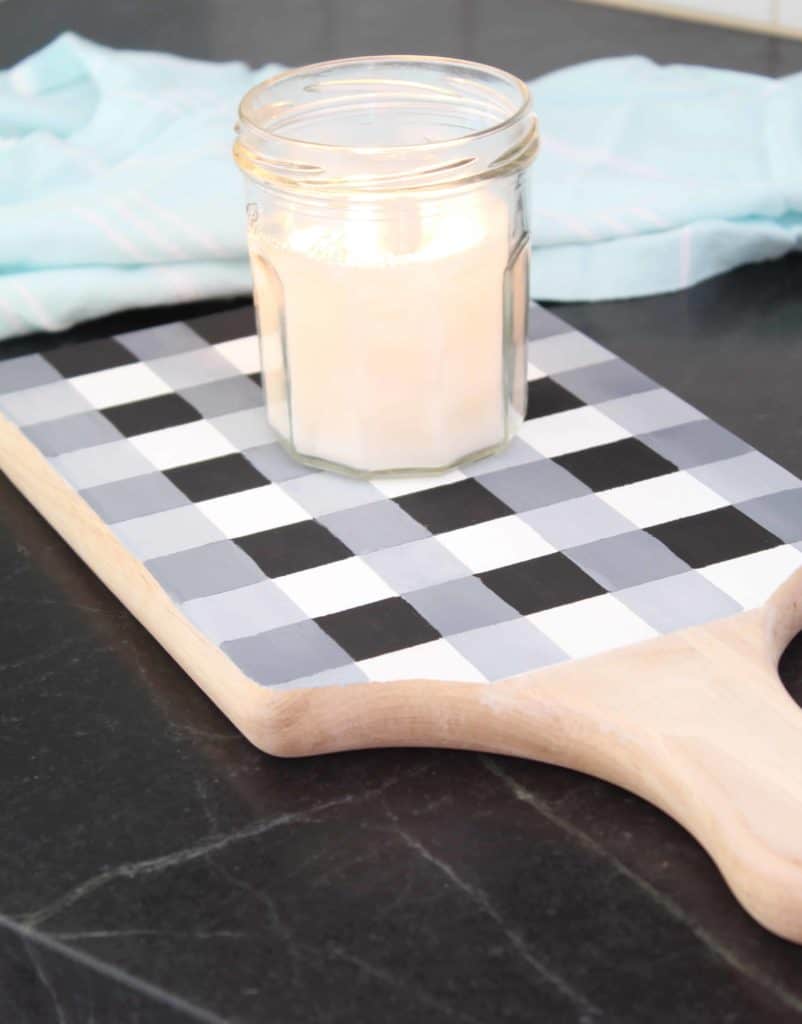
Allow a little bit of dry time (about 20 minutes) and then pull off all of your painters tape. You should be left with a beautiful buffalo check pattern! Once your tray is completely dry (I waited a day) apply your modge podge in a matte finish; I did this to help prevent any future chipping or scrapes.
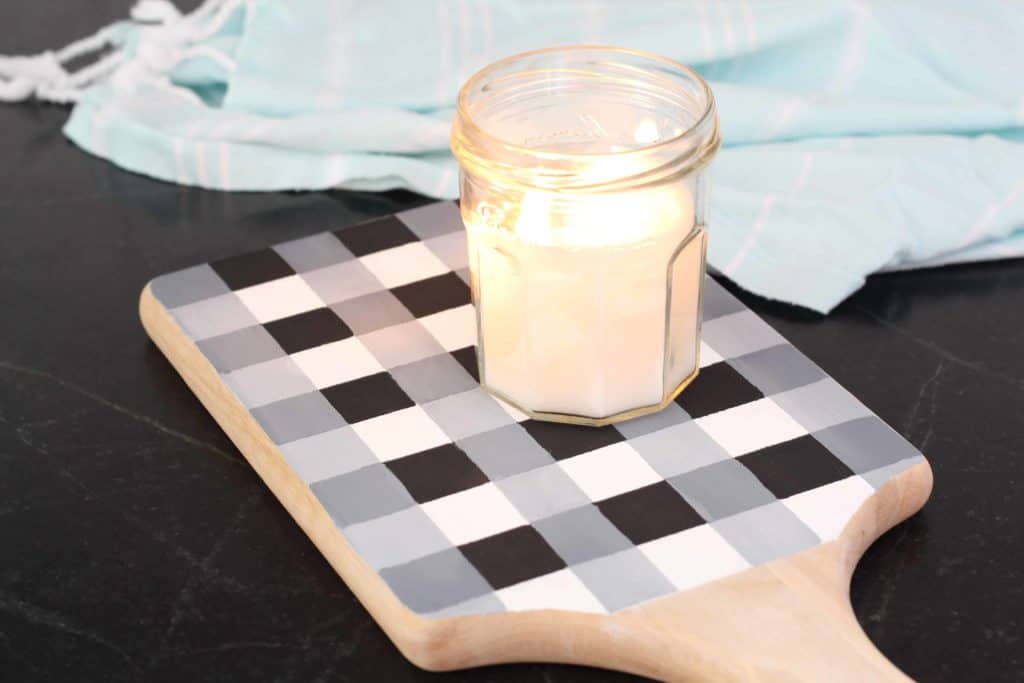
This wasn’t the easiest or fastest DIY I’ve ever done, but it was definitely worth it for the cute tray in the end:)
Have you ever painted anything with a pattern? If you have I’d love to hear about any tips or tricks you used!
p.s. If you want to make a candle to go along with your cute tray, check out this tutorial.
Want to save this post? Pin it here!




Buffalo checks are so classic and appealing. This is such a cute idea. Pinned.
Thanks so much, Debra!
This is the cutest idea, I just luv it! I’d luv to invite you to share it with us at Wall to Wall DIY Wednesday, which runs thru Mondays!! Best, Ann
I love this look, Tiffany and what an easy to follow tutorial! Visiting from Sweet Inspiration!
Thanks so much for stopping by, Gail!
This is such a darling DIY Tiffany! I might give this one a try! Pinning for later. Thanks for sharing at The Creative Circle link party.
Oh, thanks so much, Linda!
I’m currently really into buffalo check, maybe it has got to do with Fall… I don’t know, but I love the look and how cool is your tray!! Awesome idea, I love the look!
Thanks, Karin! Fall always makes me think of buffalo check too 🙂 Thanks for stopping by!
This is insanely cute, Tiffany! I have been seeing so much buffalo check lately…is buffalo check the new thing? Love it, will pin to multiple boards. Thanks for sharing at Morning Cup!
Thanks, Marissa! I never met a buffalo check I didn’t like 😉
What a great post. We’d love to have you share it with us at Creatively Crafty Link Party #CCBG. http://tryit-likeit.com/entries/link-party
Very pretty! Great hostess gift idea as well. Visiting from BFF Party.
Thanks so much, Victoria!