This simple DIY floral block print art is a fun and easy way to celebrate spring! The best part? You only need a few basic items to complete this project!
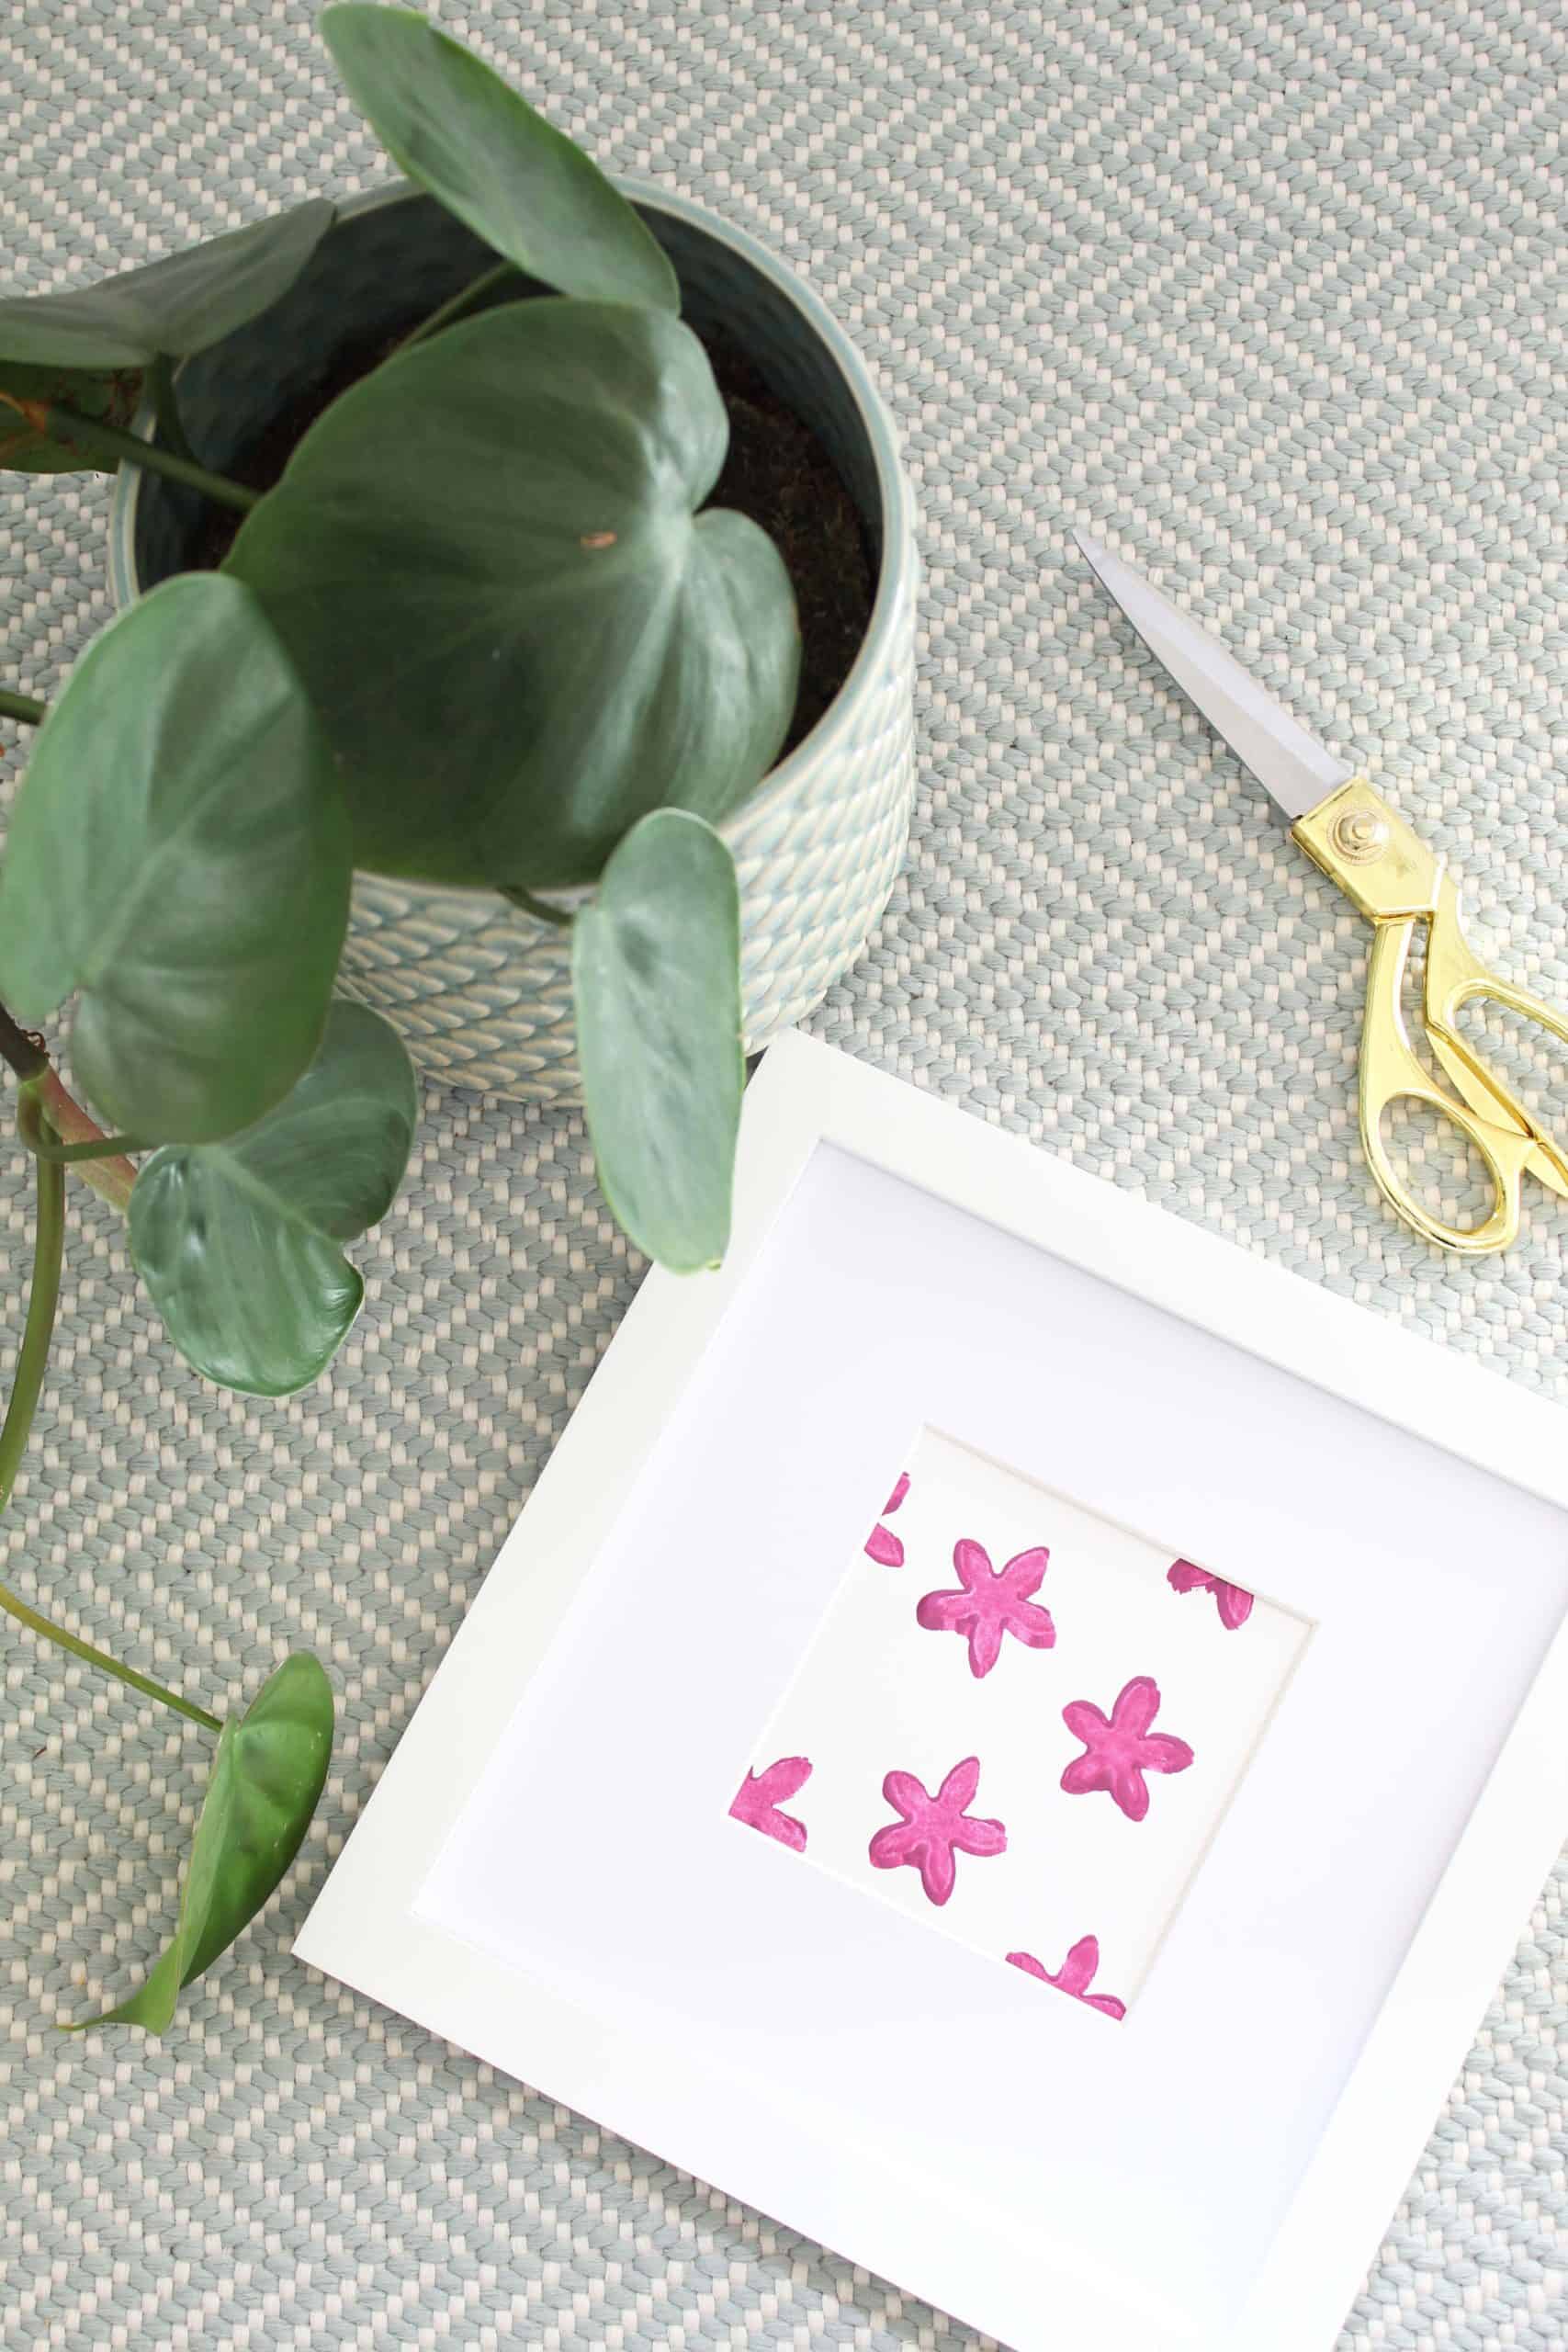
With all of the time we’ve been spending at home and the full blown spring weather we’ve been having lately (March I forgive you for the eight inches of snow), I’ve been itching to tackle some sort of craft project to celebrate spring. A new piece of block print art for our gallery wall seemed like a good place to start.
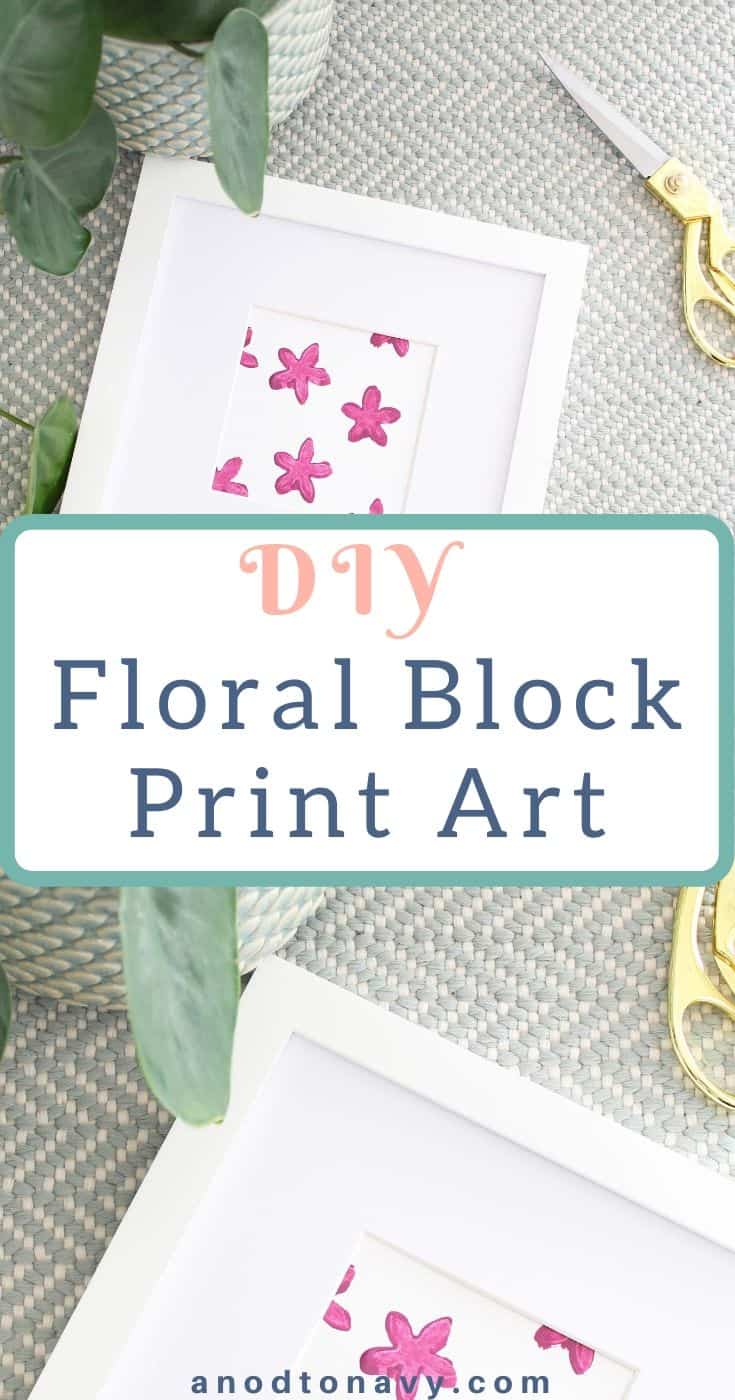
I’ve always loved the look of block print art and this easy DIY project is the perfect way to use a few simple items you may already have in your home or pantry. With minimal supplies and a little bit of imagination, this is the perfect low key project to tackle on a rainy afternoon or lazy weekend morning. It’s also a great way to make a few new pieces of spring artwork for your home.
If you’re unfamiliar with block print art, it’s a traditional form of art that uses handmade stamps. Part of what makes the art so beautiful (in my opinion) is the fact that block print art is imperfect. This also makes it ideal for a homemade art project, because the beauty is in the imperfections – which makes for less stress!
DIY Floral Block Print Art
What you need:
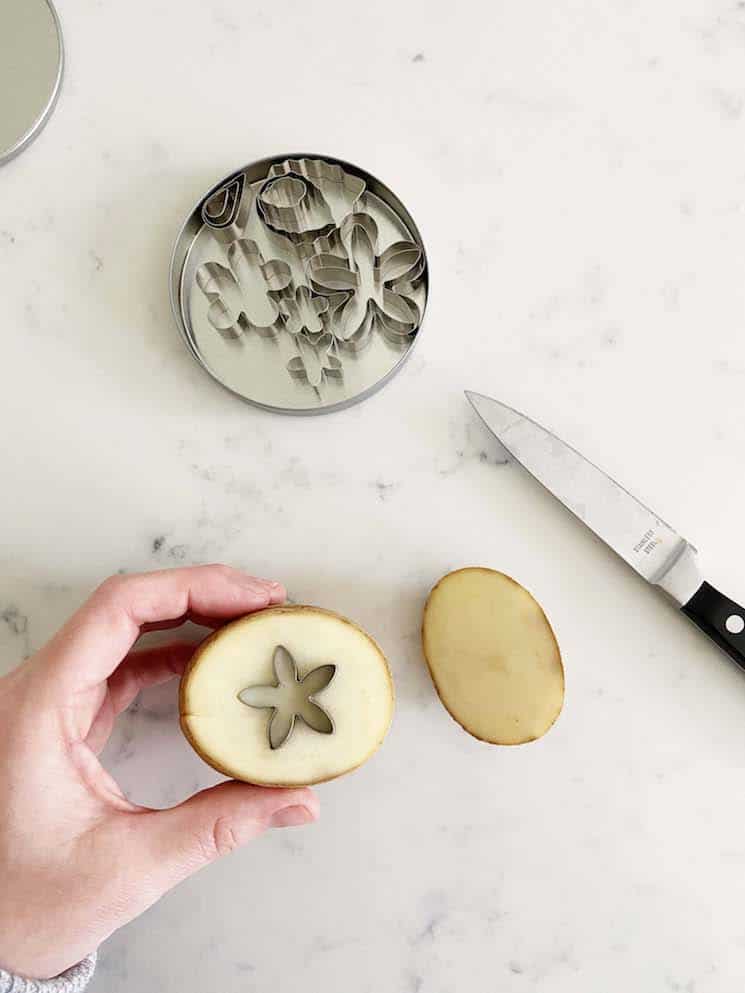
- Potato
- Knife
- Small Cookie Cutter
- Acrylic Paint
- Paper
For the stamp, I used a potato from our pantry that was just past its prime and starting to get a little soft. This made getting the cookie cutter into it easier. Use whatever color acrylic paint you have on hand or whatever color strikes your fancy. I went with a nice purple color in honor of spring. I used these cookie cutters that I already had on hand for cutting shapes into fruit and such. For paper I used card stock, but regular printer paper would also work.
- Cut a 1 inch slice off of the top of your potato. Press the cookie cutter down firmly into the top of the larger potato piece.
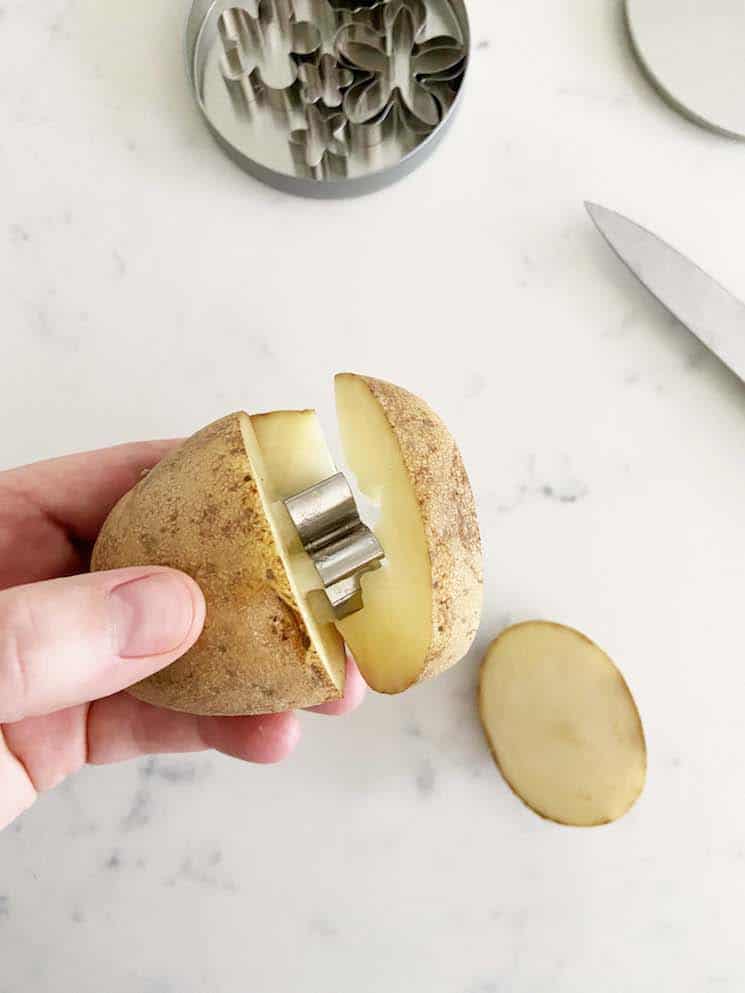
- Once the cookie cutter is pressed down at least 3/4 of the way into the potato use a paring knife and cut around the circumference of the potato, about 1 inch in depth.

3. Once you’ve completely cut around the potato, carefully pull your cut section away from the remaining potato. Remove the cookie cutter.
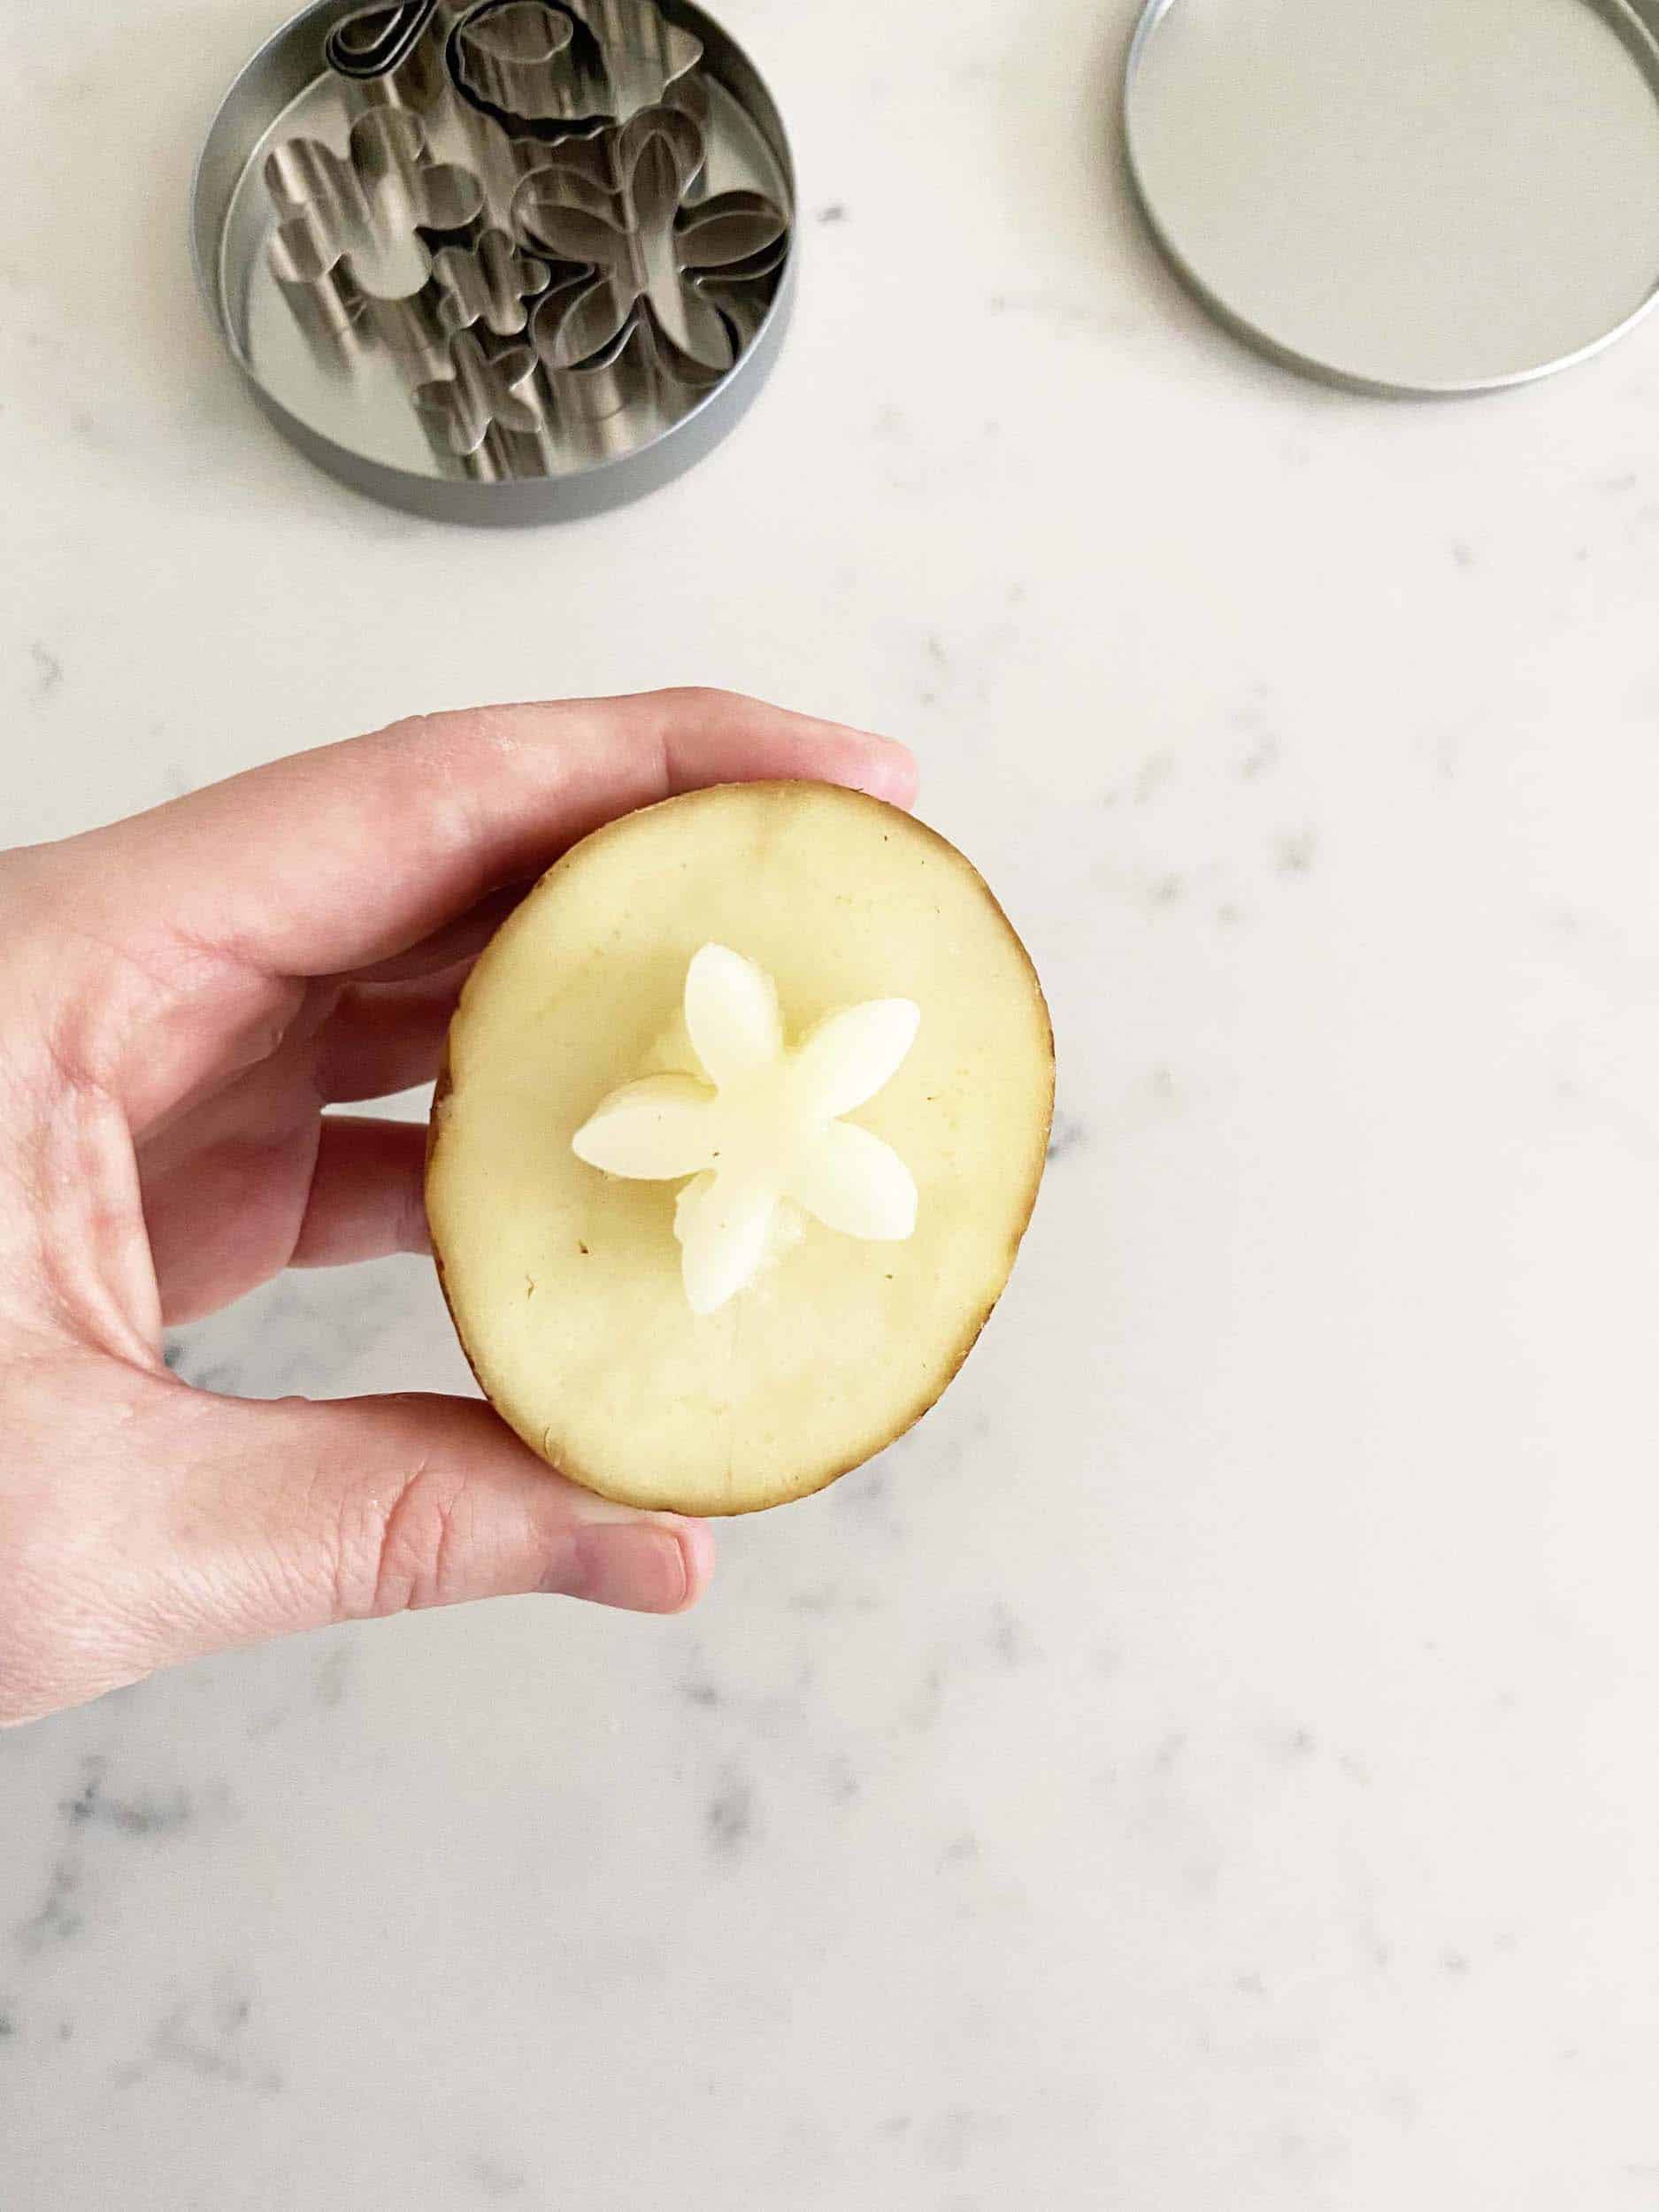
4. You should be left with your new potato stamp!
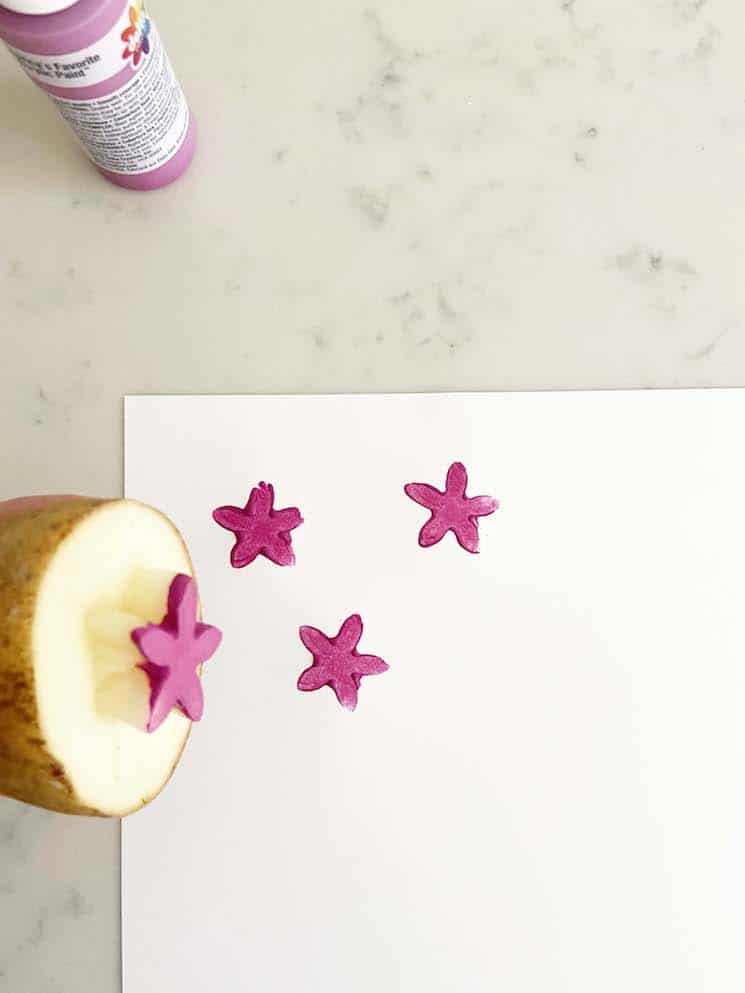
5. Dip your potato stamp into your acrylic paint and do a couple of test stamps to see how it works. It might take a few tries to figure out how much paint you need on your stamp and how hard to press. I think it’s important to remember that these types of stamps aren’t meant to be perfect, so embrace the flaws! Once you have your technique down, start stamping away!
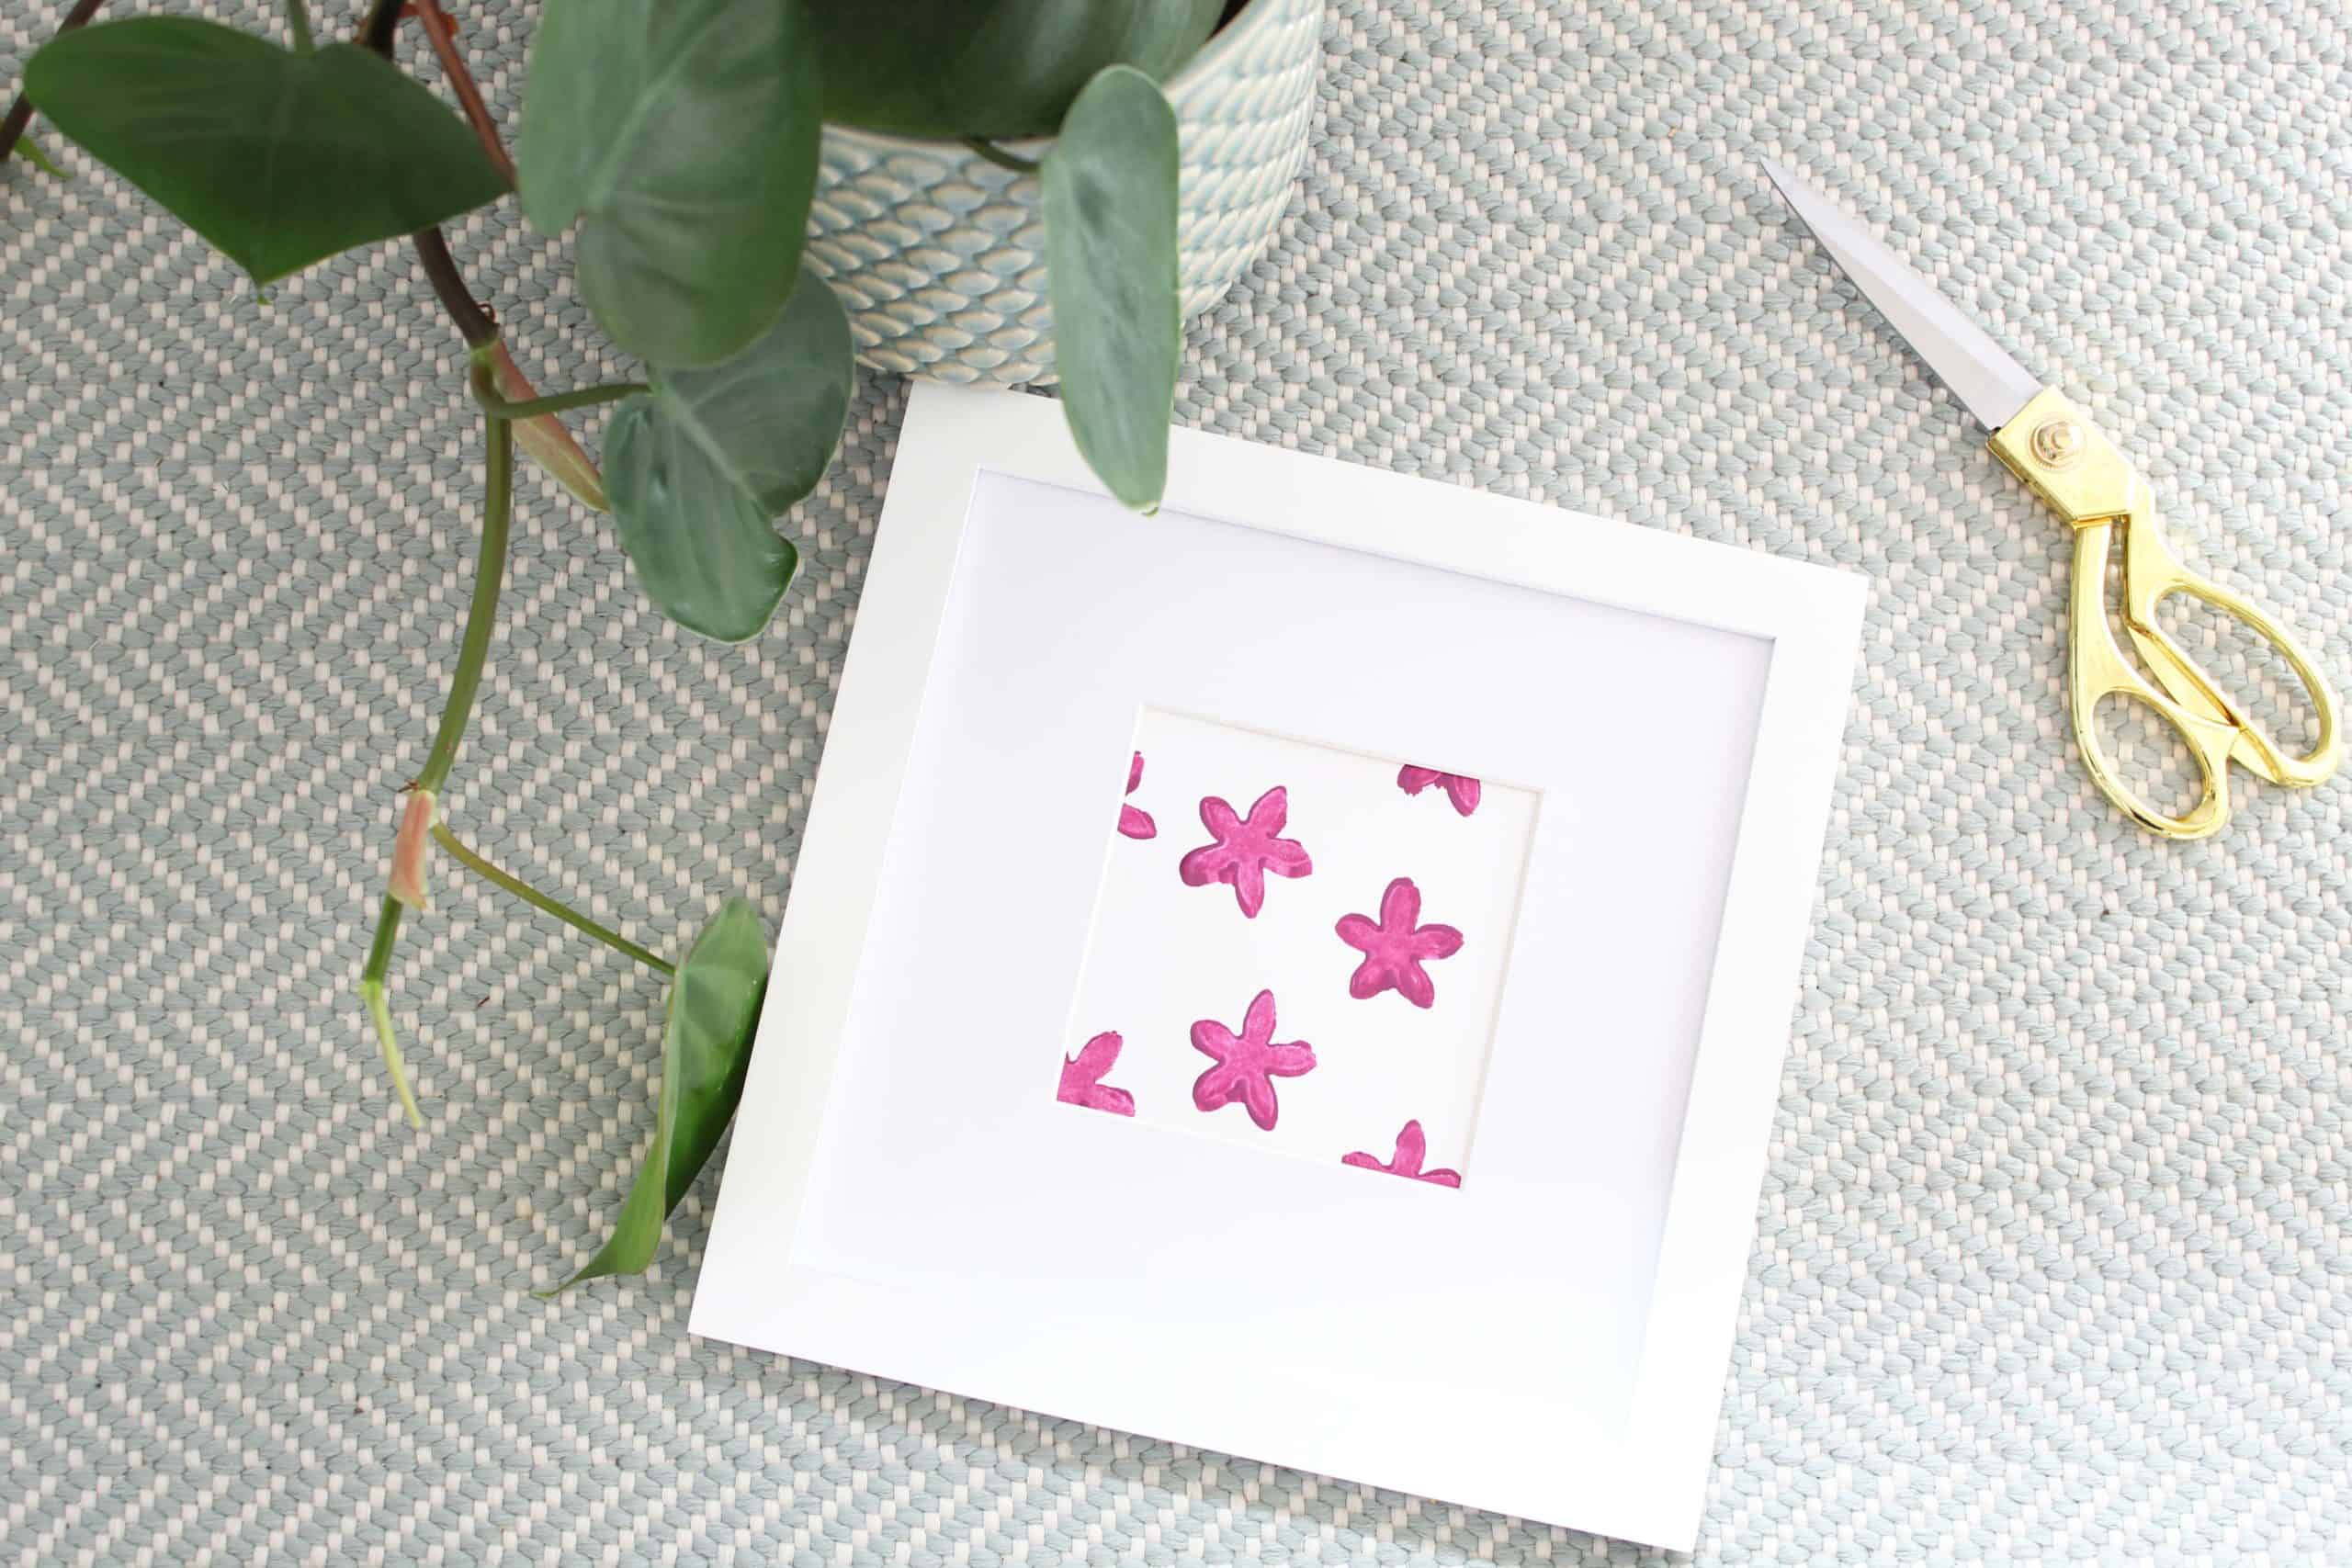
This art is so simple to make and could easily be adapted to make different seasonal art throughout the year. Plus, if you have little ones, it really is a craft that all age groups can enjoy!
Want to save this post? Pin it here!


[…] DIY Floral Block Print Art […]