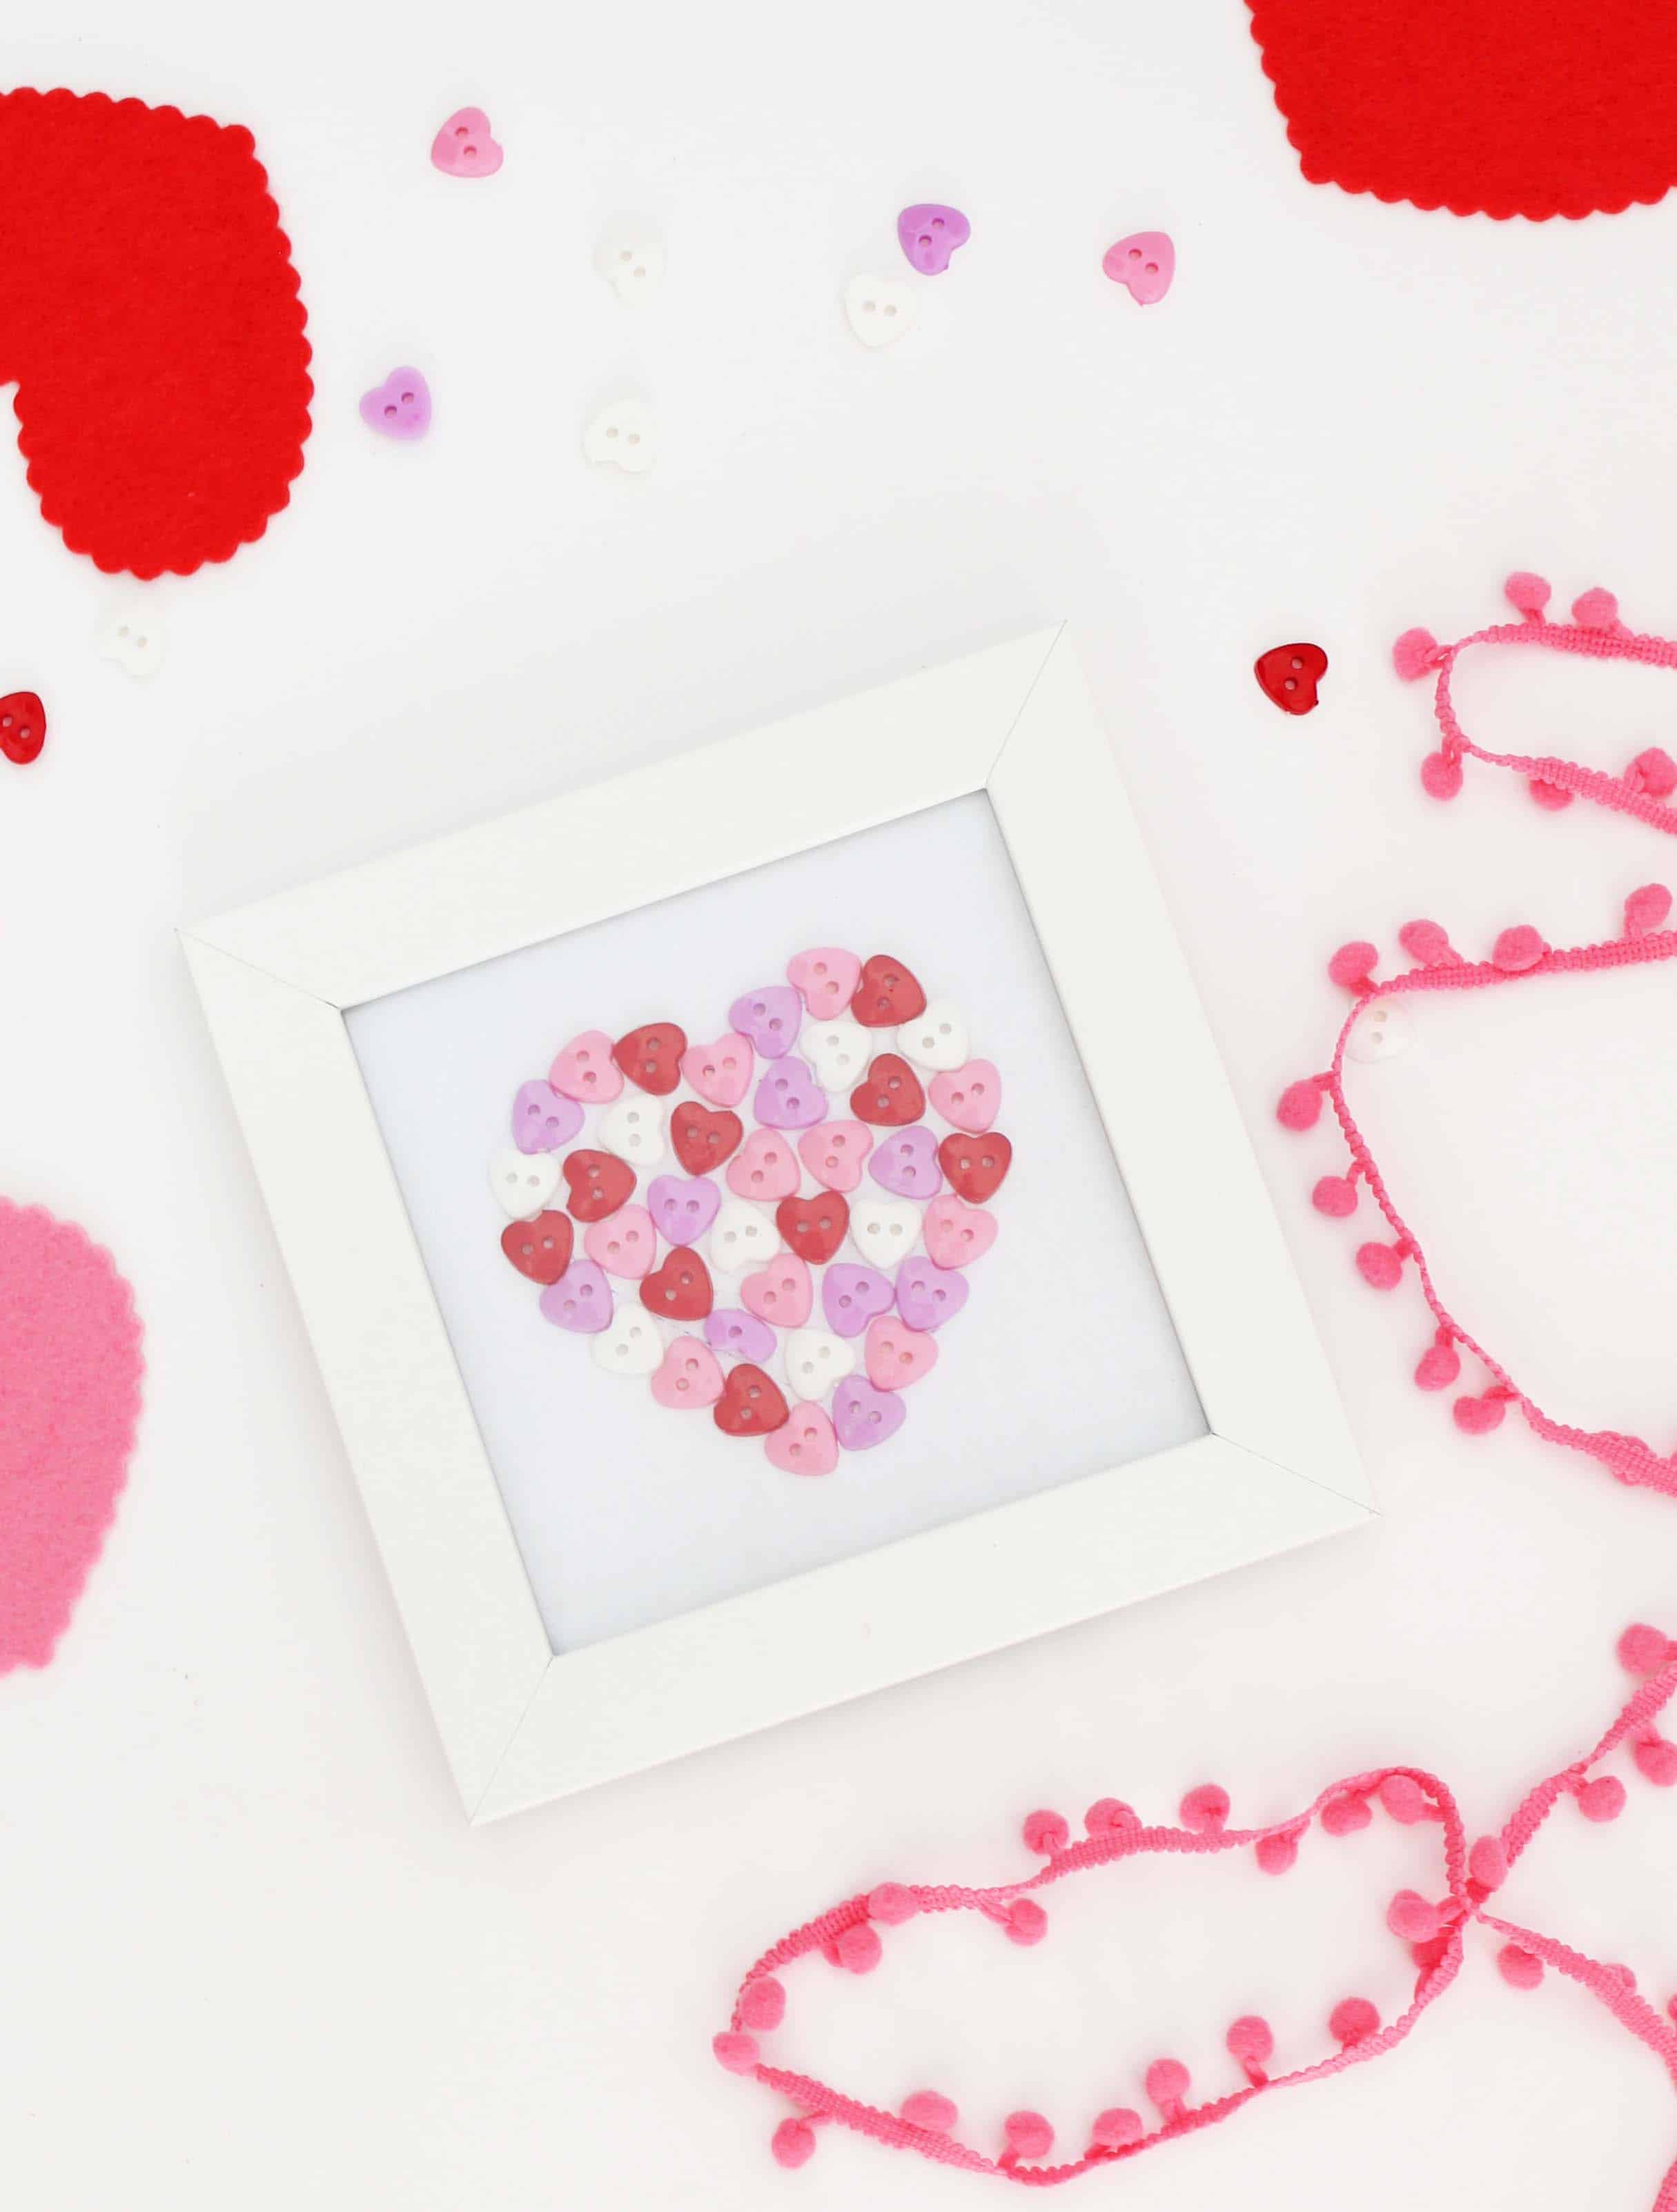
This Valentine’s Day button heart art is a fun way to celebrate the holiday with a simple, sweet DIY project.
Have you ever made button art? I’ve wanted to make some button art for just about forever. I saw a really cute teacher gift idea on Pinterest last spring of a framed apple made out of buttons that was so cute. It inspired me to put this craft on my “to make” list. When I saw these adorable heart buttons in the dollar section at Target I knew they would be perfect for this project.
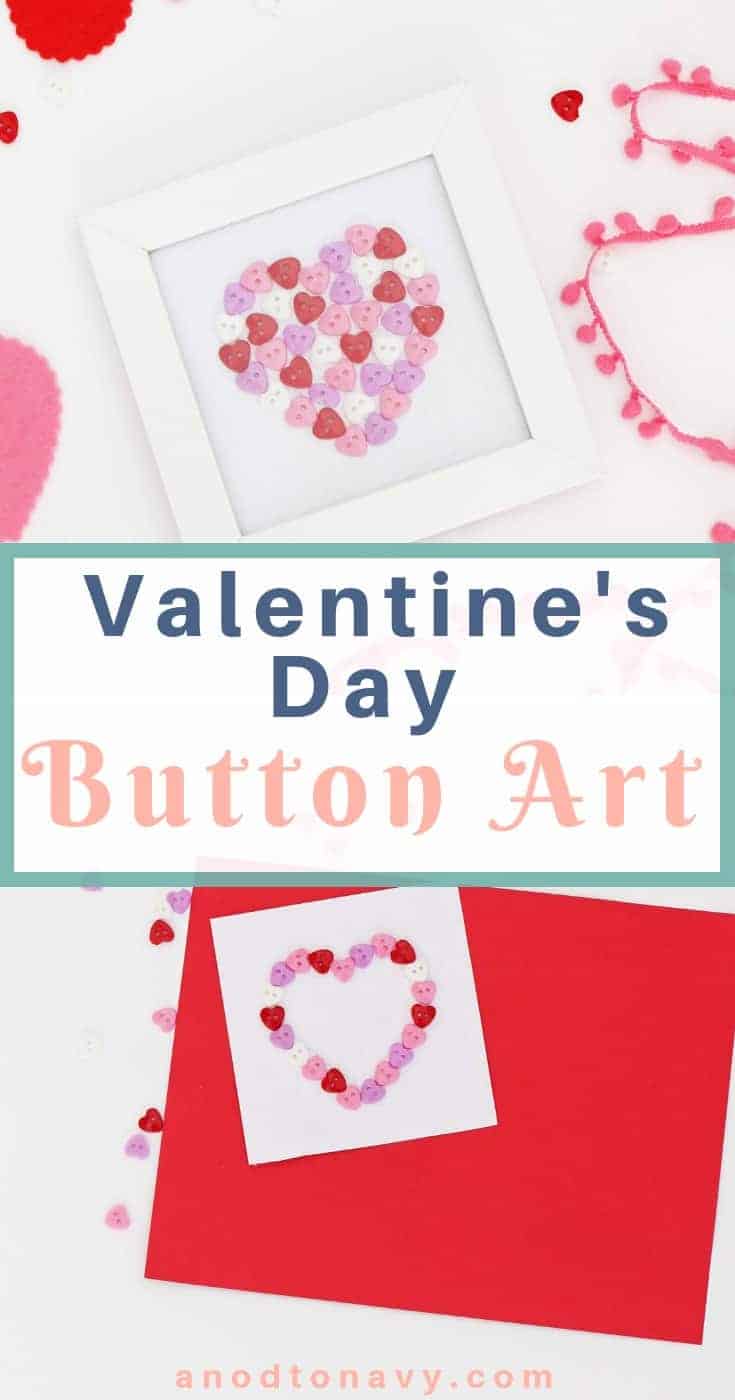
Valentine’s Day Button Heart Art
Button art is great because it’s not only cute, but also relatively inexpensive to make. The traditional way of making something out of buttons normally means you use buttons you’ve collected over the years from old sewing projects. I don’t sew (sad face) so I didn’t really have more than a couple of odd buttons laying around the house.
So if you’re fortunate enough to know how to sew, gather up your buttons! Or if you’re like me, check out your local craft and dollar stores and go buy some 🙂 .
How to Make Button Heart Art
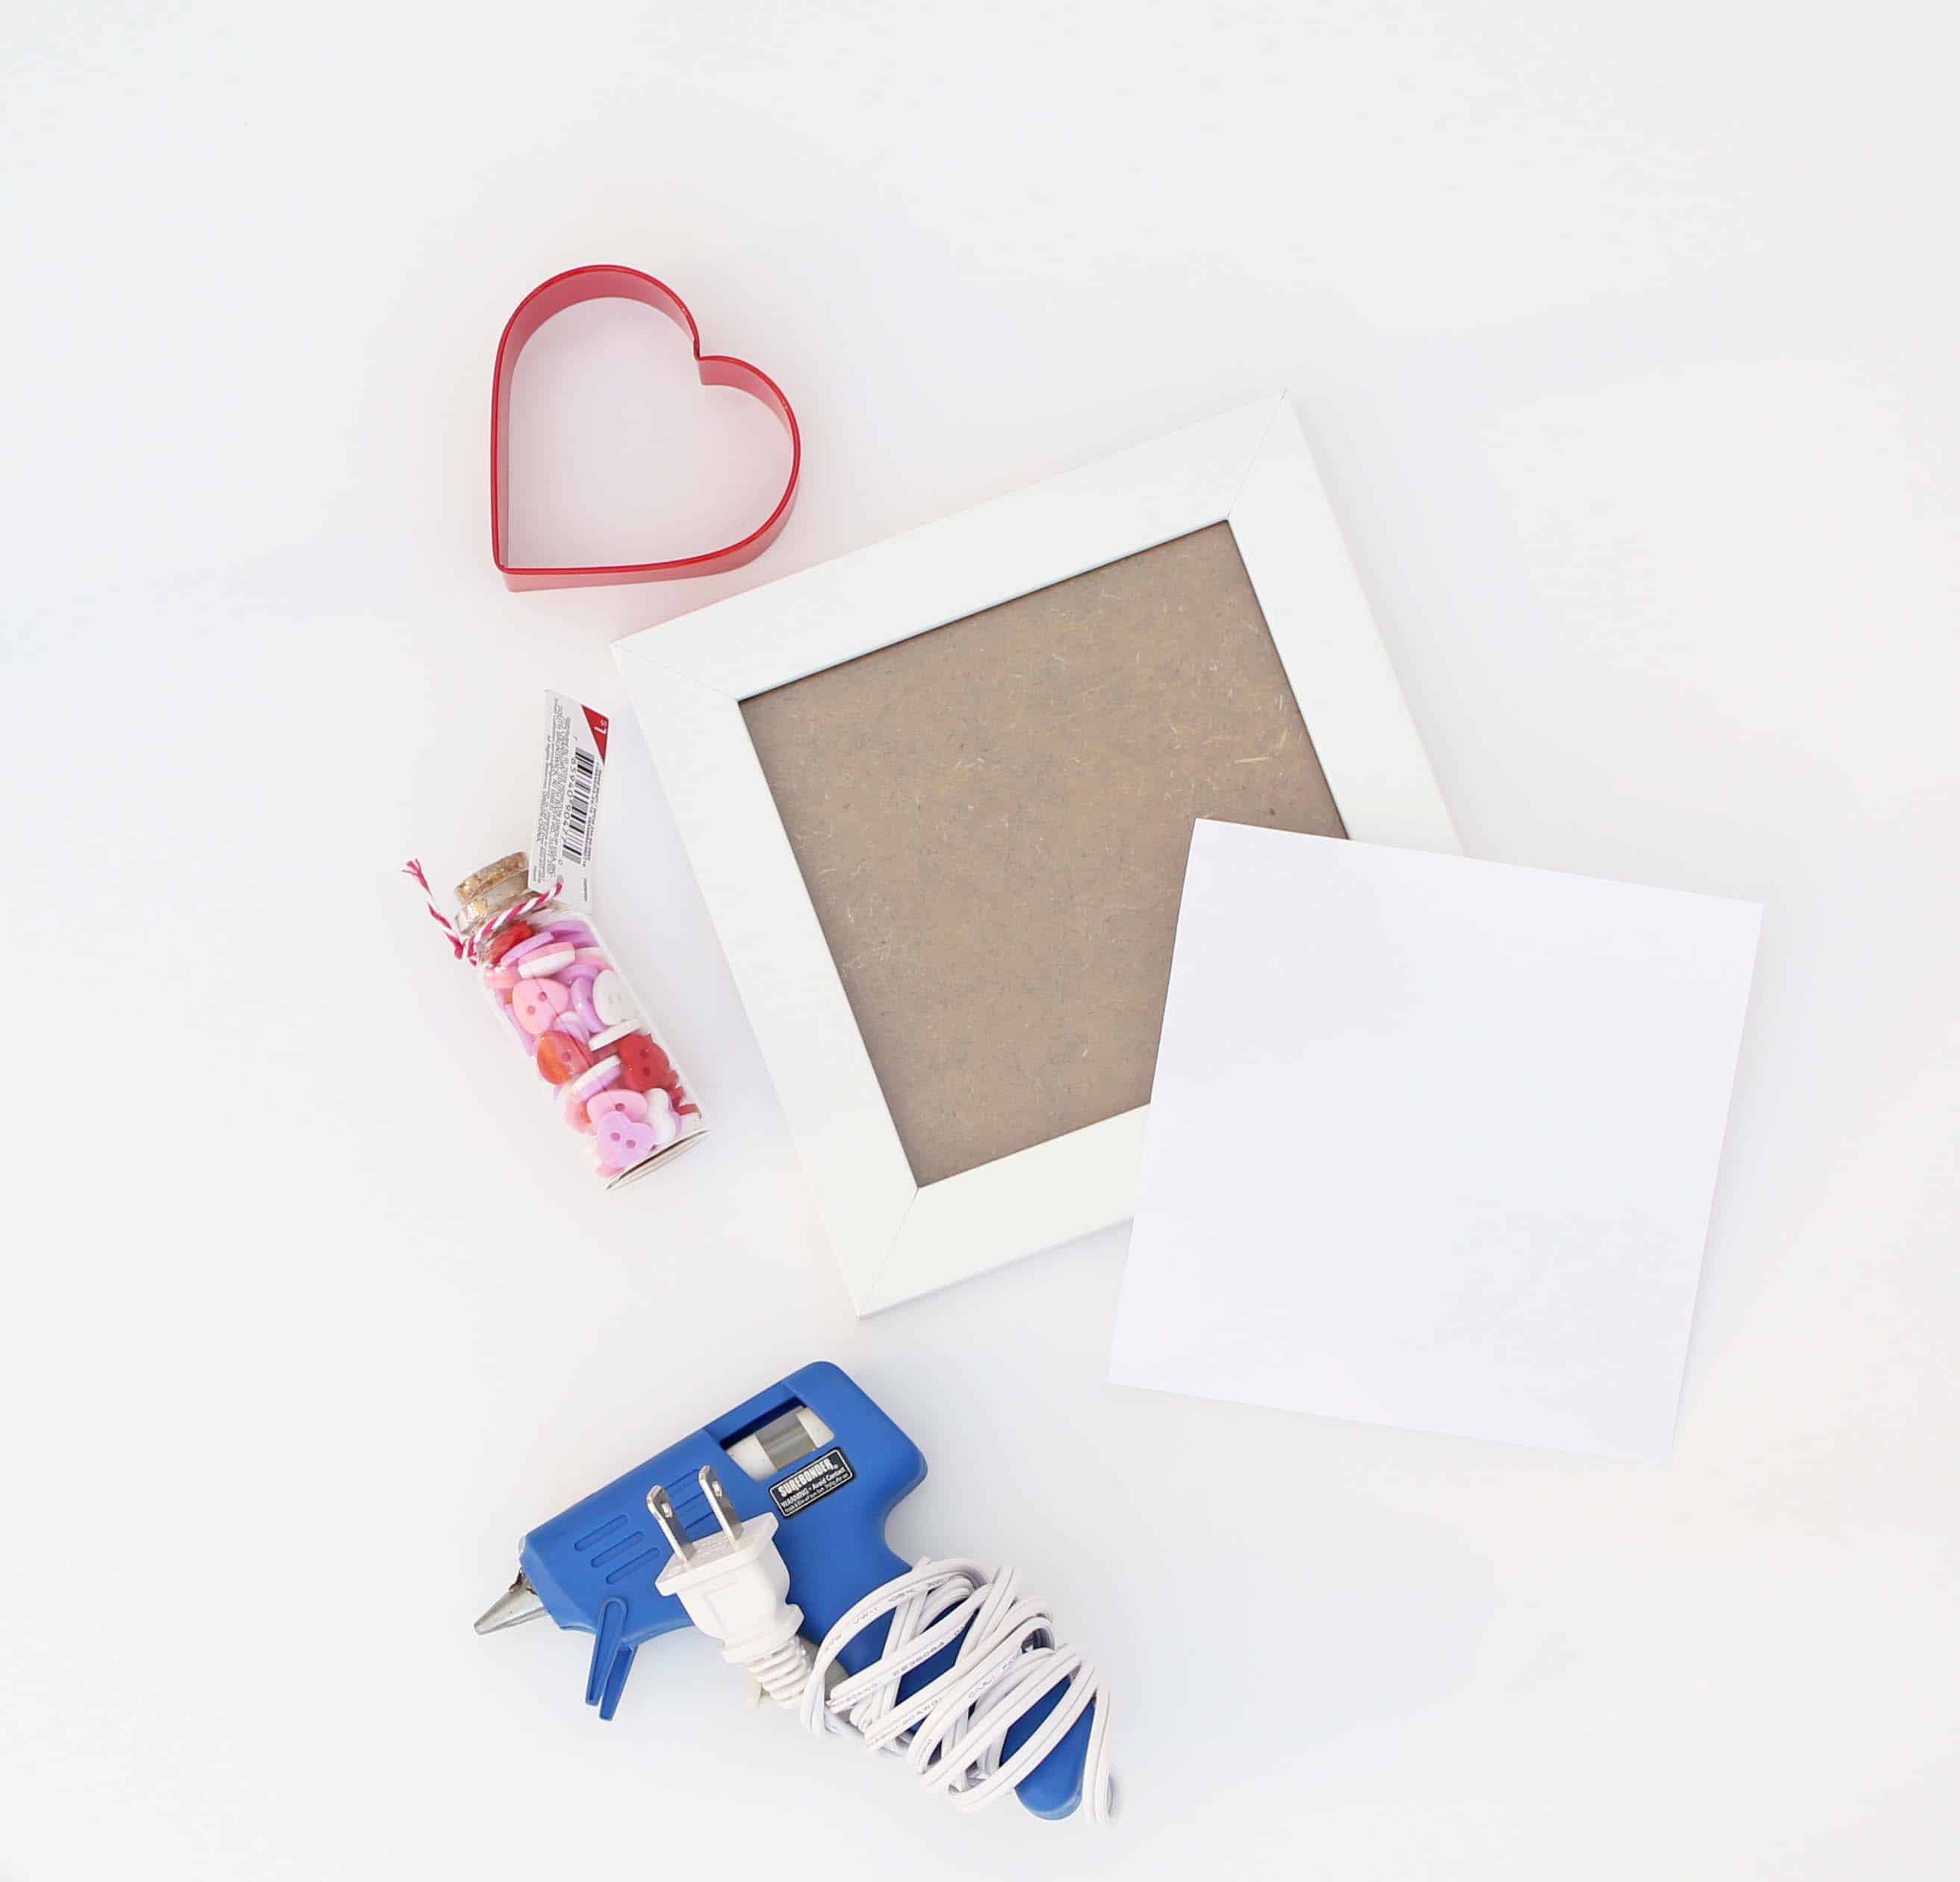
What You’ll Need:
- A Picture Frame
- A piece of card stock
- Glue gun
- Heart cookie cutter (to use as a stencil)
- Heart buttons (or any buttons)
1. Start by cutting your card stock to the size it needs to be to fit in your frame. I find the easiest way to do this is to use the picture insert that comes with your frame as a template. Lay it on top of the card stock and cut around it. (Mine has already been cut in the picture above.)
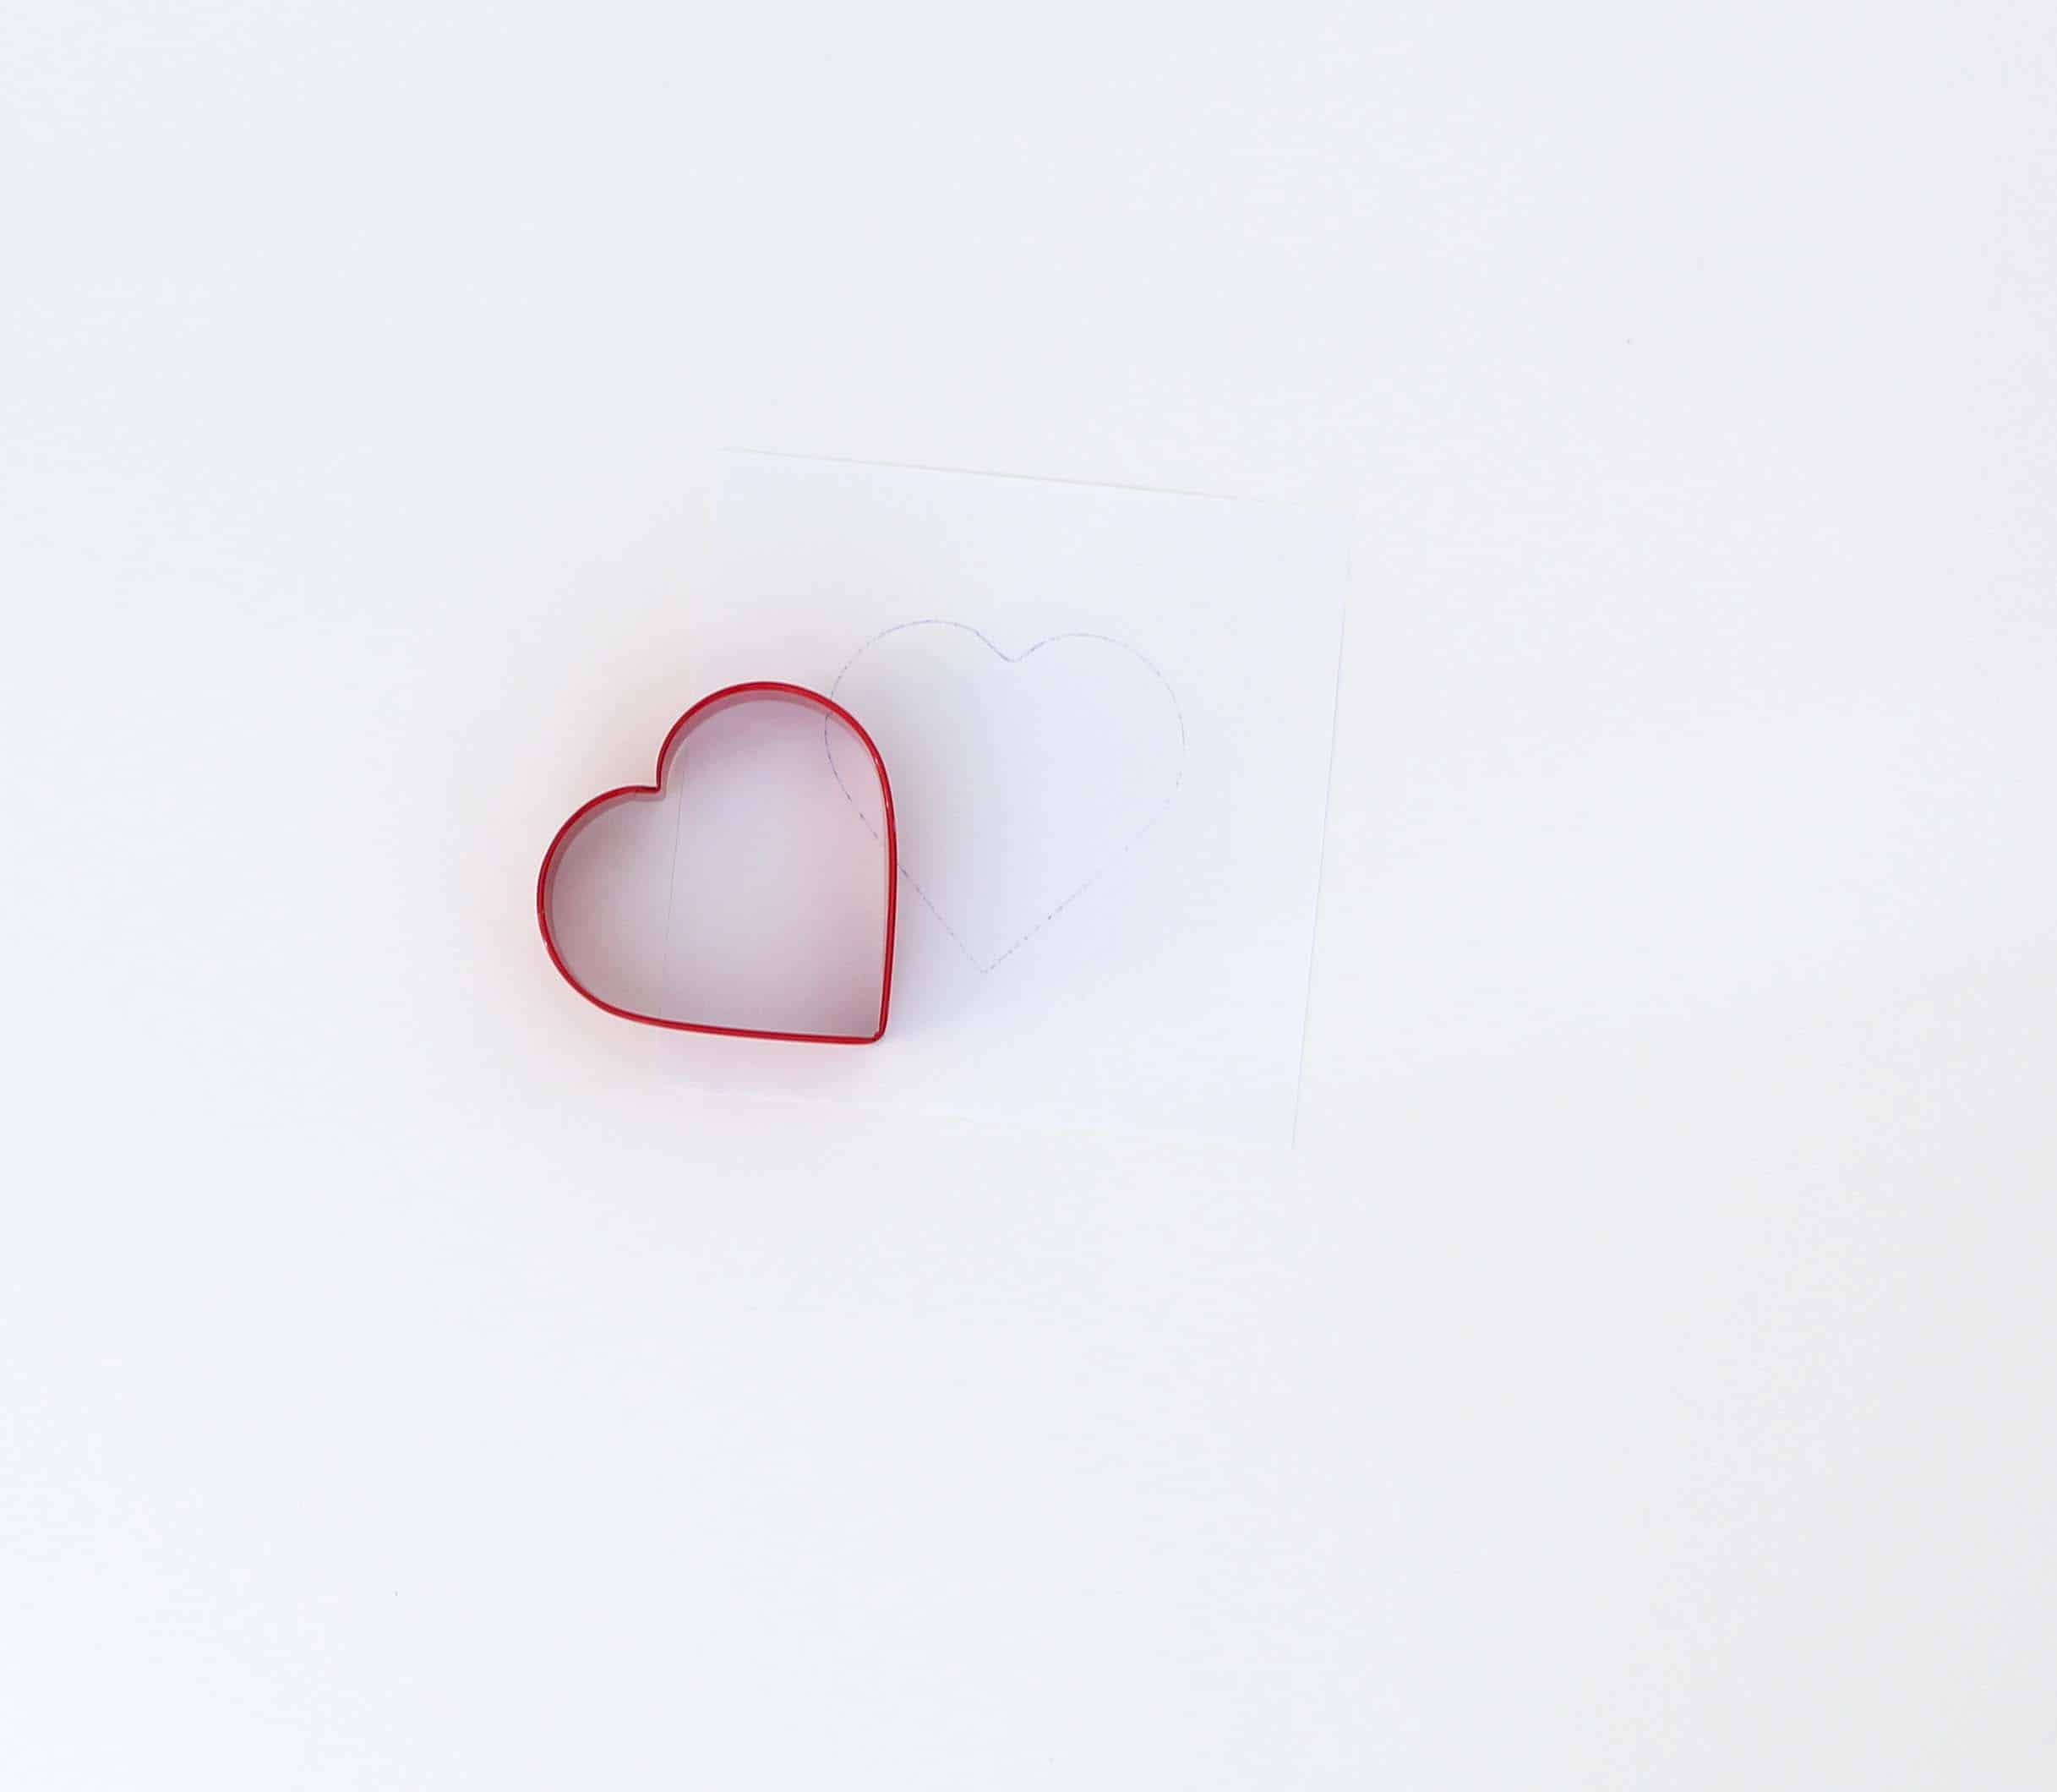
2. Once you have your card stock cut, grab your cookie cutter (it’s going to double as a stencil for you). I used a 3.5 inch heart cookie cutter, but you can use whatever size you want or have. It’s all going to depend on how big you want your heart to be and what size your frame will allow for. By stenciling it out on the paper first you’ll get to see exactly where your heart is positioned and how big it will be.
How to Arrange the Buttons
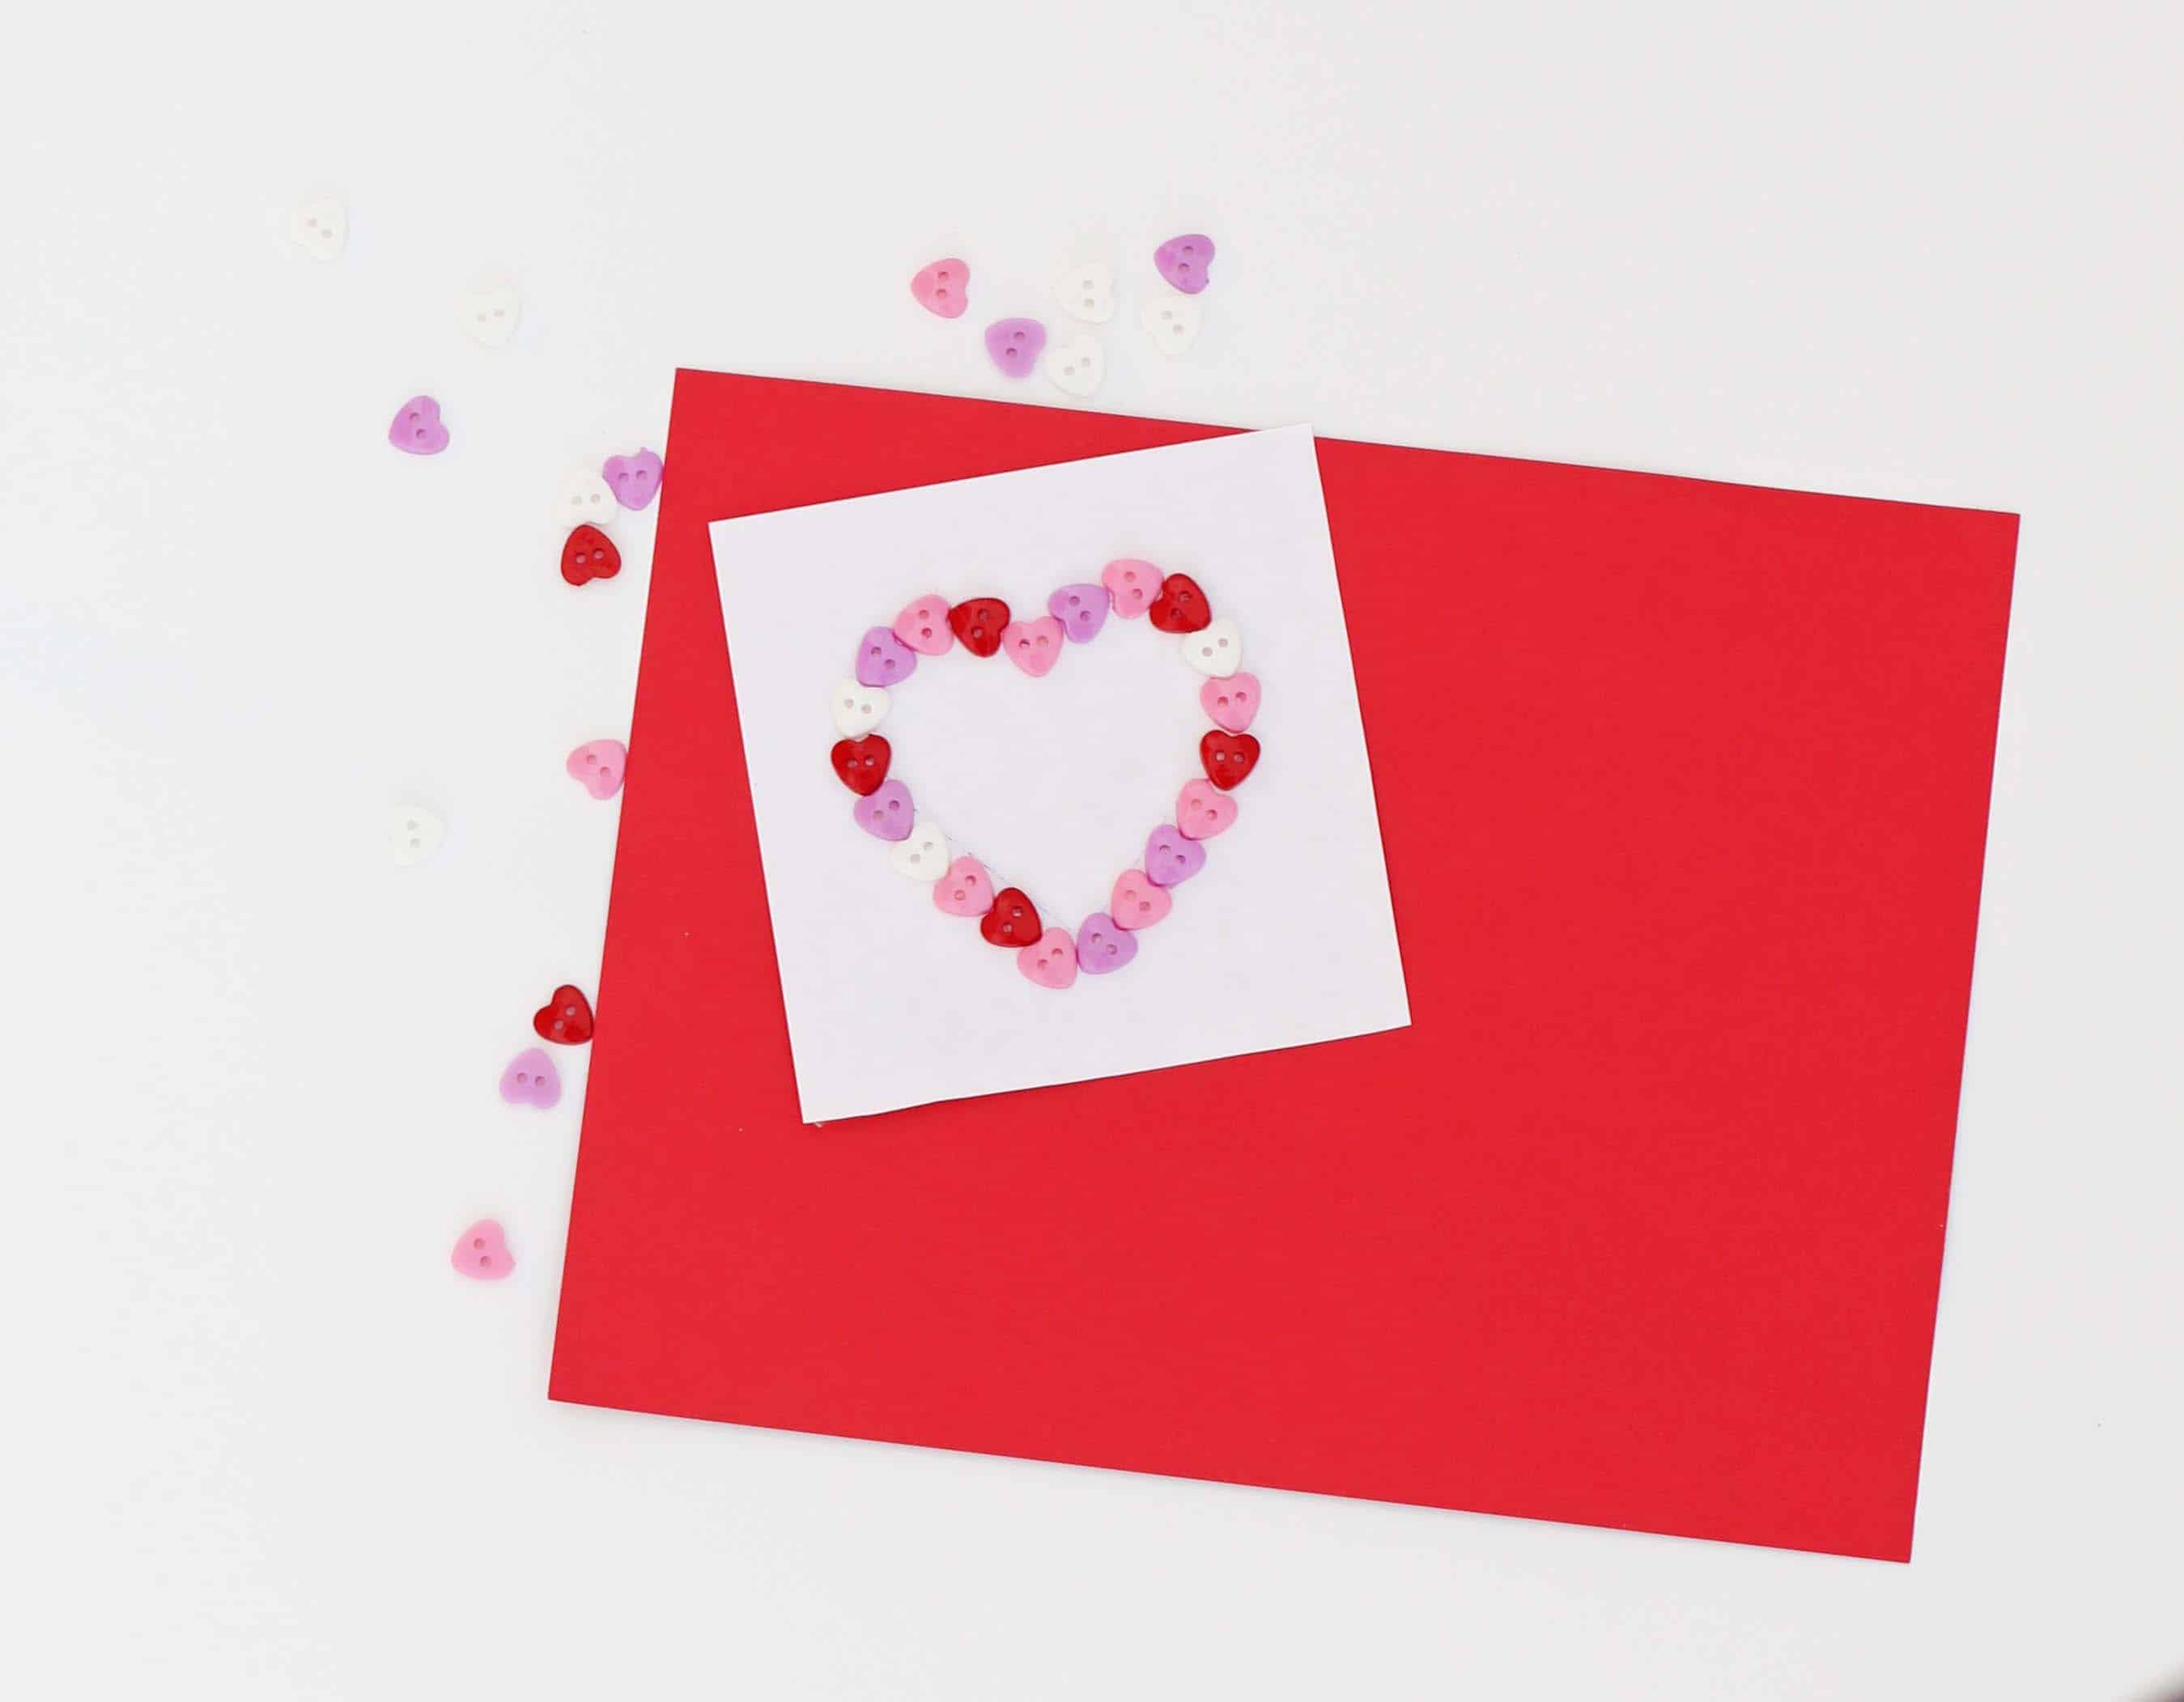
3. Now comes the fun part, the buttons! I chose to do the outline of my heart first. I laid all of the buttons down slightly outside of my stencil line and moved them around until I was happy with the outline. Then I started at the top of the heart and glued them on one by one as I worked my way down the row.
4. Once I had my outline done I used a similar approach to fill in the heart. The key is always to get it looking how you want before you glue anything down! This was by far the trickiest part for me, and I struggled for a while trying to get every space filled with the awkward shape of the heart buttons. To solve this I ended up cutting one of the buttons in half, and voila! Everything fit.
I let the glue dry for about an hour and then popped it into the frame. I’m loving how it turned out! Homemade valentine’s decor and cards always feel special to me, and what’s more homey than some button art on your mantle 😉 ?
Want more Valentine’s Day inspiration? Try making this Decadent Dark Chocolate Mug Cake.
This post contains some affiliate links for your convenience. Click here to read my full disclosure policy.
Want to save this post? Pin it here!


This turned out really cute and it’s so easy to do! Easy crafts are the best, aren’t they? Going to pin to my V-Day board! Cheers. <3
Such a cutie-patootie wall hanging. The buttons make it look so vintage! 😉 Thanks for sharing on Homestyle Gathering. Hope you link-up again tomorrow, Tiffani!