Popular and budget friendly, box trim moulding is a great way to add character to your walls without breaking the bank! Here’s how to install box trim wall moulding.

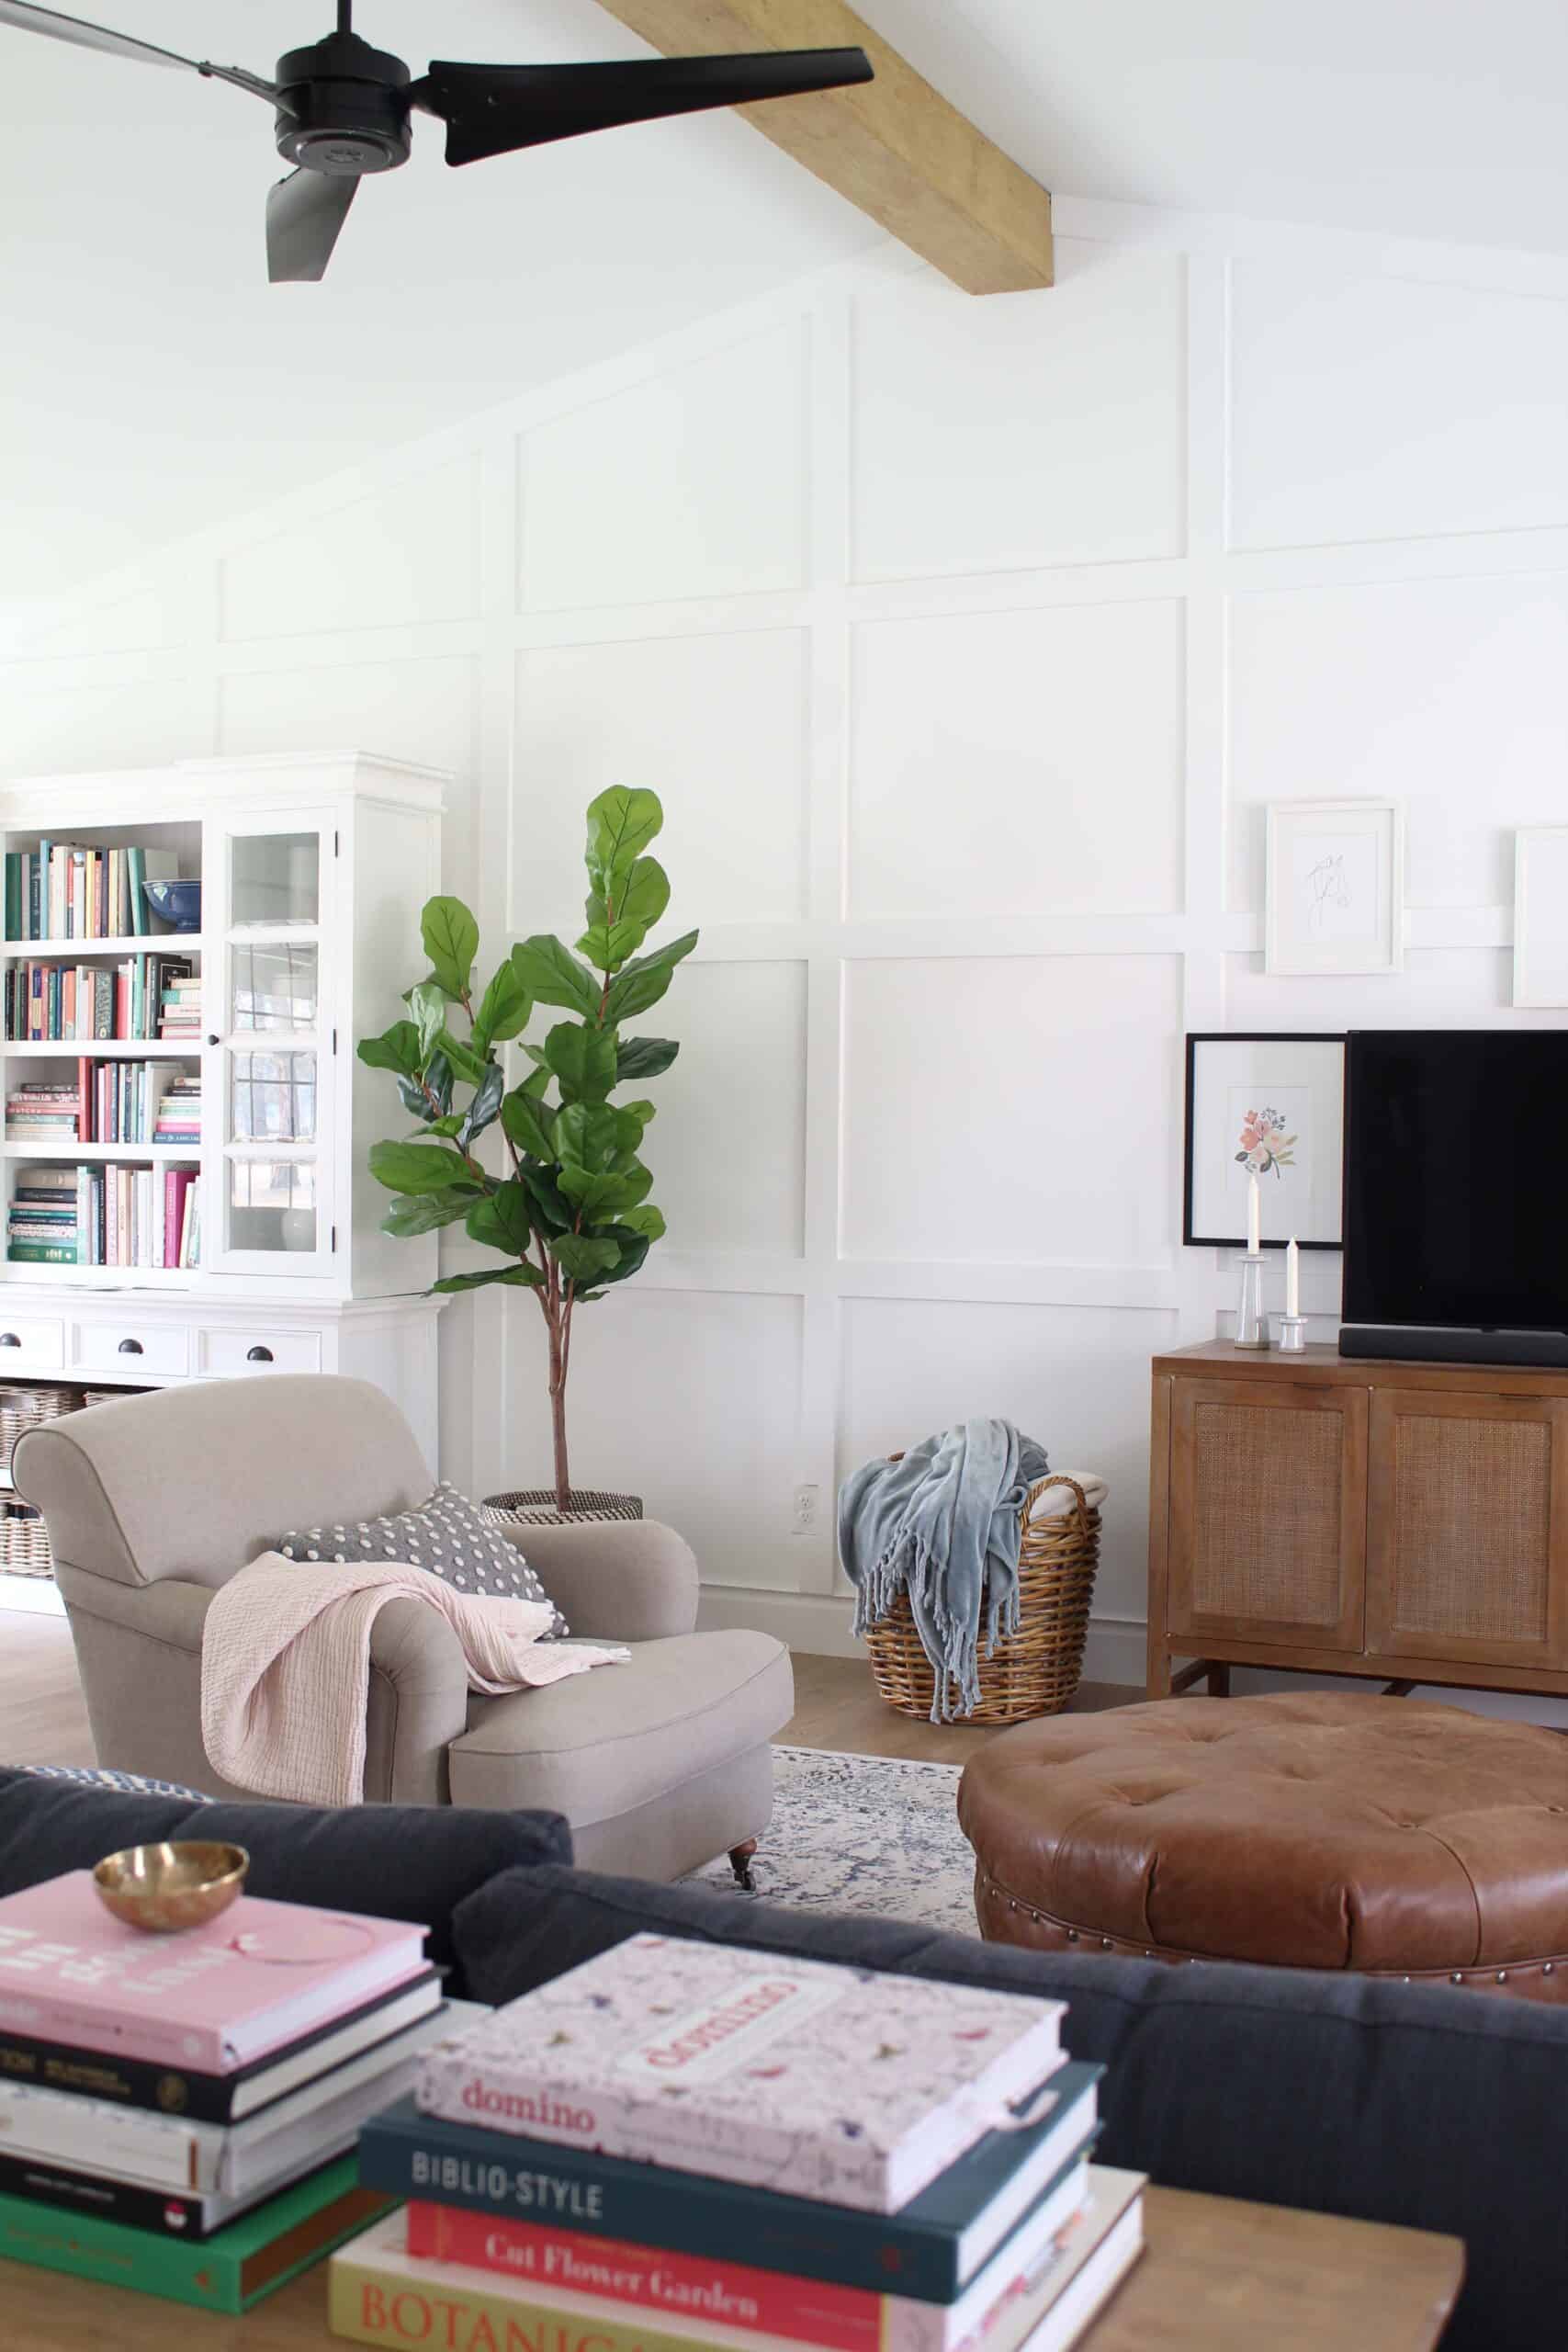
Do you have any large blank walls in your home? Do you look at them and feel a little overwhelmed? I’ve been feeling like this for the past couple of years since we moved into our home. While I love the vaulted ceiling in our great room, its always felt a little bit bare and stark. I knew eventually we wanted to do some sort of a wall treatment, but it took me a while to figure out which one felt the most natural to our home.
Enter box trim moulding (I’ve seen some call it a board and batten accent wall as well). It’s become pretty popular as a design choice over the last couple of years and I can see why. Box trim moulding is a great way to add character to a large wall when you have a small budget. The materials to do it are pretty basic and readily available, and it doesn’t involve any major demo. It’s a bit labor intensive, but if you’re patient and take your time, I think the end result is worth it!
How To Install Box Trim Wall Moulding
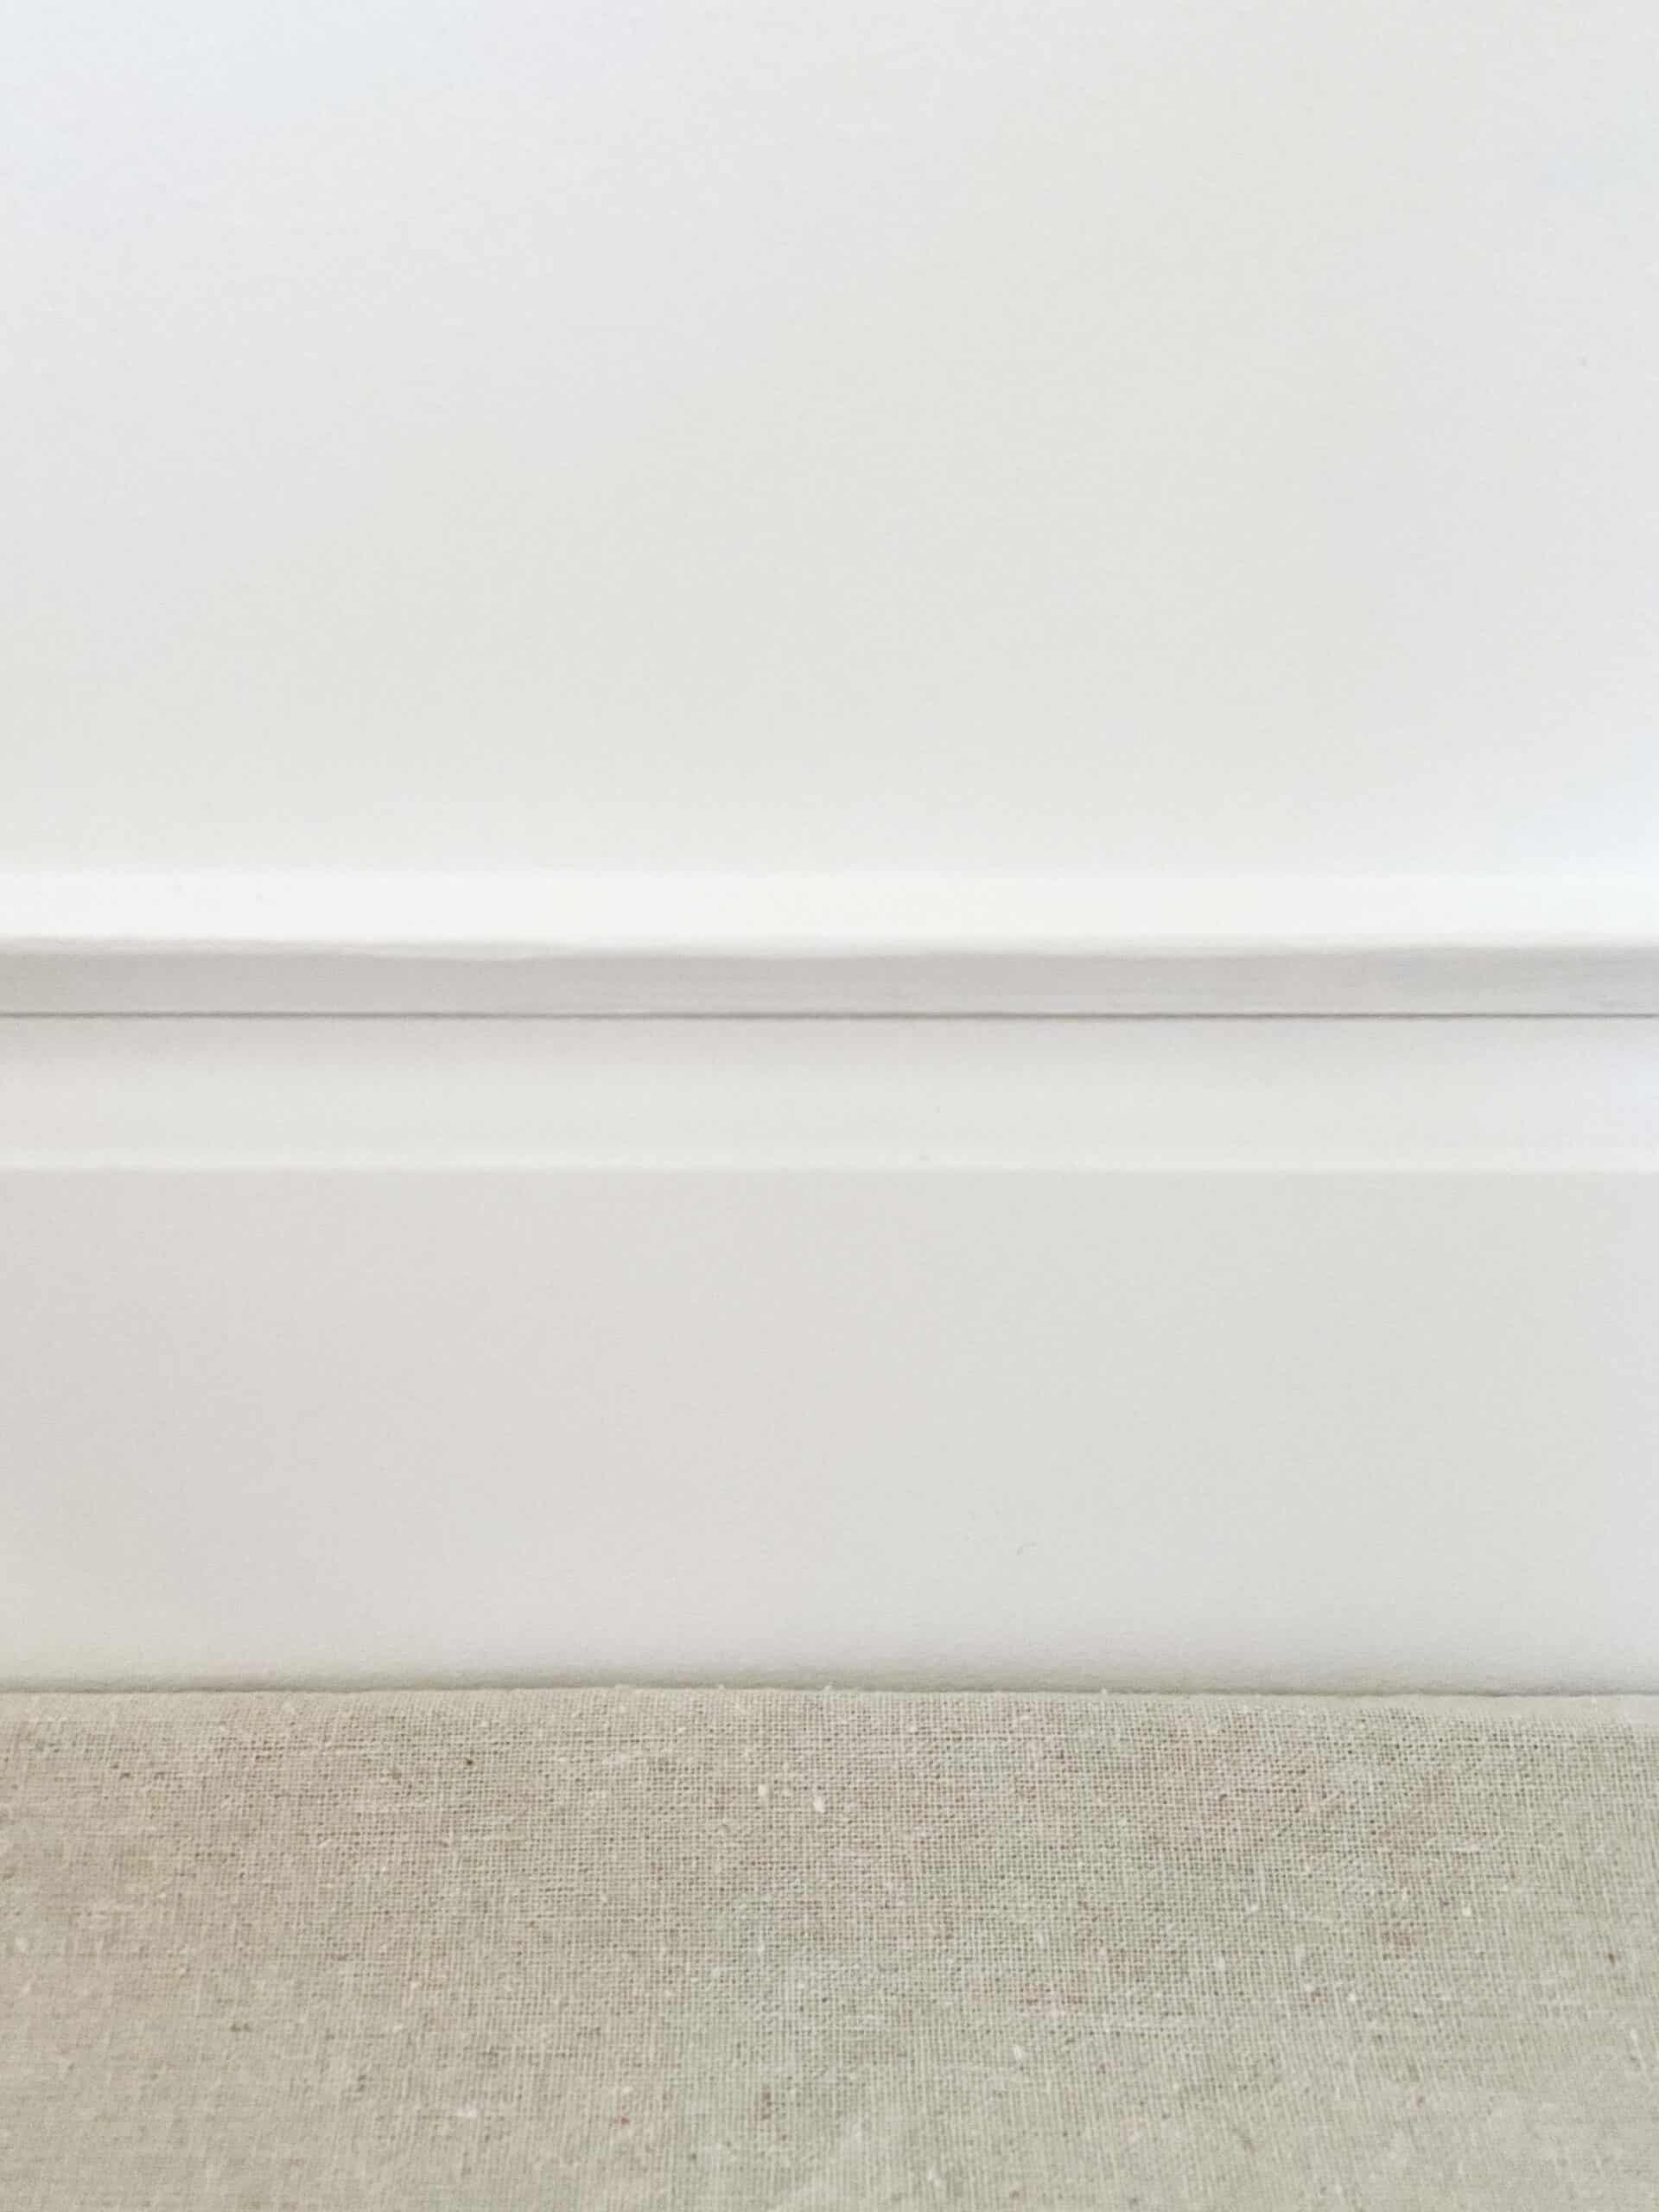
We started by making sure the box trim we were going to install would fit flush against our existing baseboard moulding. To do this we added a thin piece of flex trim flipped upside down to the top or our existing baseboard moulding. We then caulked and painted it. You can see this in the picture below. This allows the box trim to fit flush against the baseboard and look more finished.
Post Sources

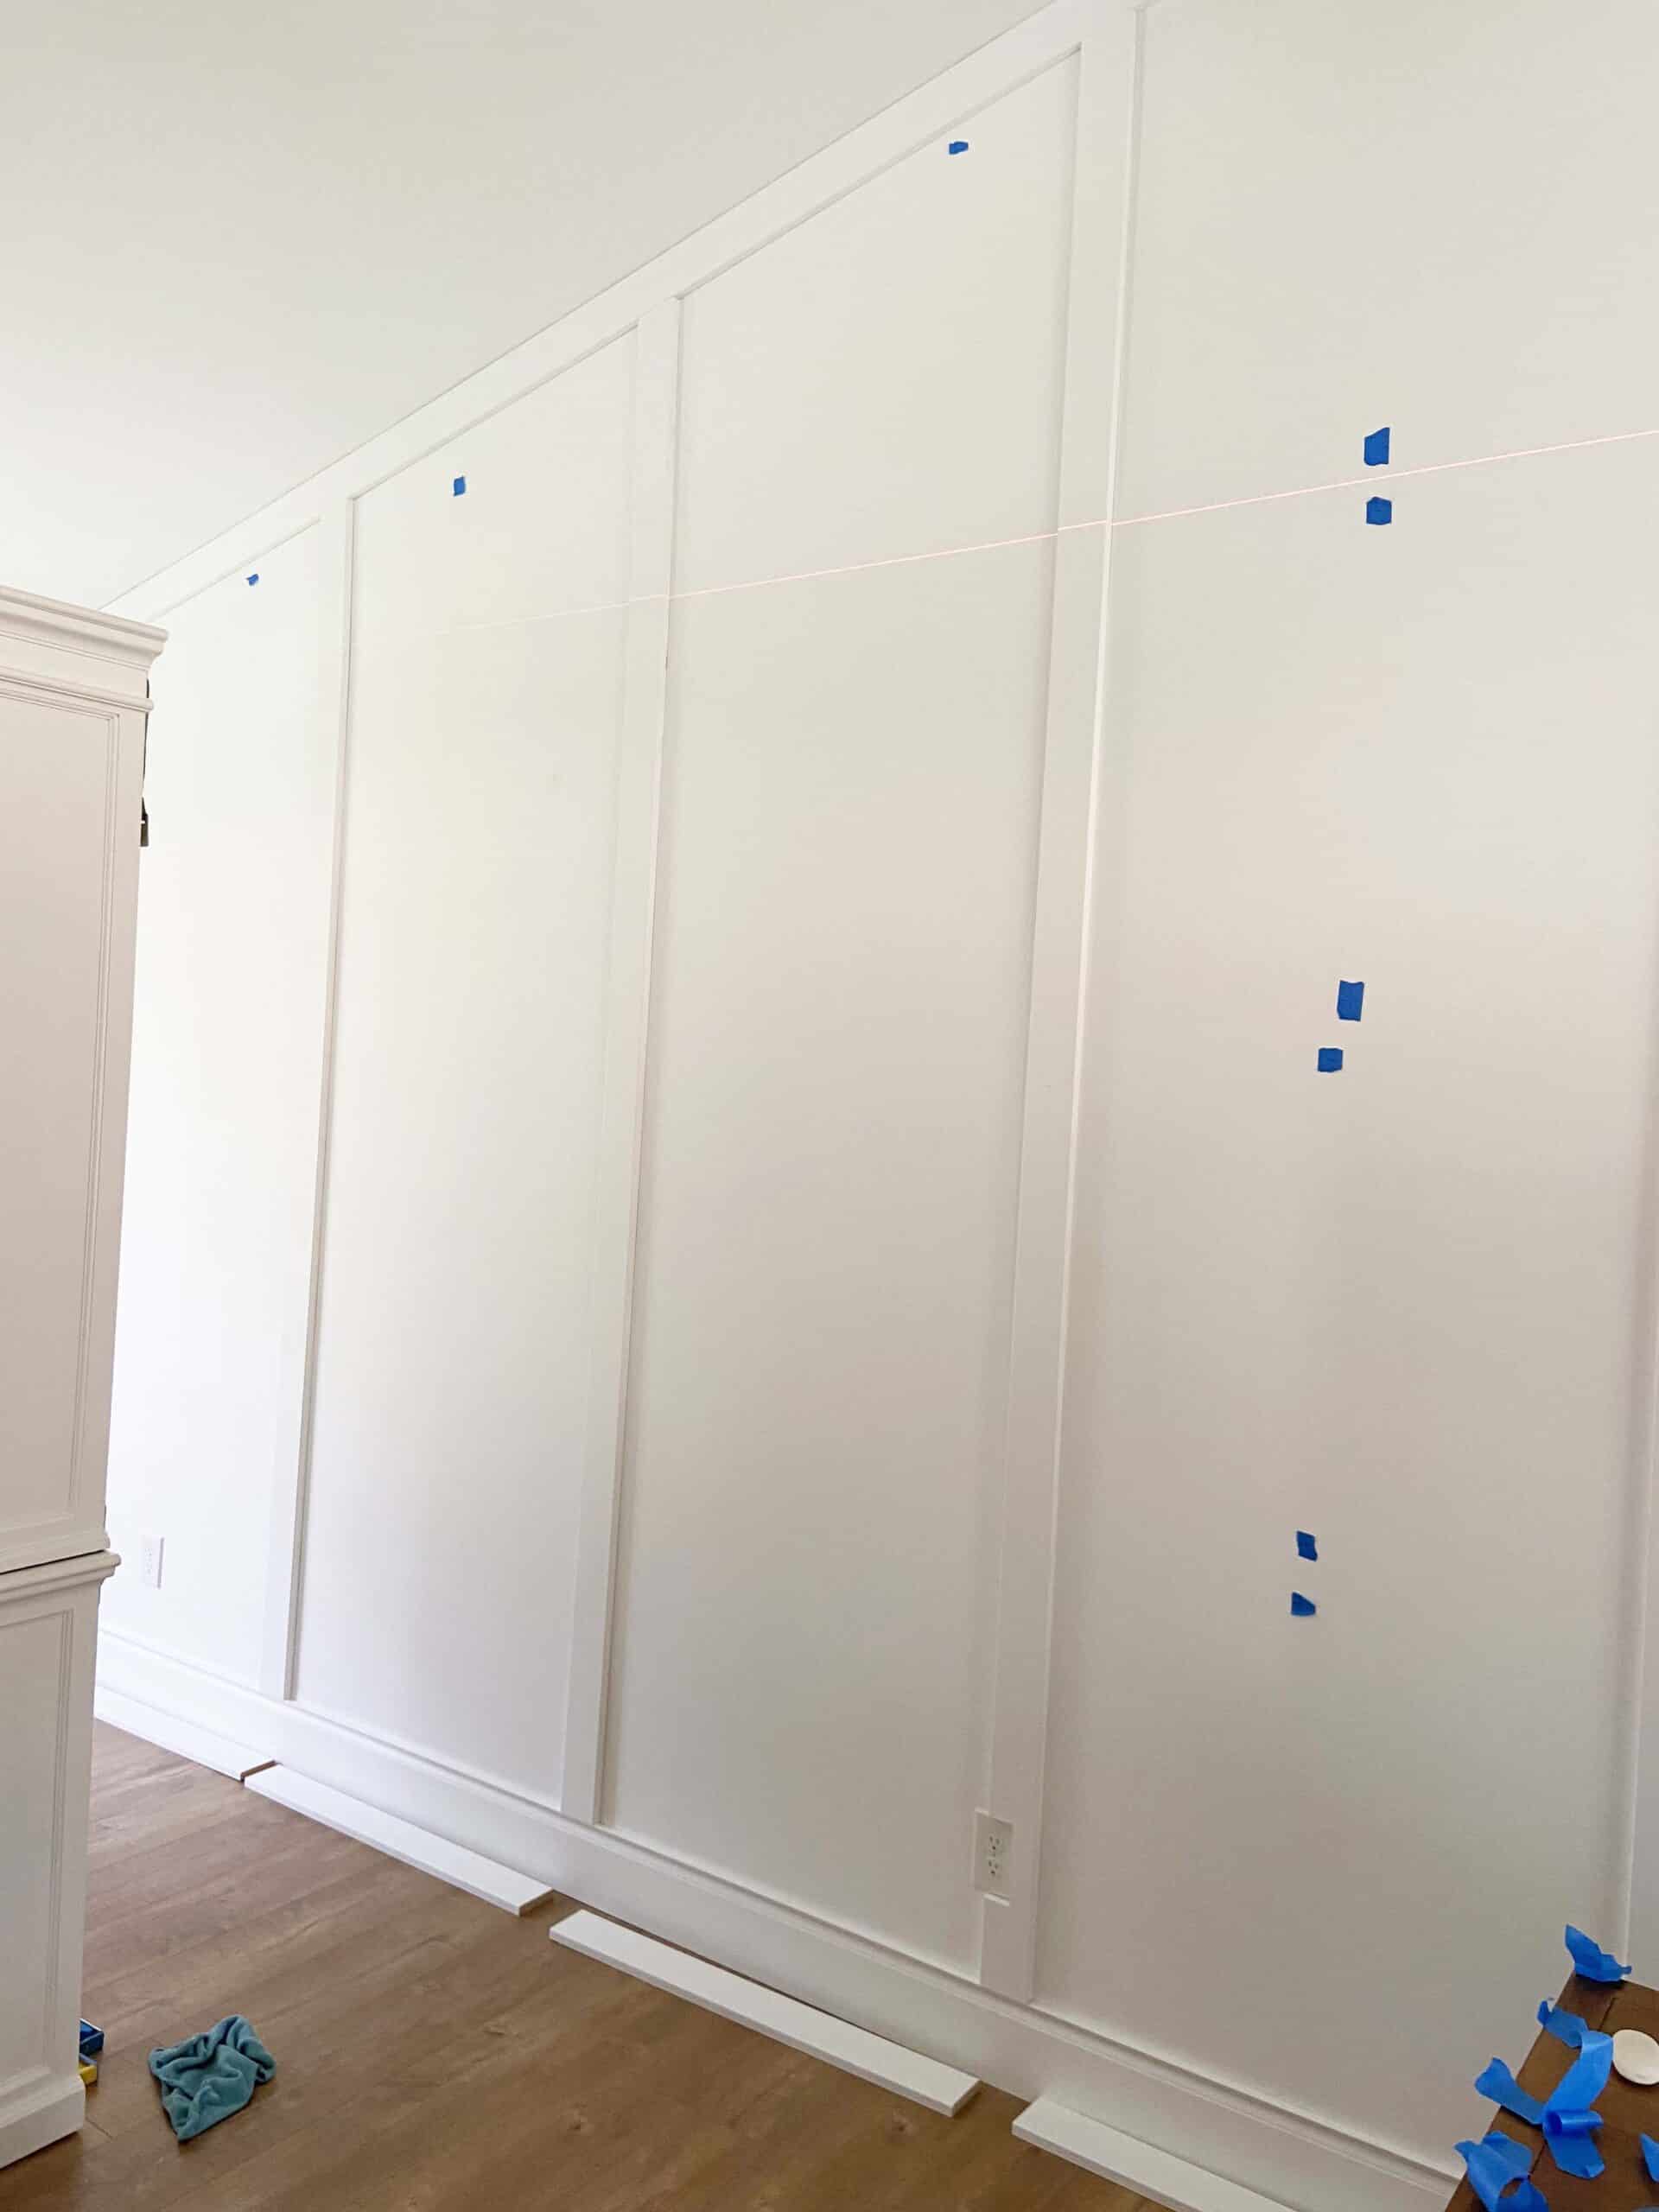
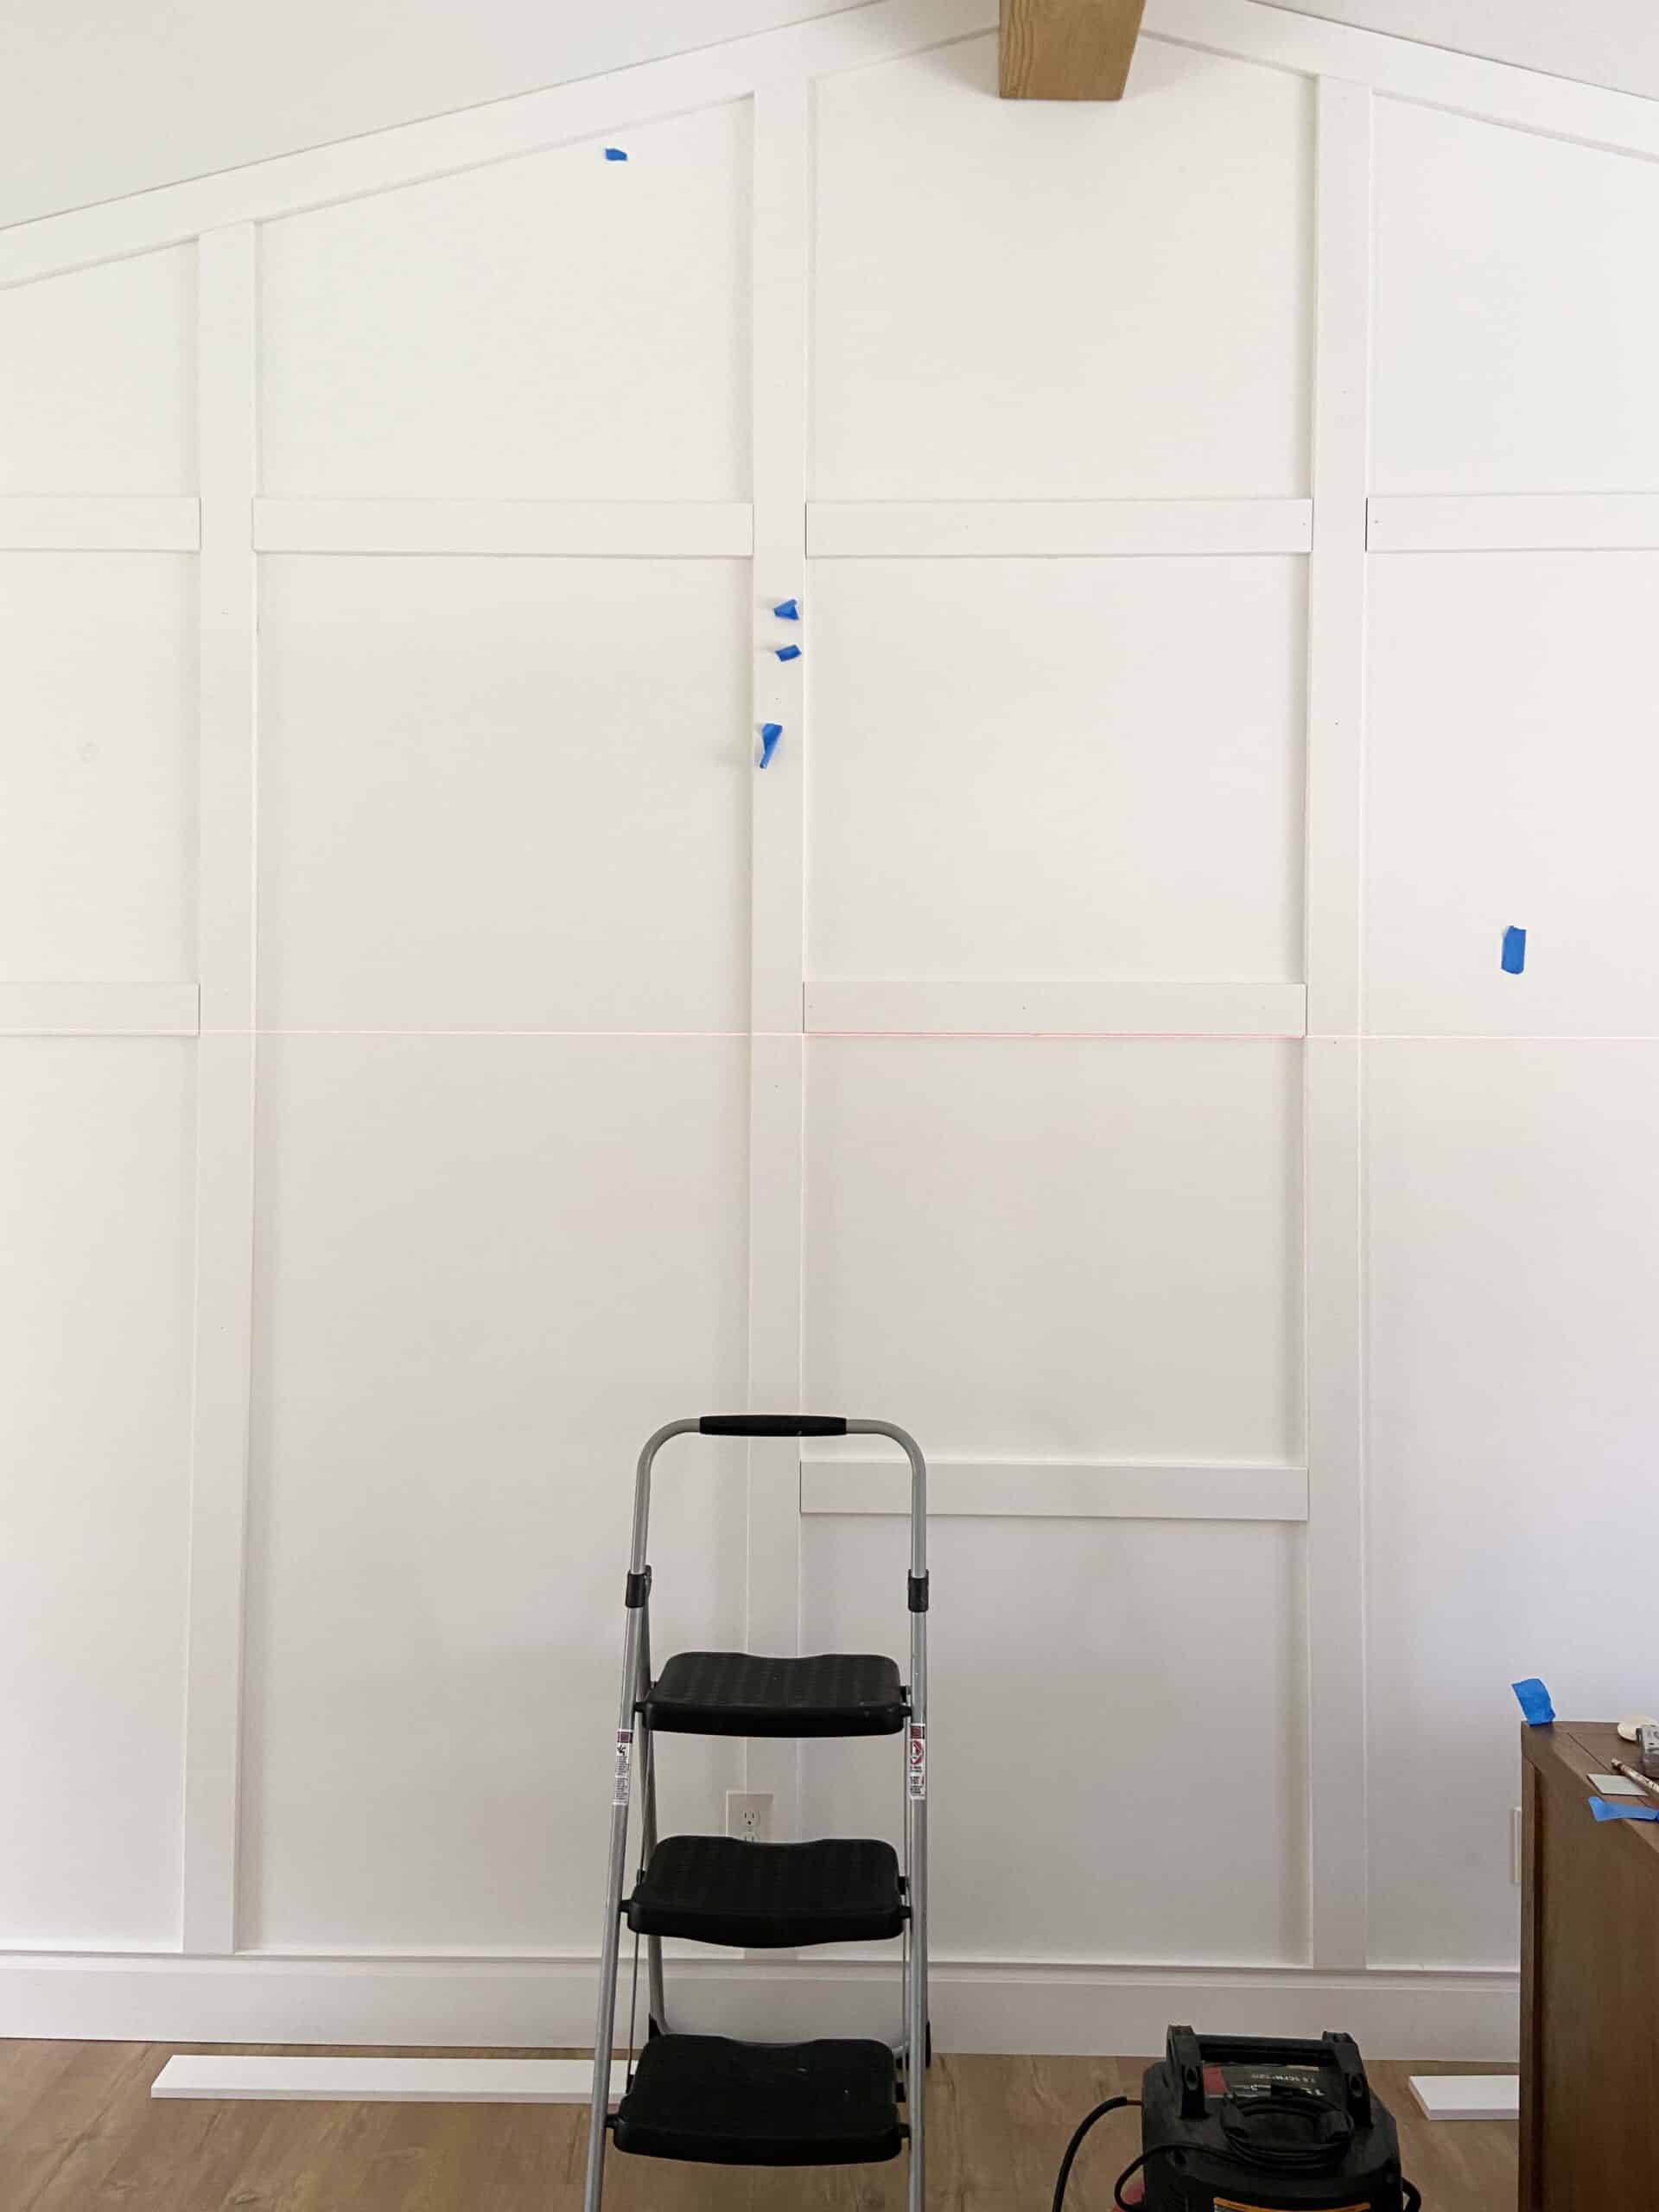
Ceiling Trim & Marking Out Grids
2. Install the trim pieces at the ceiling and along the side walls.
3. Once we had the ceiling and side trim up we measure out the grid size we wanted to use. This is going to vary for everyone based on your own wall size. I knew I wanted the box trim to be evenly spaced between our ceiling beam, so we started from the middle and measure out until we knew our vertical trim would be evenly spaced.
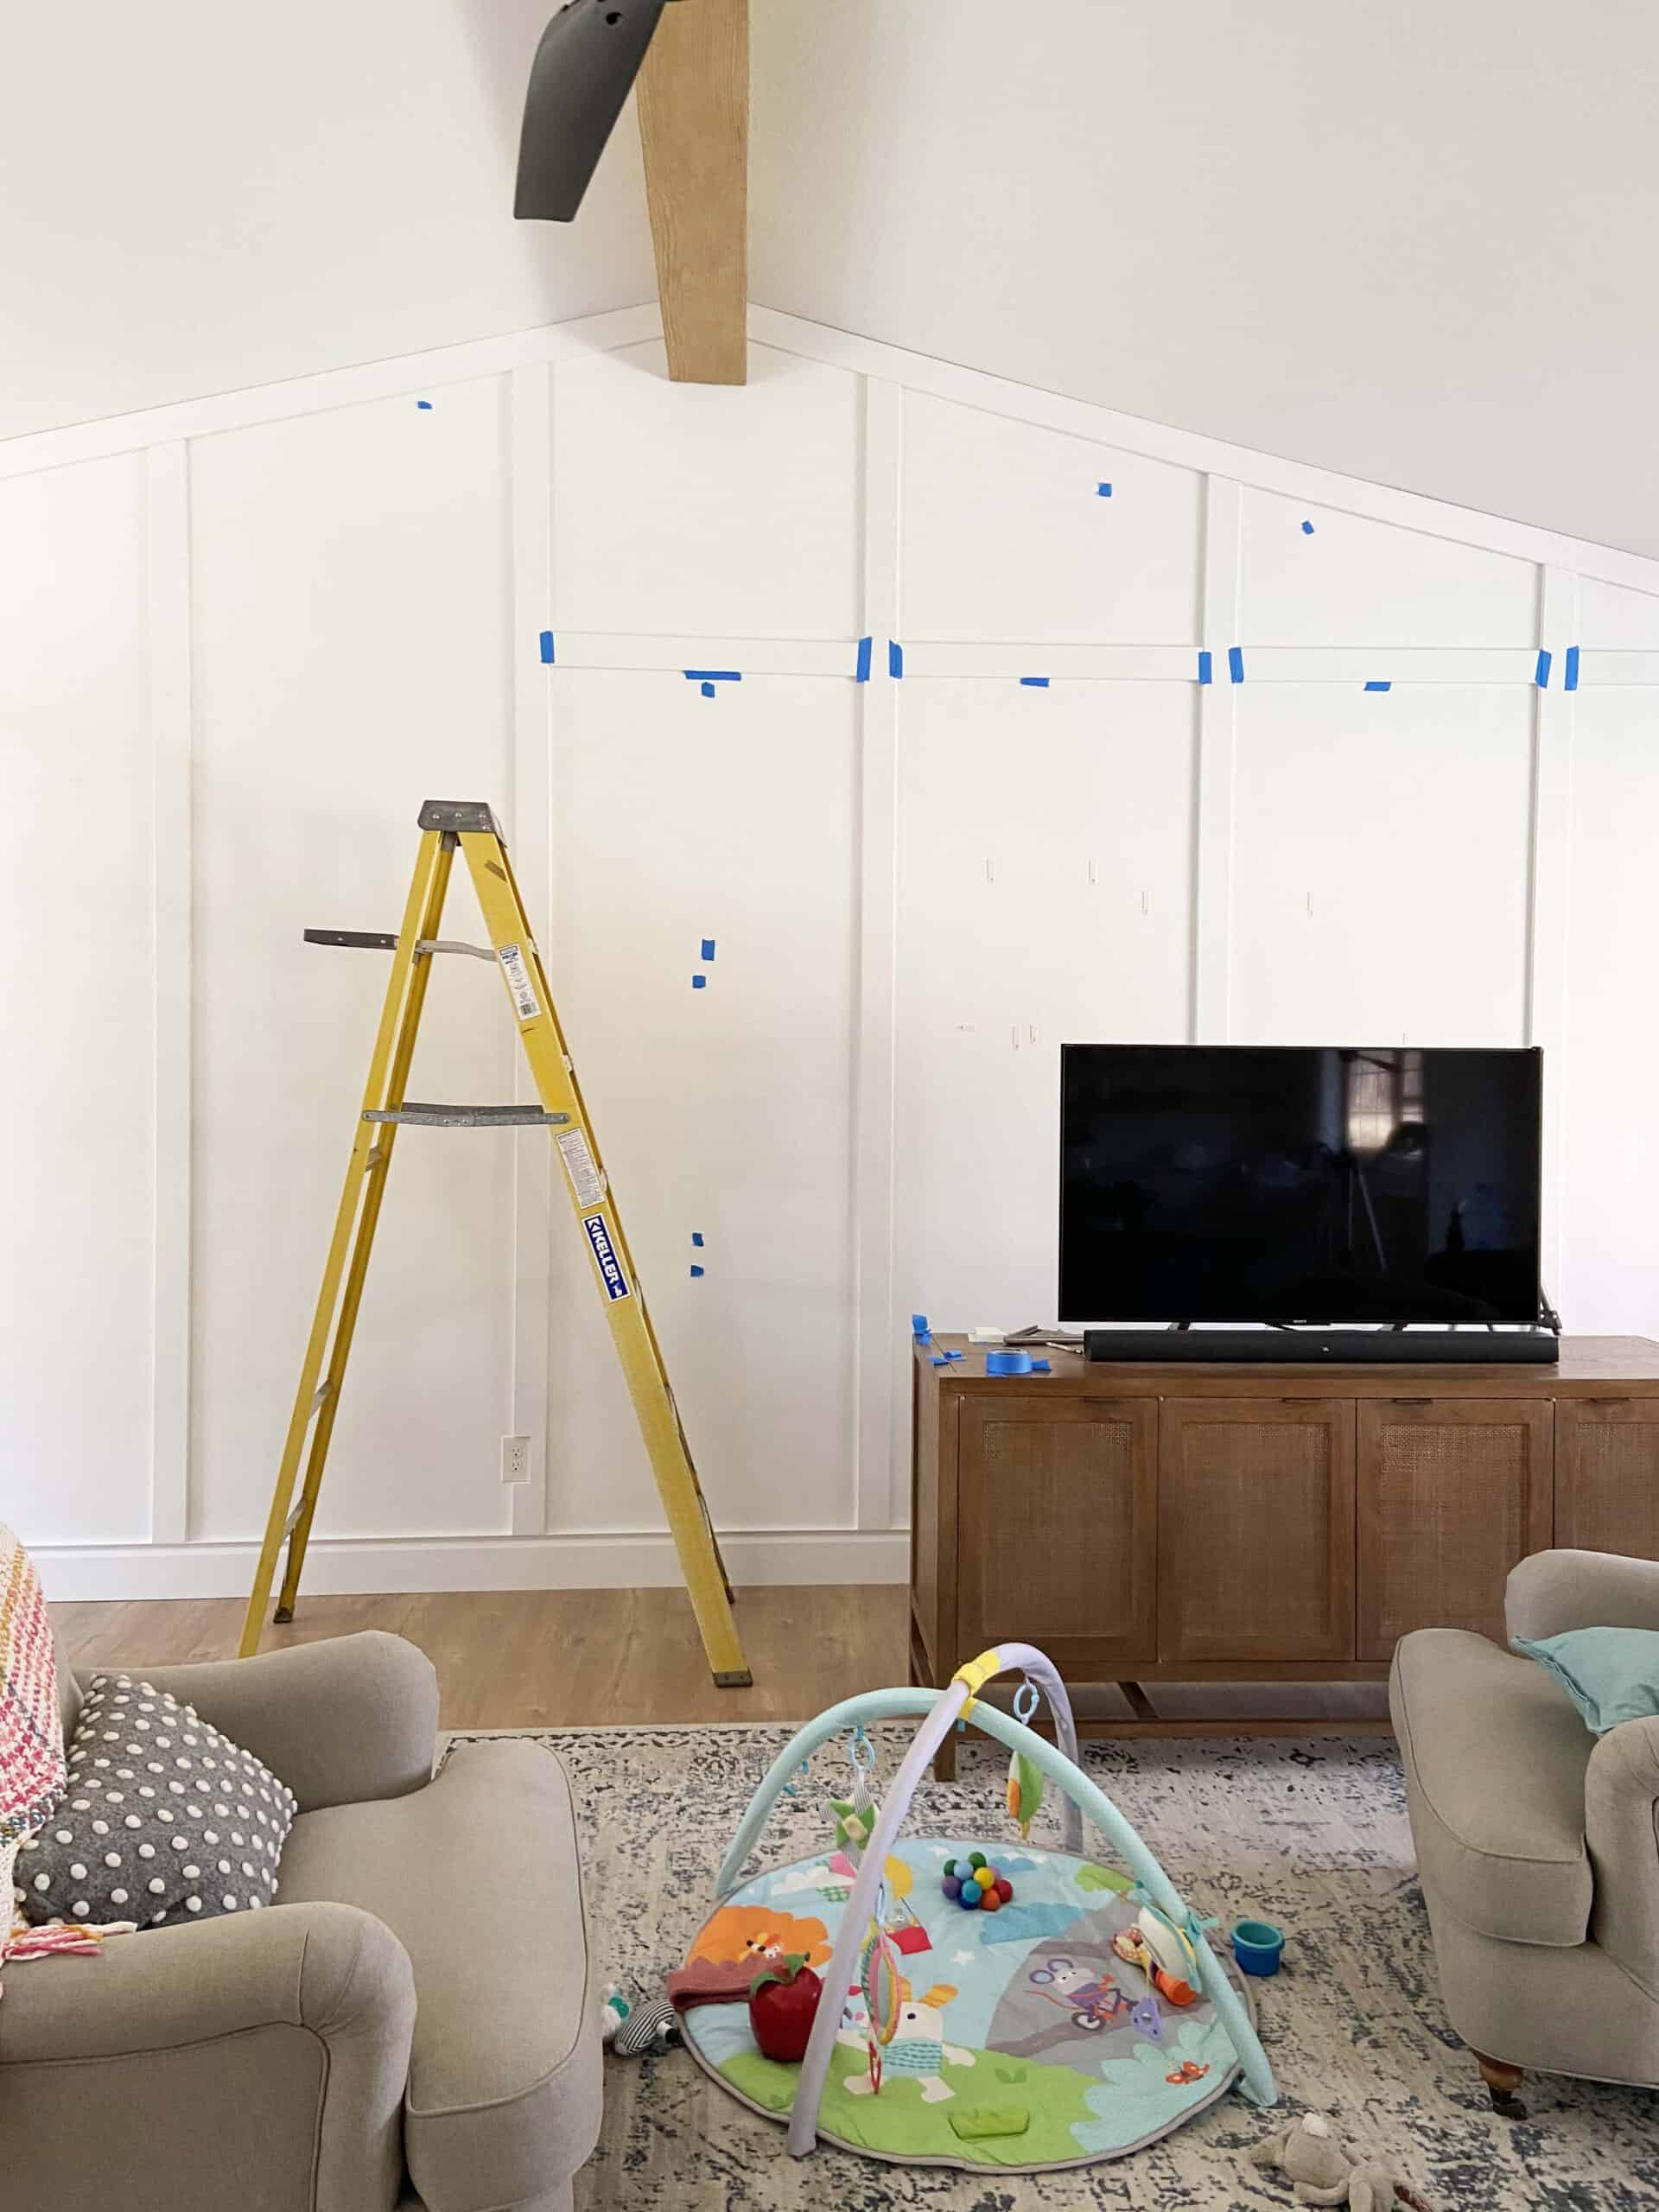
Install Vertical Moulding
5. Once we knew what our spacing was going to be, we started installing the vertical moulding. The vertical moulding didn’t always line up exactly where the studs are, so we used liquid nails to attach them to the wall. When a stud was available we added a nail for a little extra support. We used a laser to make sure our vertical trim was straight. If you don’t have a laser, a long level used against the wall would also work.
Install Horizontal Moulding
6. Once the vertical moulding was installed, it was time for the horizon moulding. The horizontal moulding took way longer because each piece had to be individually cut to the spot it was going into.
We measured out the distance we wanted between each piece before we started and used the laser level to make sure each piece was level before we nailed it. We didn’t use glue on the horizontal pieces, just nails since studs were always readily available.

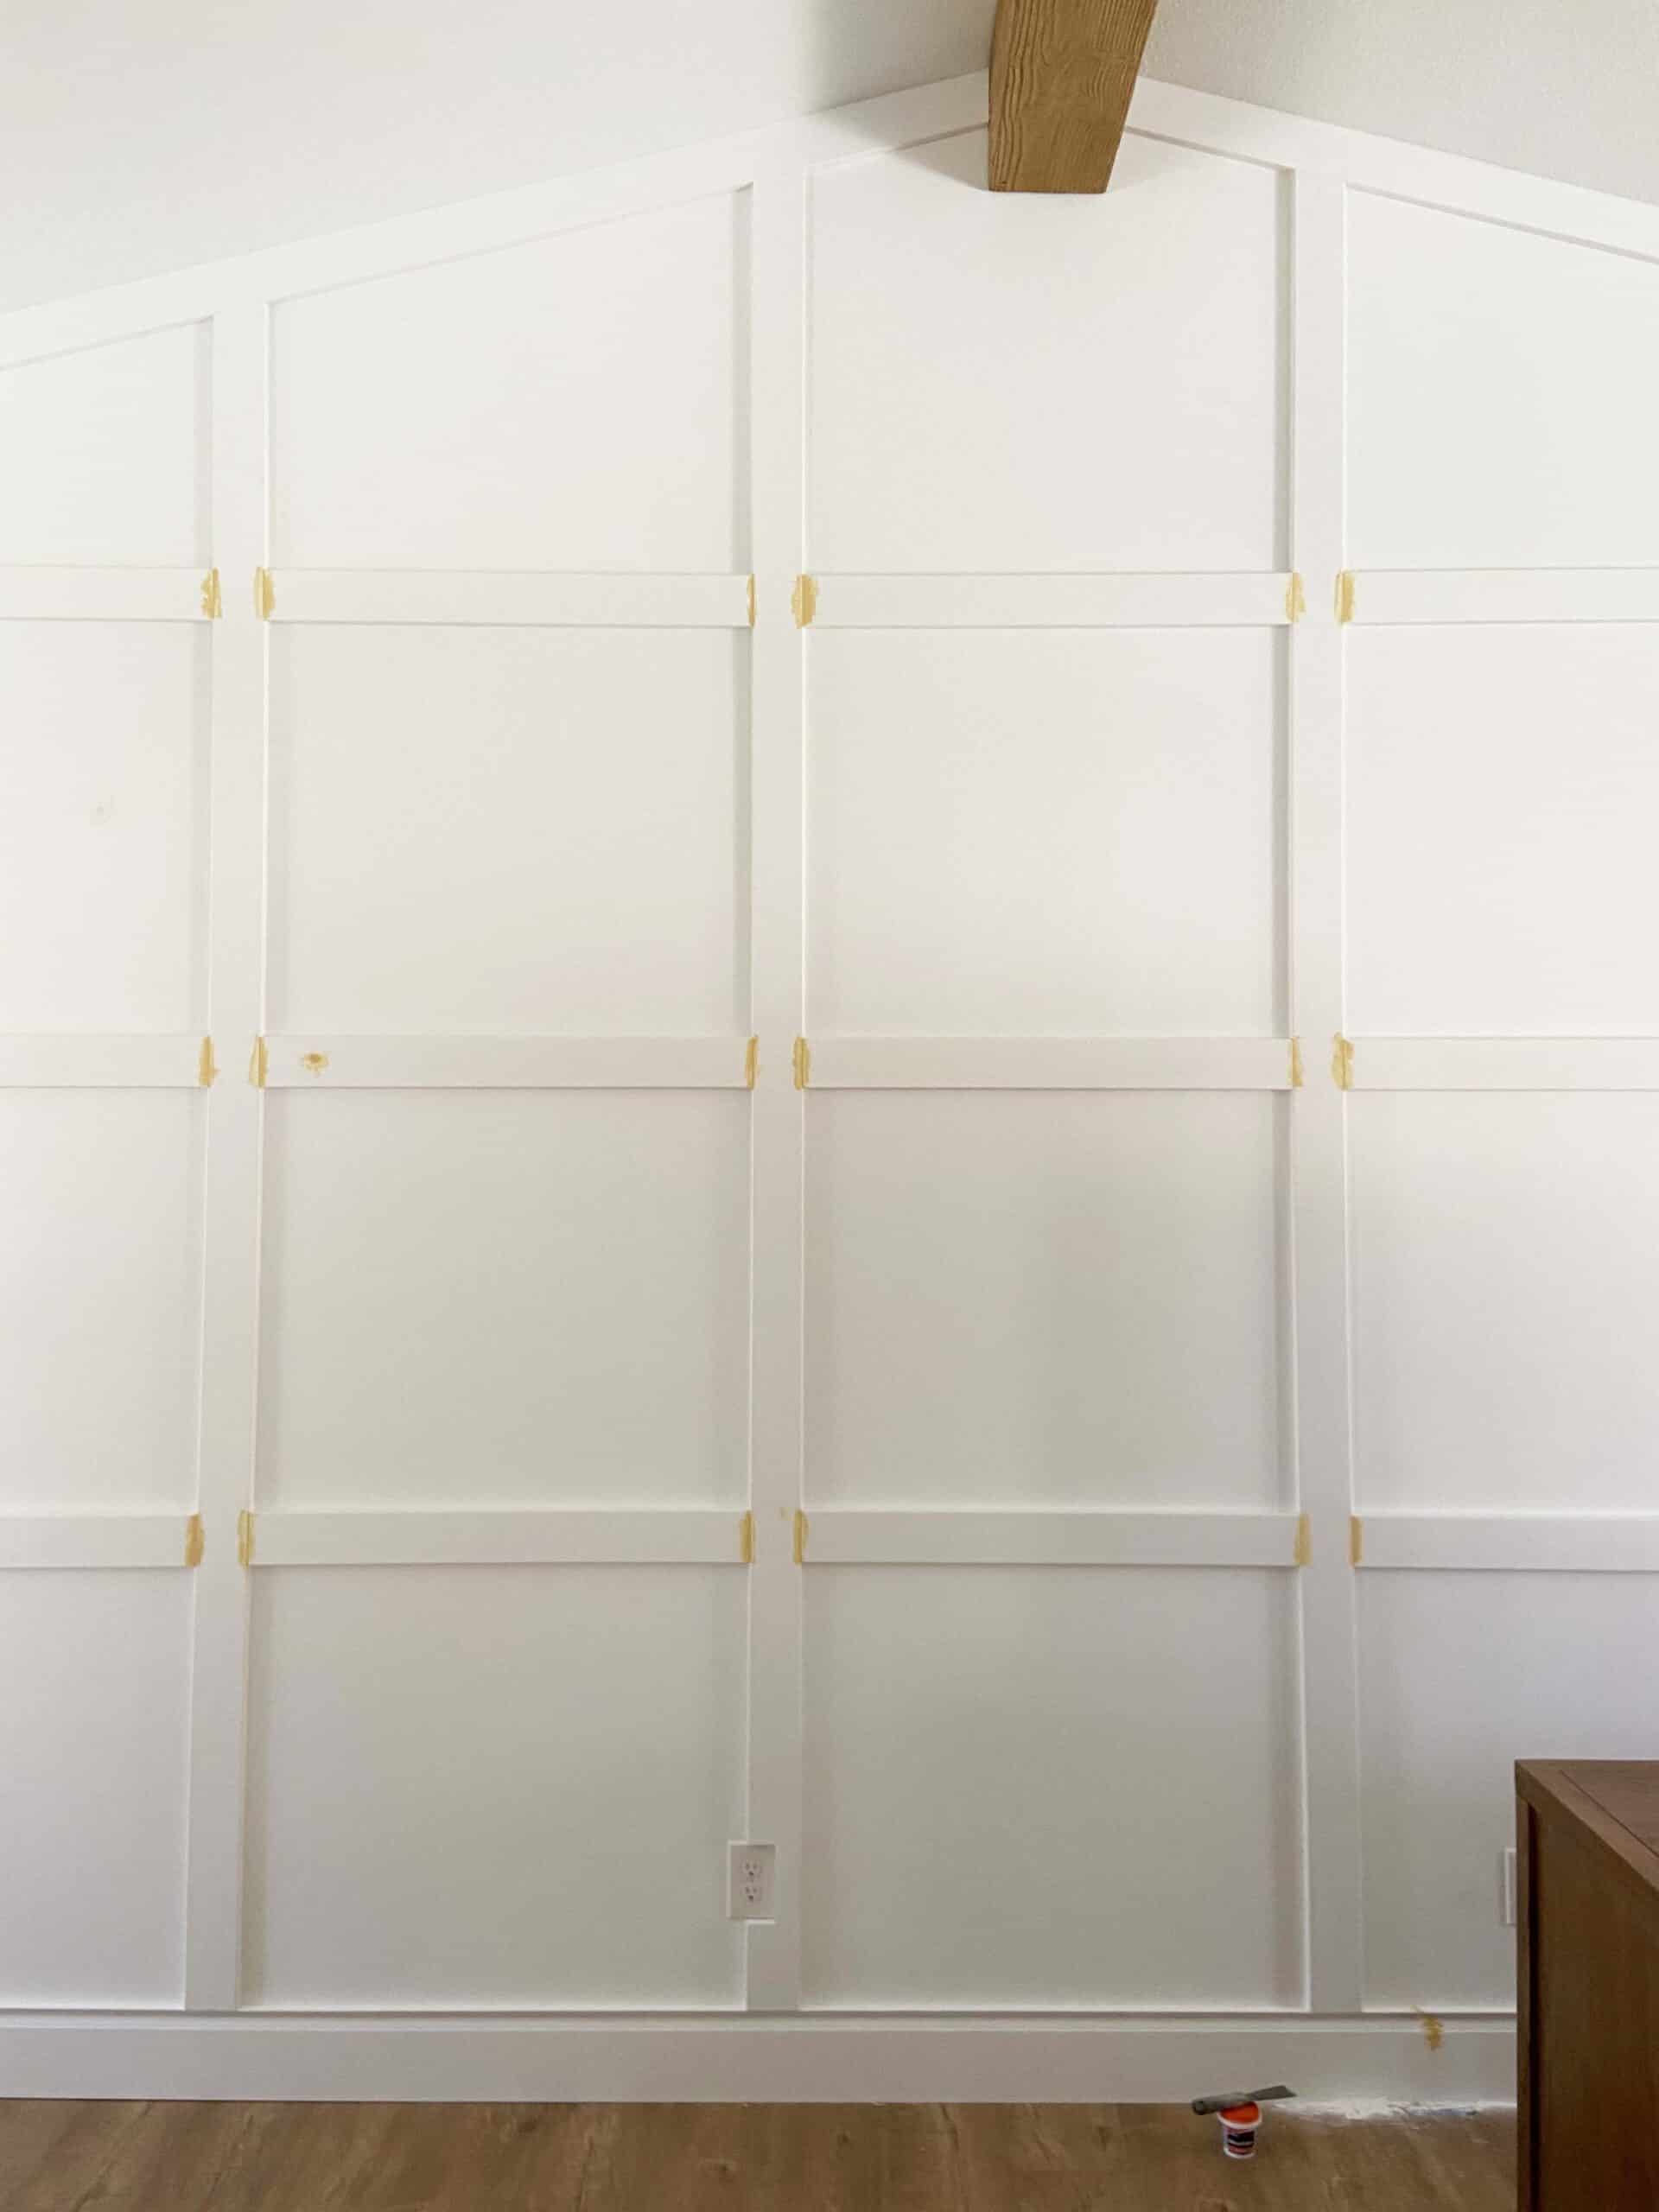
Caulk All Seams & Nail Holes
7. Once all the moulding is up, it’s time for the really tedious part, caulking and filling all the seams and holes. The worst step in my opinion, but the one that really transforms it into looking professionally finished. We used caulk on all of the side seams along each piece of trim and Elmers wood filler for all of the top seams where the vertical and horizontal pieces meet and then sanded (you can see the wood filler in the picture below).
A side note on the wood filler: If you can find one that is white or dries white it’s way easier to paint over. We had to do several coats to get ours completely covered.
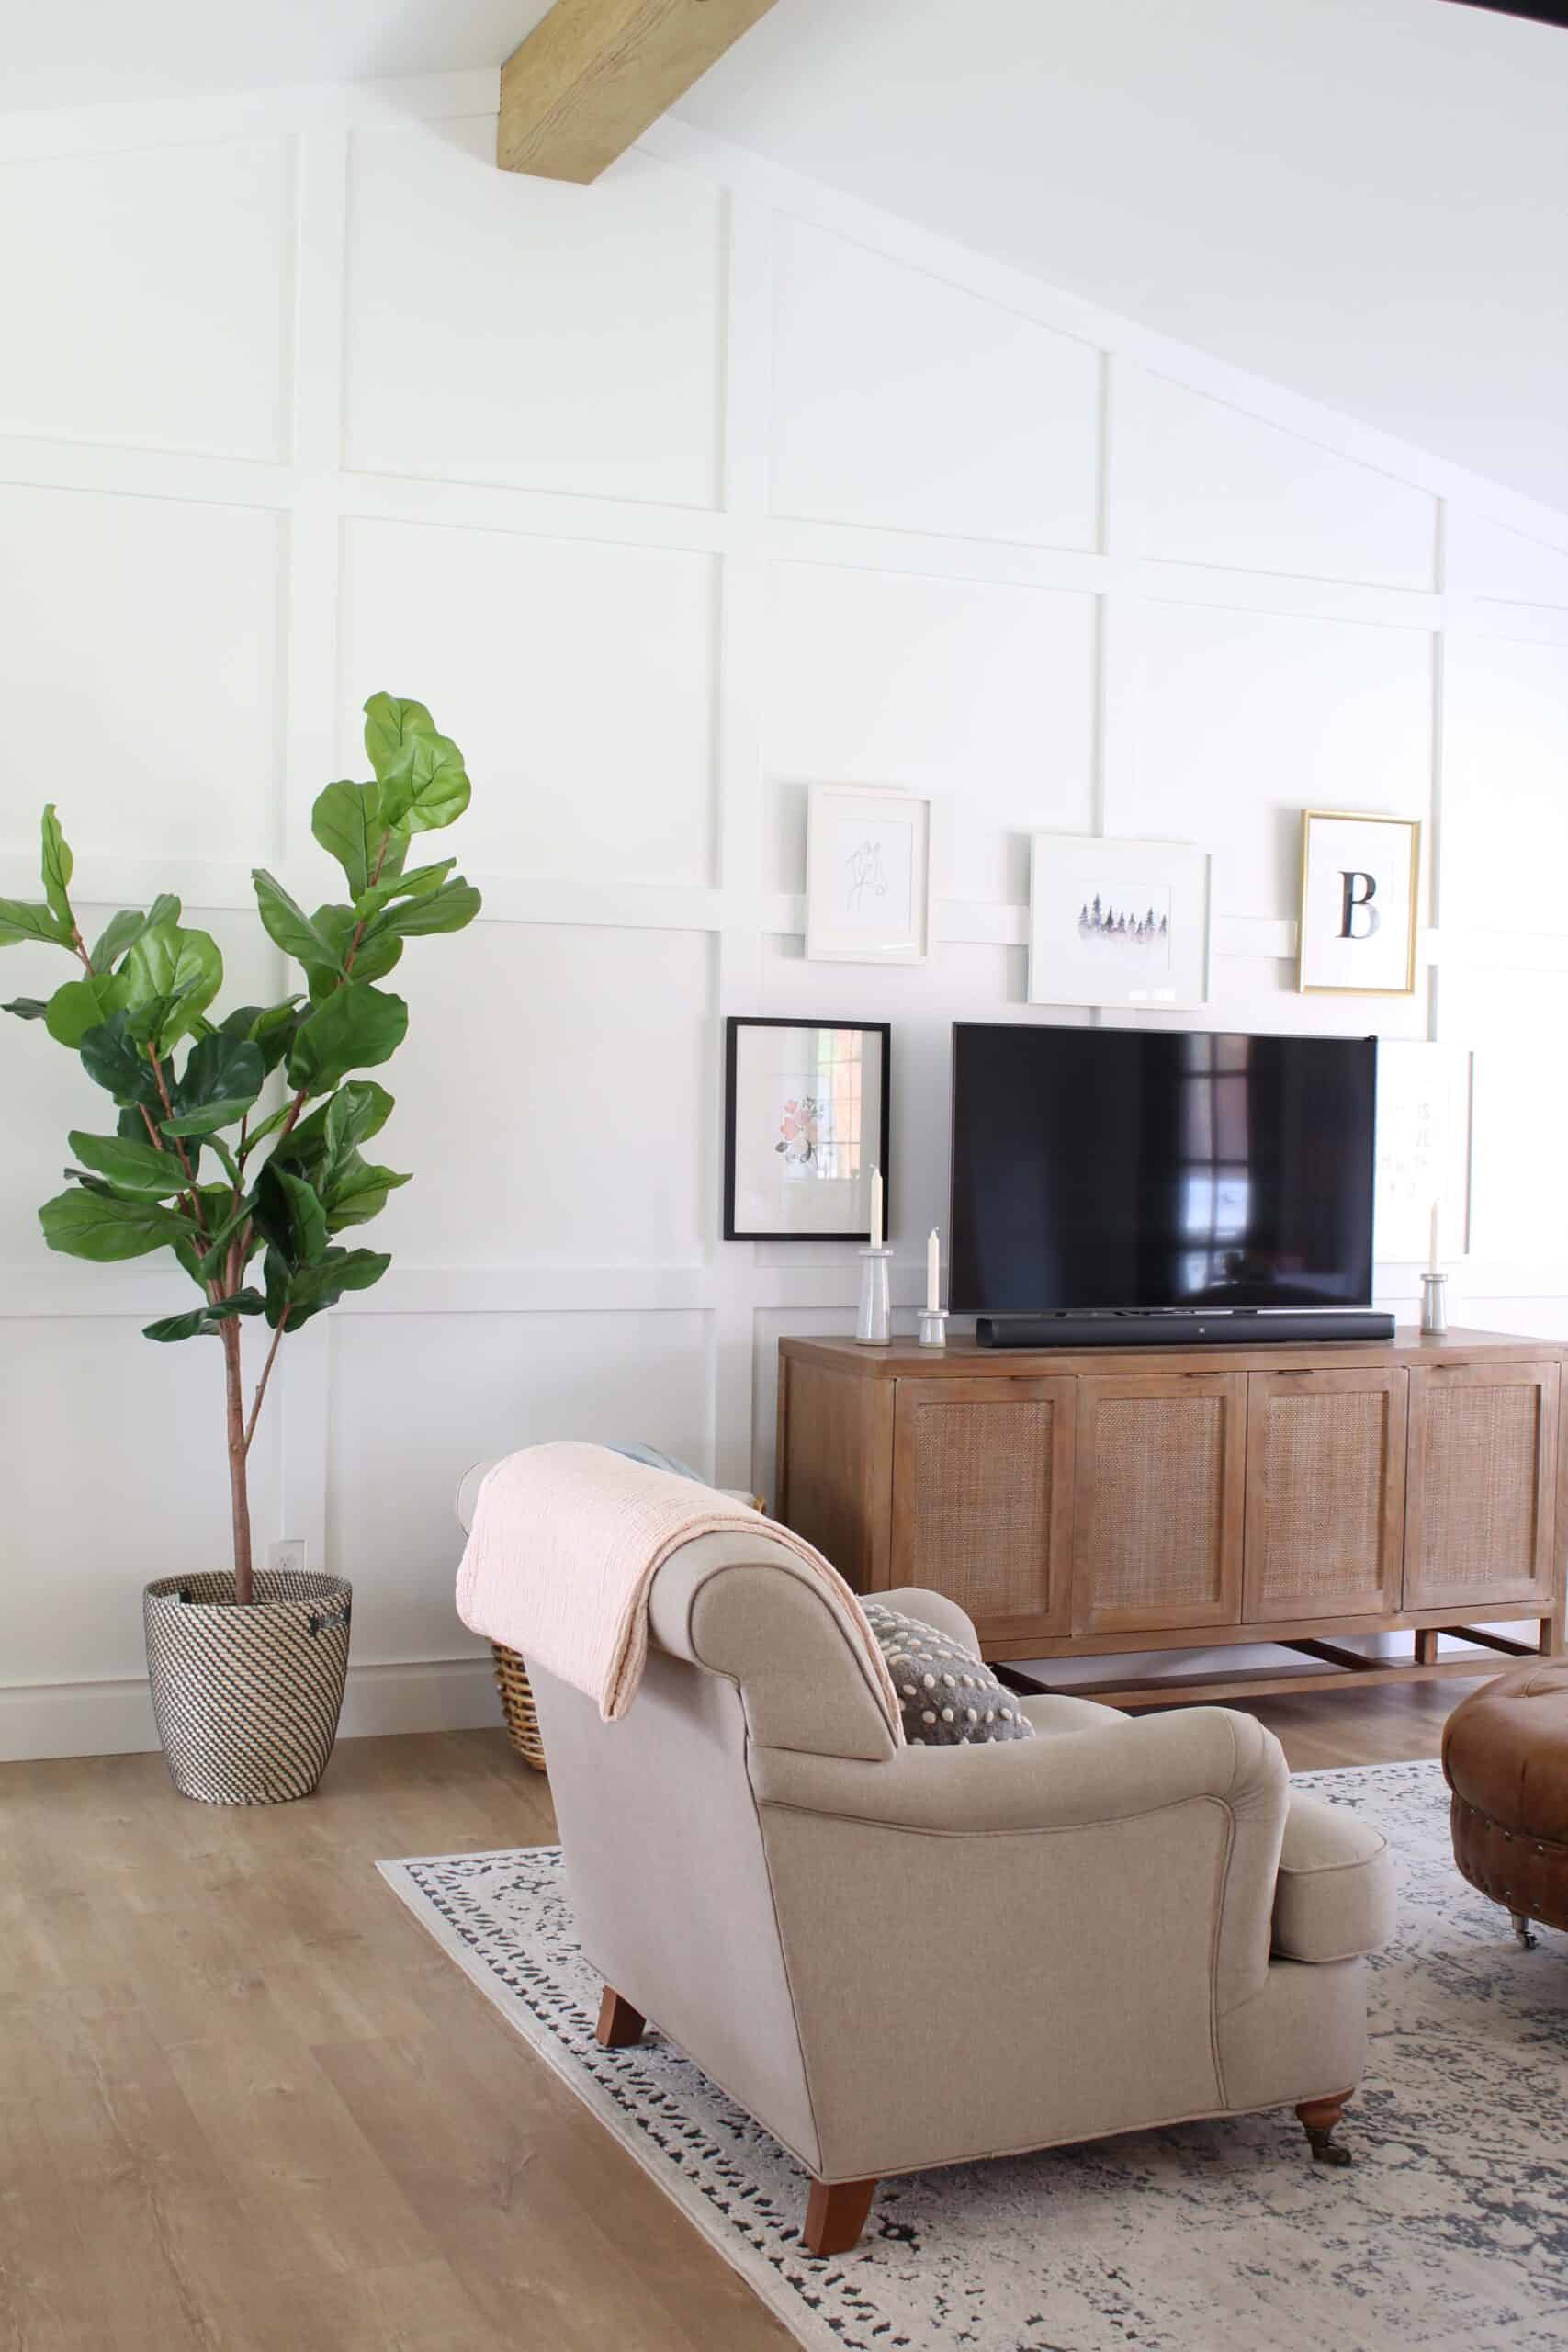
For us, the end result was totally worth the time and effort. Our blank wall that felt so unfinished before now has character and interest. It makes the room feel cozier, and it’s something that has a big impact with a very minimal investment!
Enjoy this post? You might also like:
Scandinavian Farmhouse Kitchen Reveal
Hall Closet Turned Bookshelf
Post Sources
This post contains some affiliate links for your convenience. Click here to read my full disclosure policy.
Want to save this post? Pin it here!


Leave a Reply
You must be logged in to post a comment.