If you’ve ever thought it might be nice to have a built-in bookshelf, this post is for you! Here’s how we turned a closet into a bookshelf.

This post is the step by step process we took to turn a hallway closet in our home into a built-in bookshelf. If you want to see more pictures of the finished bookshelf reveal you can check it out here.
When we first started tossing the idea around of turning one of our hall closets into a bookshelf I scoured the interwebs for ideas on what might work for our space. I found quite a few closet to bookshelf transformations, but none that matched exactly what I was looking for: a standard depth bookshelf (12 inches deep).
The average closet is obviously much deeper than that, so I knew we would need to figure out how to retrofit the extra space we currently had in our hall closet along the back and sides. Doing so would allow for a built-in bookcase that wasn’t too deep and would look more like a traditional built-in that had always been there. Here’s how we did it:
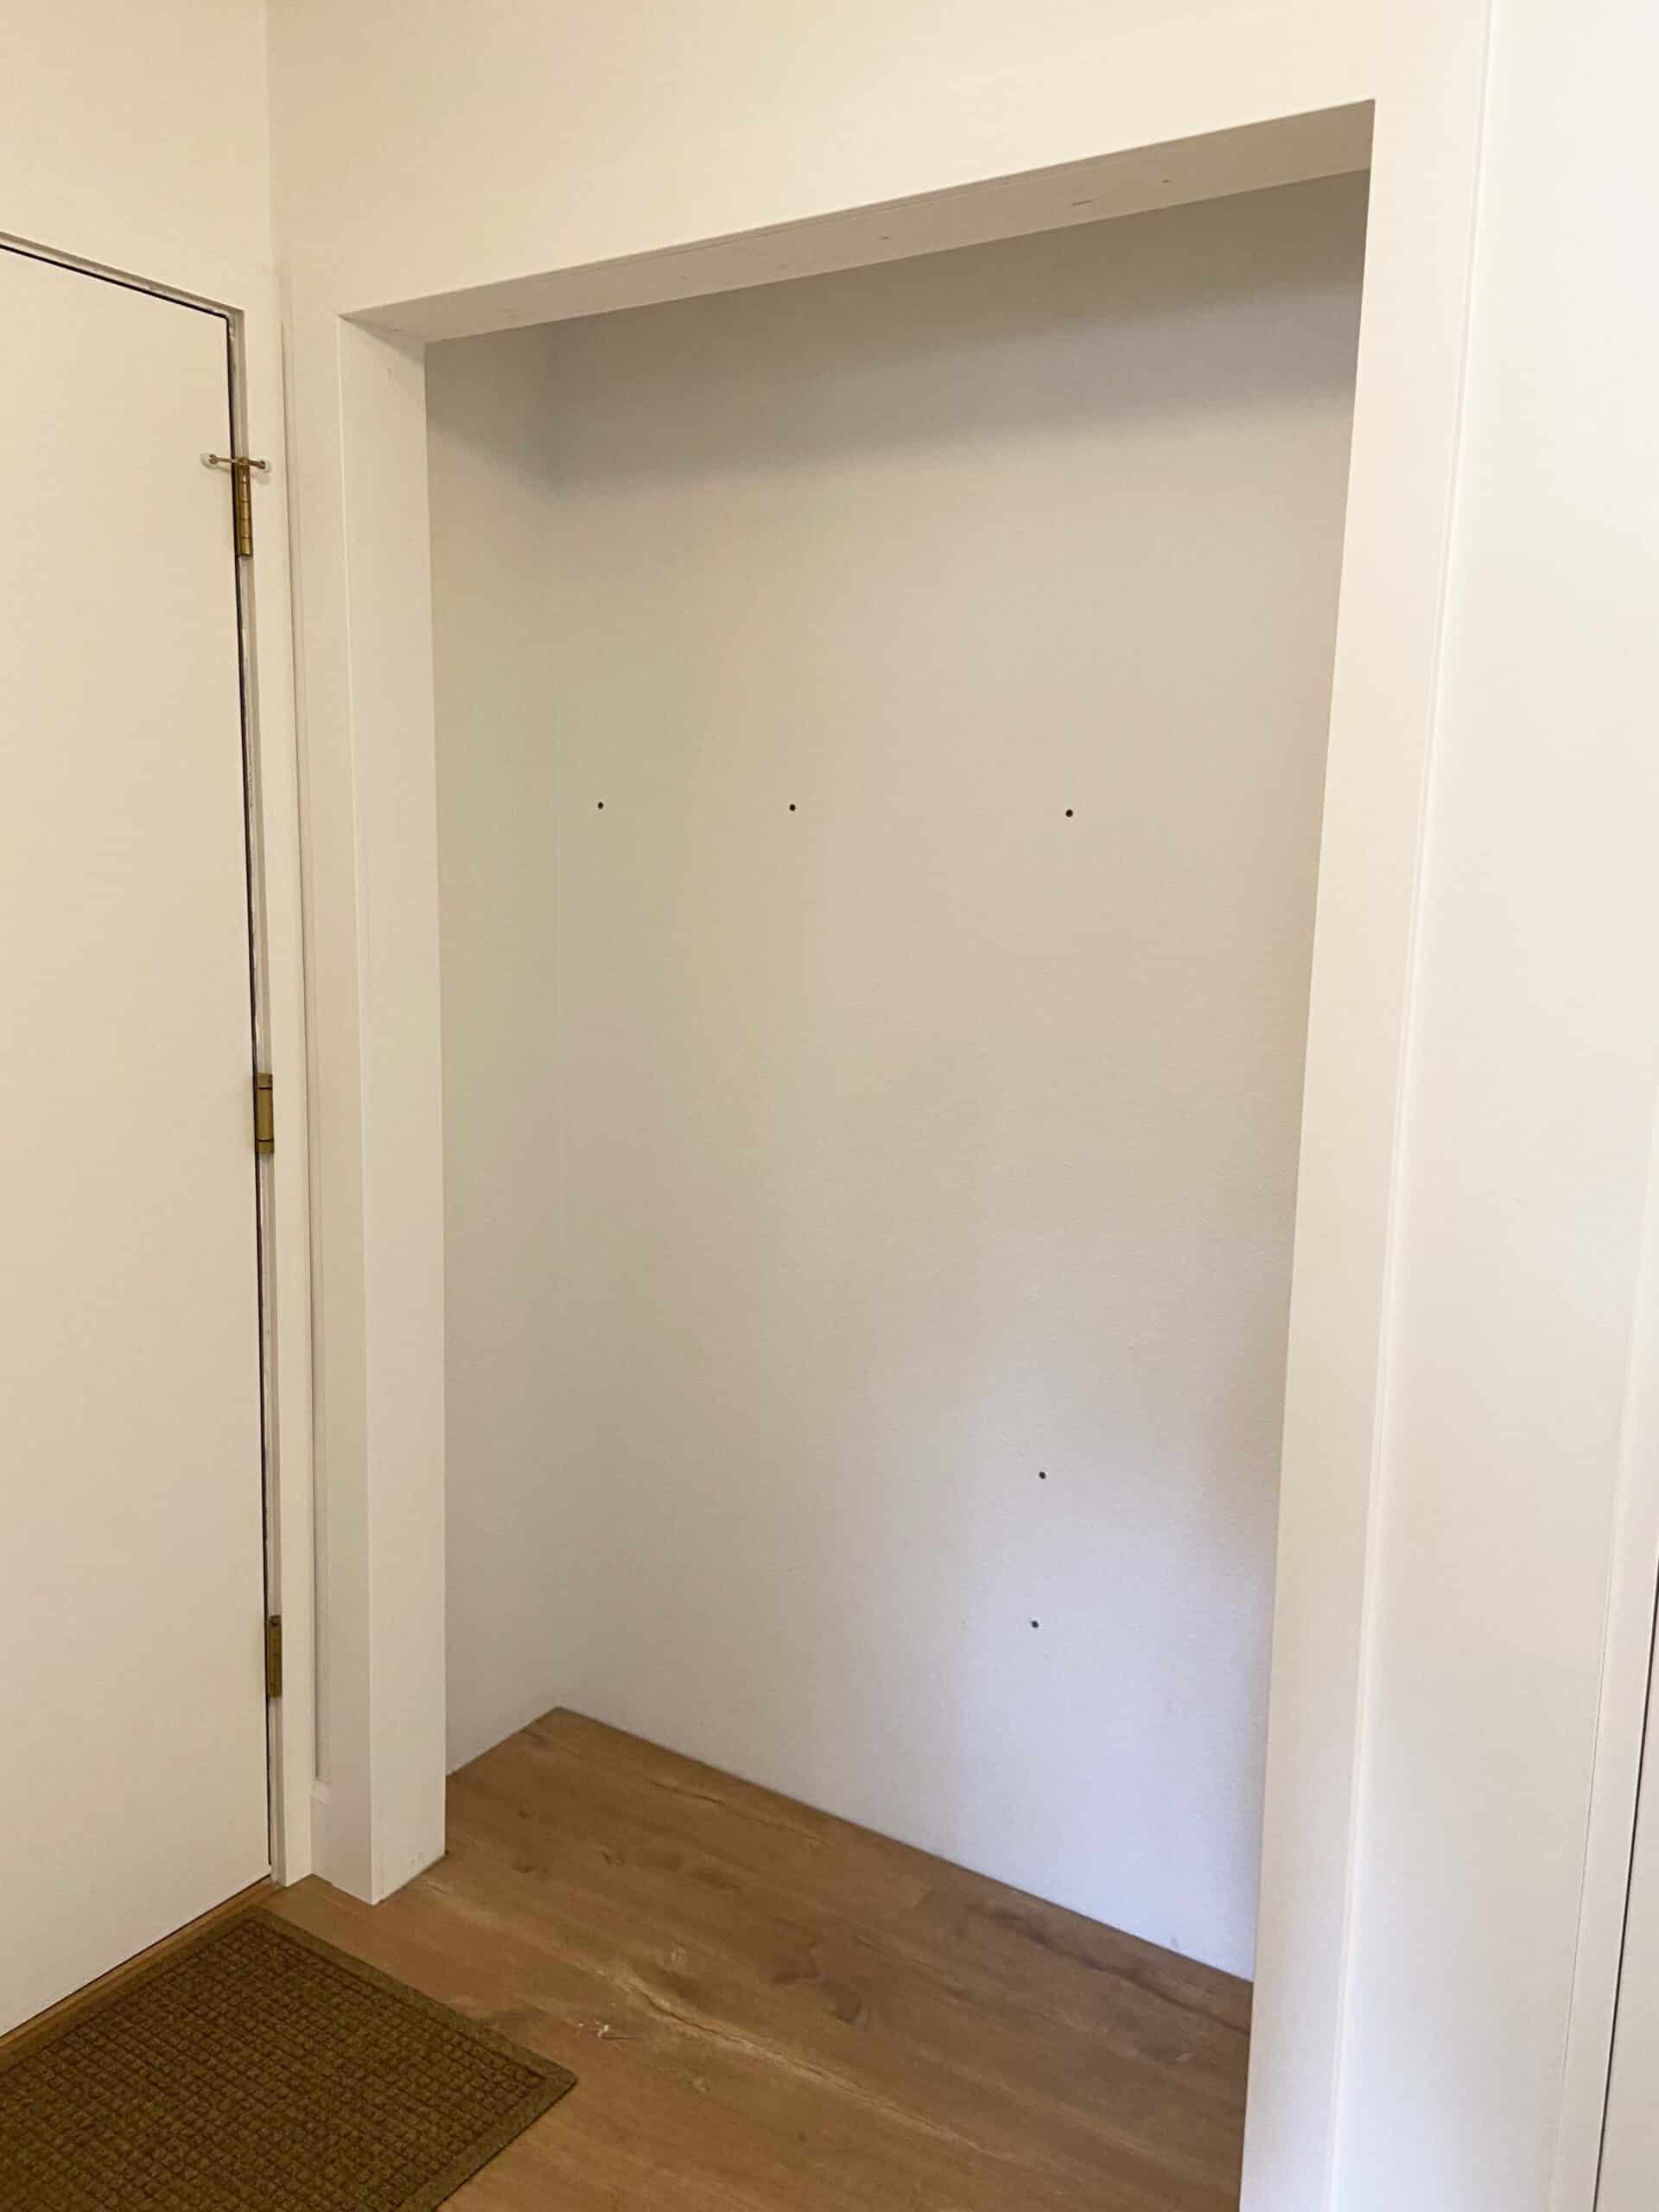
Before
How We Turned A Closet Into A Bookshelf
Before we get started, please keep in mind that closets come in all shapes and sizes. This tutorial is a basic outline on how we made ours, but you will probably have to make adjustments based on your own closets dimensions and individual quirks. 😉
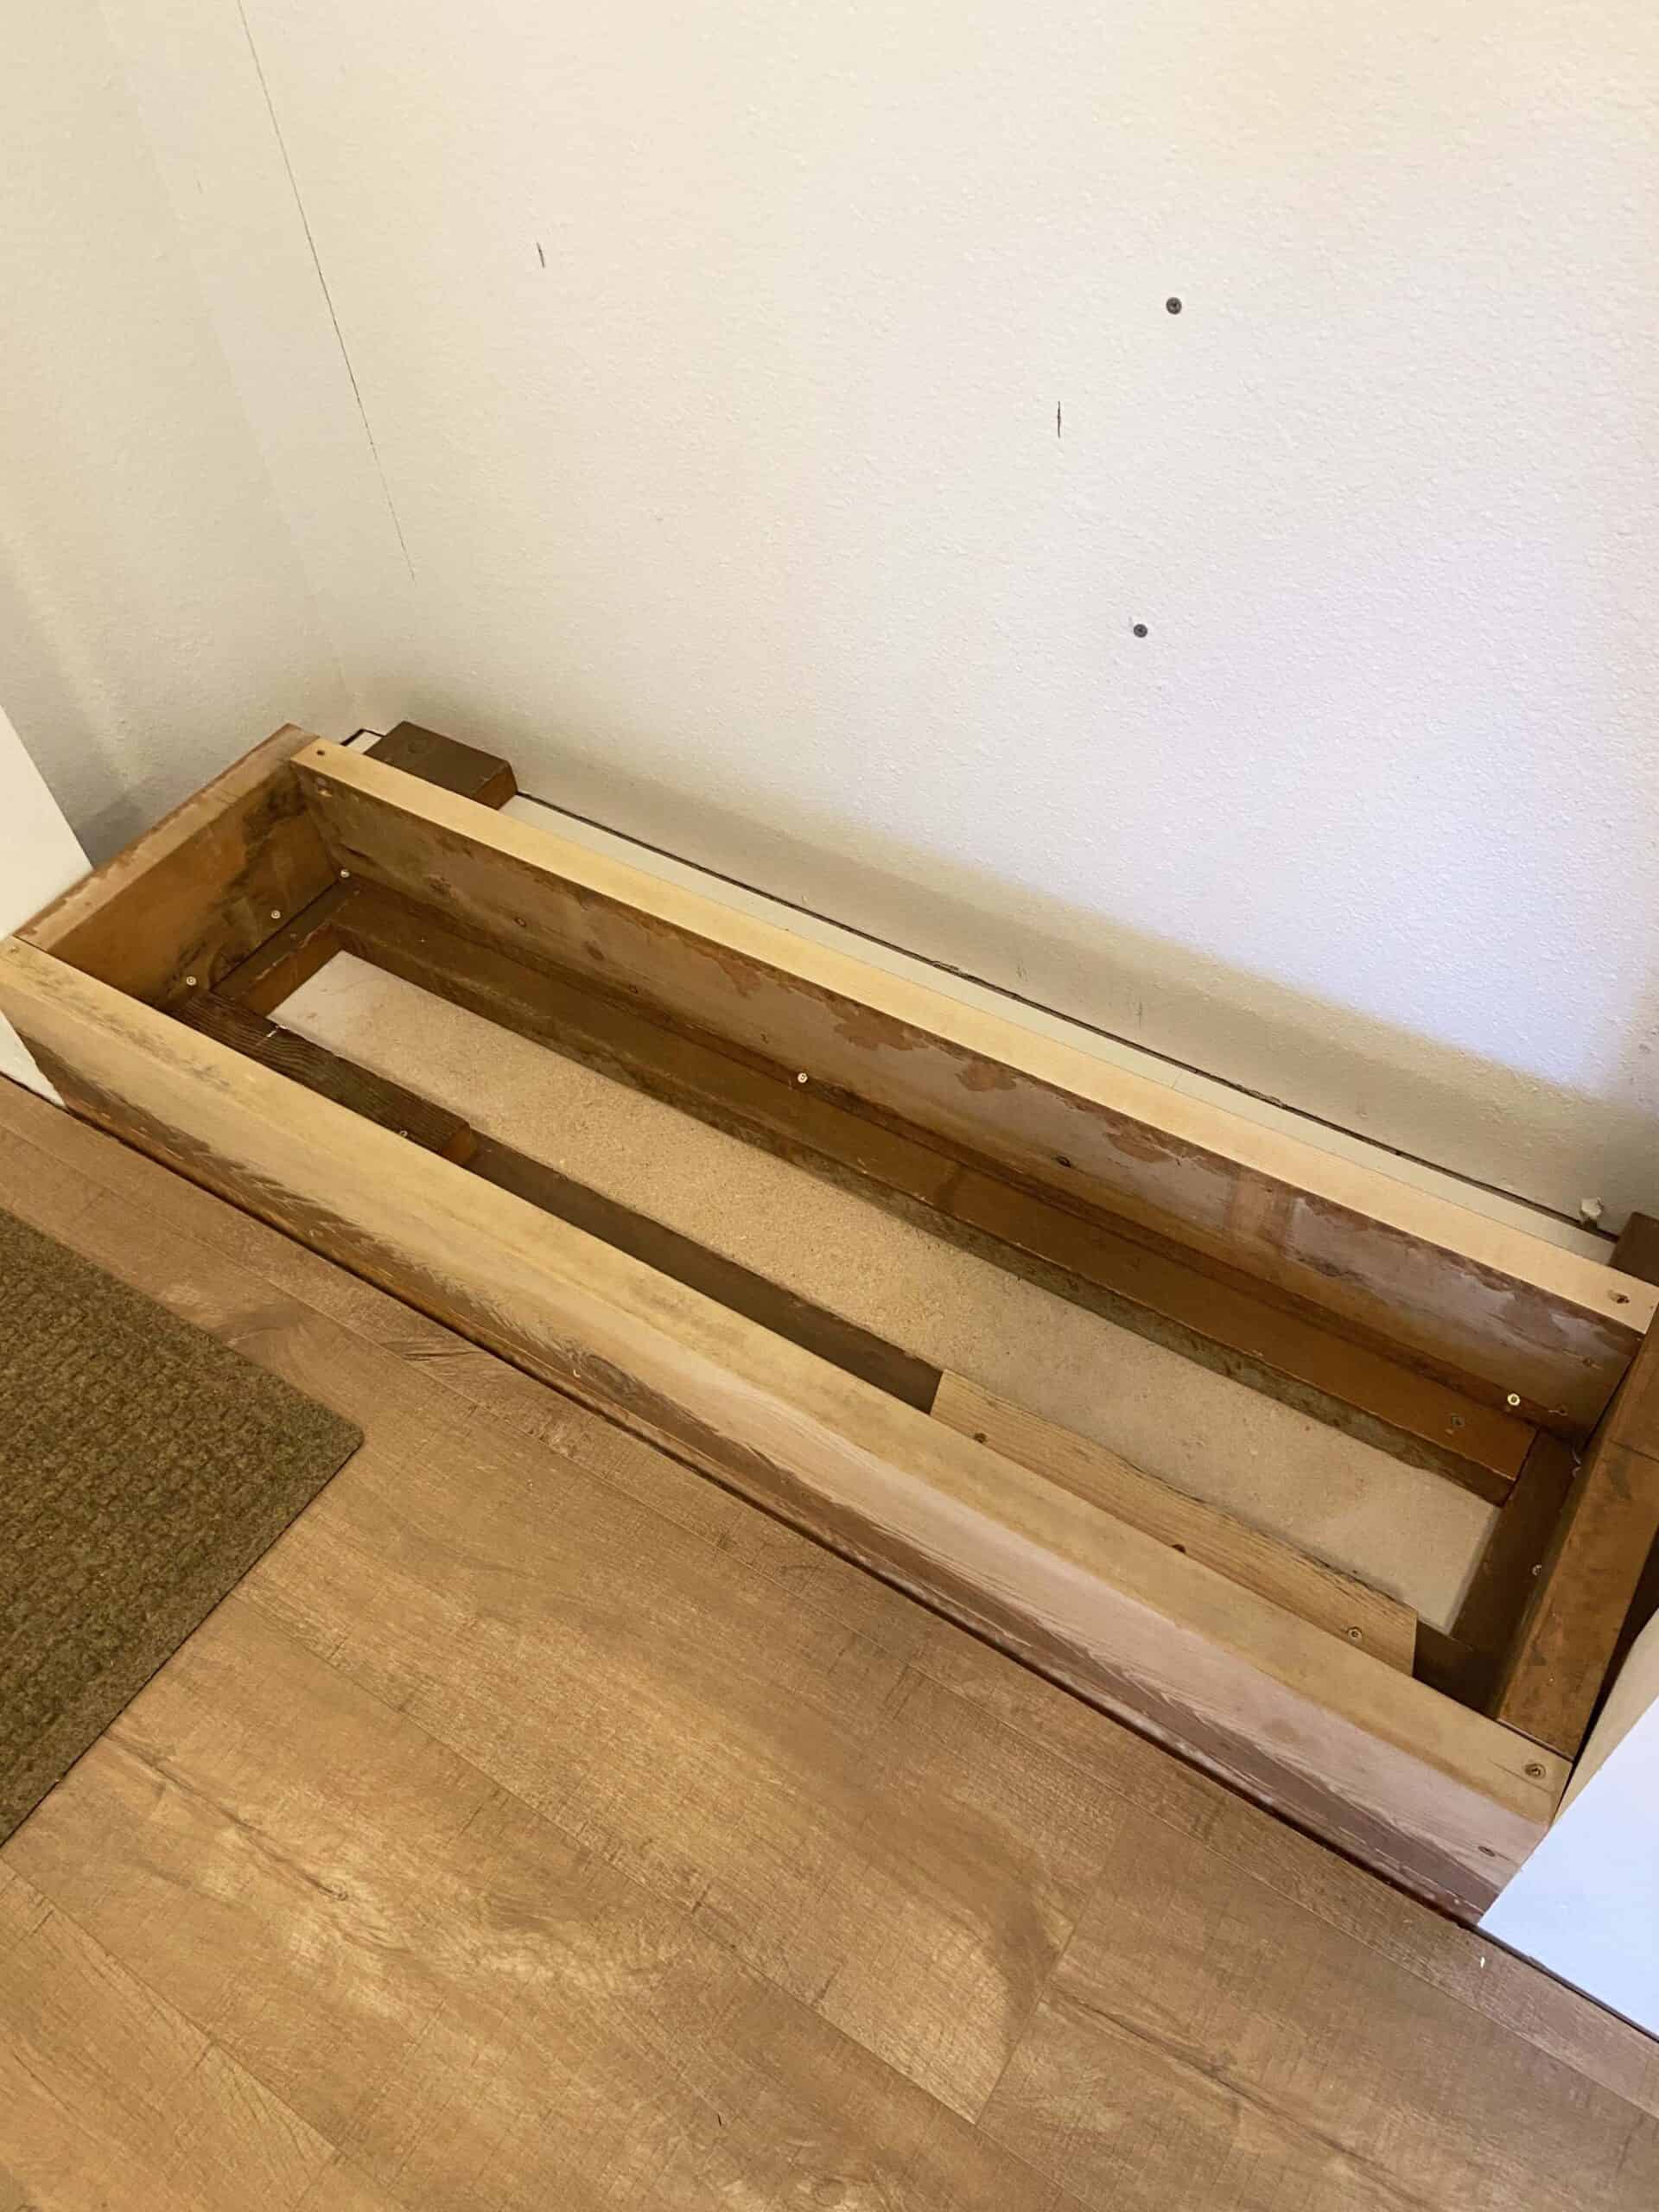
1. Build A Base
Building a base for the bookcase is the first thing we did. The base is built according to the width and depth we wanted our finished bookcase to be. For us this meant 12 inch deep shelves that are fully flush with each side of the closet opening.
Our base was built to accommodate the thickness of the boards that would be needed to support the back of the bookcase (we used 2 x 6’s cut down) plus the material being used as backing itself (we used shiplap). So keep that in mind when building your base, it needs to be bigger than just the depth you want for your shelves.

2. Build Out A Frame For Back & Sides
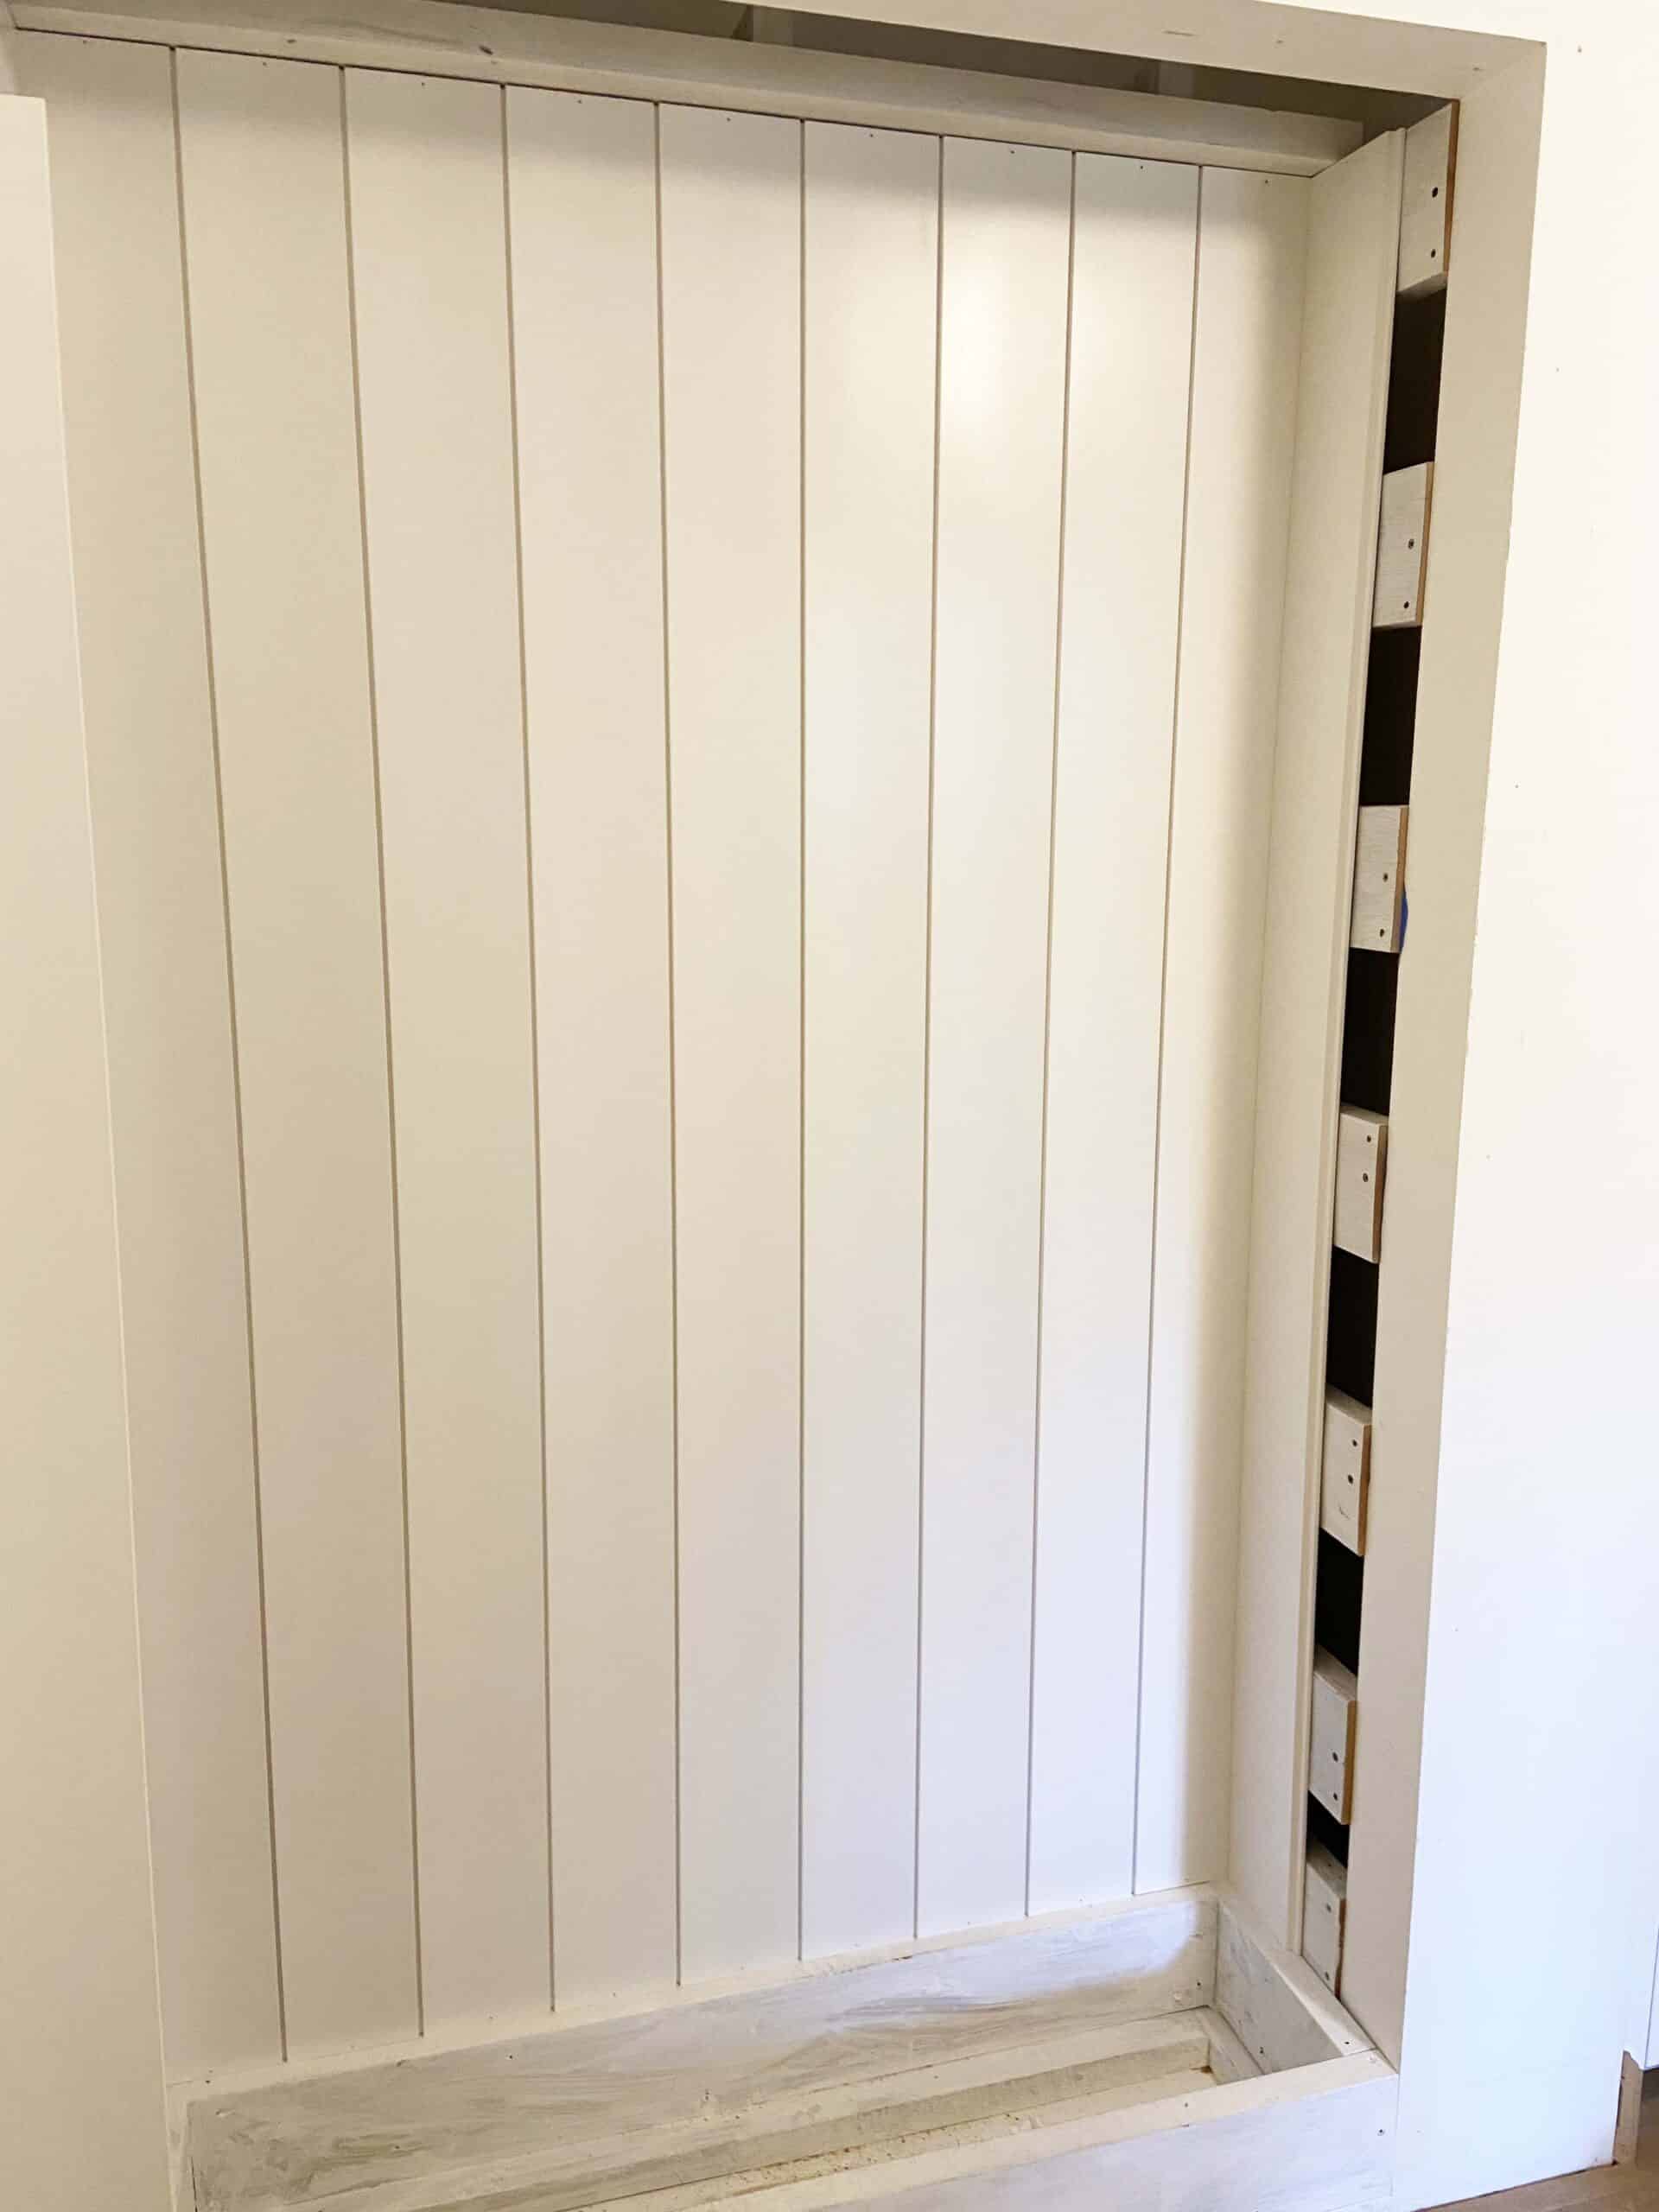
This is probably the trickiest part. Figuring out how to fill the gap between the base and the existing closet depth. Doing so gives it the truly “built-in” look.
We used 2 x 6’s ripped down to the specific depth (theses are the boards attached vertically to the back wall in the above picture) we needed to have them meet the horizontal boards we then attached to them. The horizontal boards (pictures above) are there so we have something to attach the shelves to.
Using the same process, we then attached side support boards from the closet opening to the horizontal boards to create a backing to attach our shiplap to on the sides (thus creating the bookcase sides).
3. Attach A Decorative Backer
This is where you get to have some fun. There are so many different materials you can use as backing material. We chose to use a fabricated shiplap, but bead board or something similar would be easy to install and equally as cute.
The shiplap is attached with nails at the top and bottom of each piece of shiplap.
We then attached our top and bottom shelf boards. This enclosed the bookcase and created a base from which to build out our shelves.
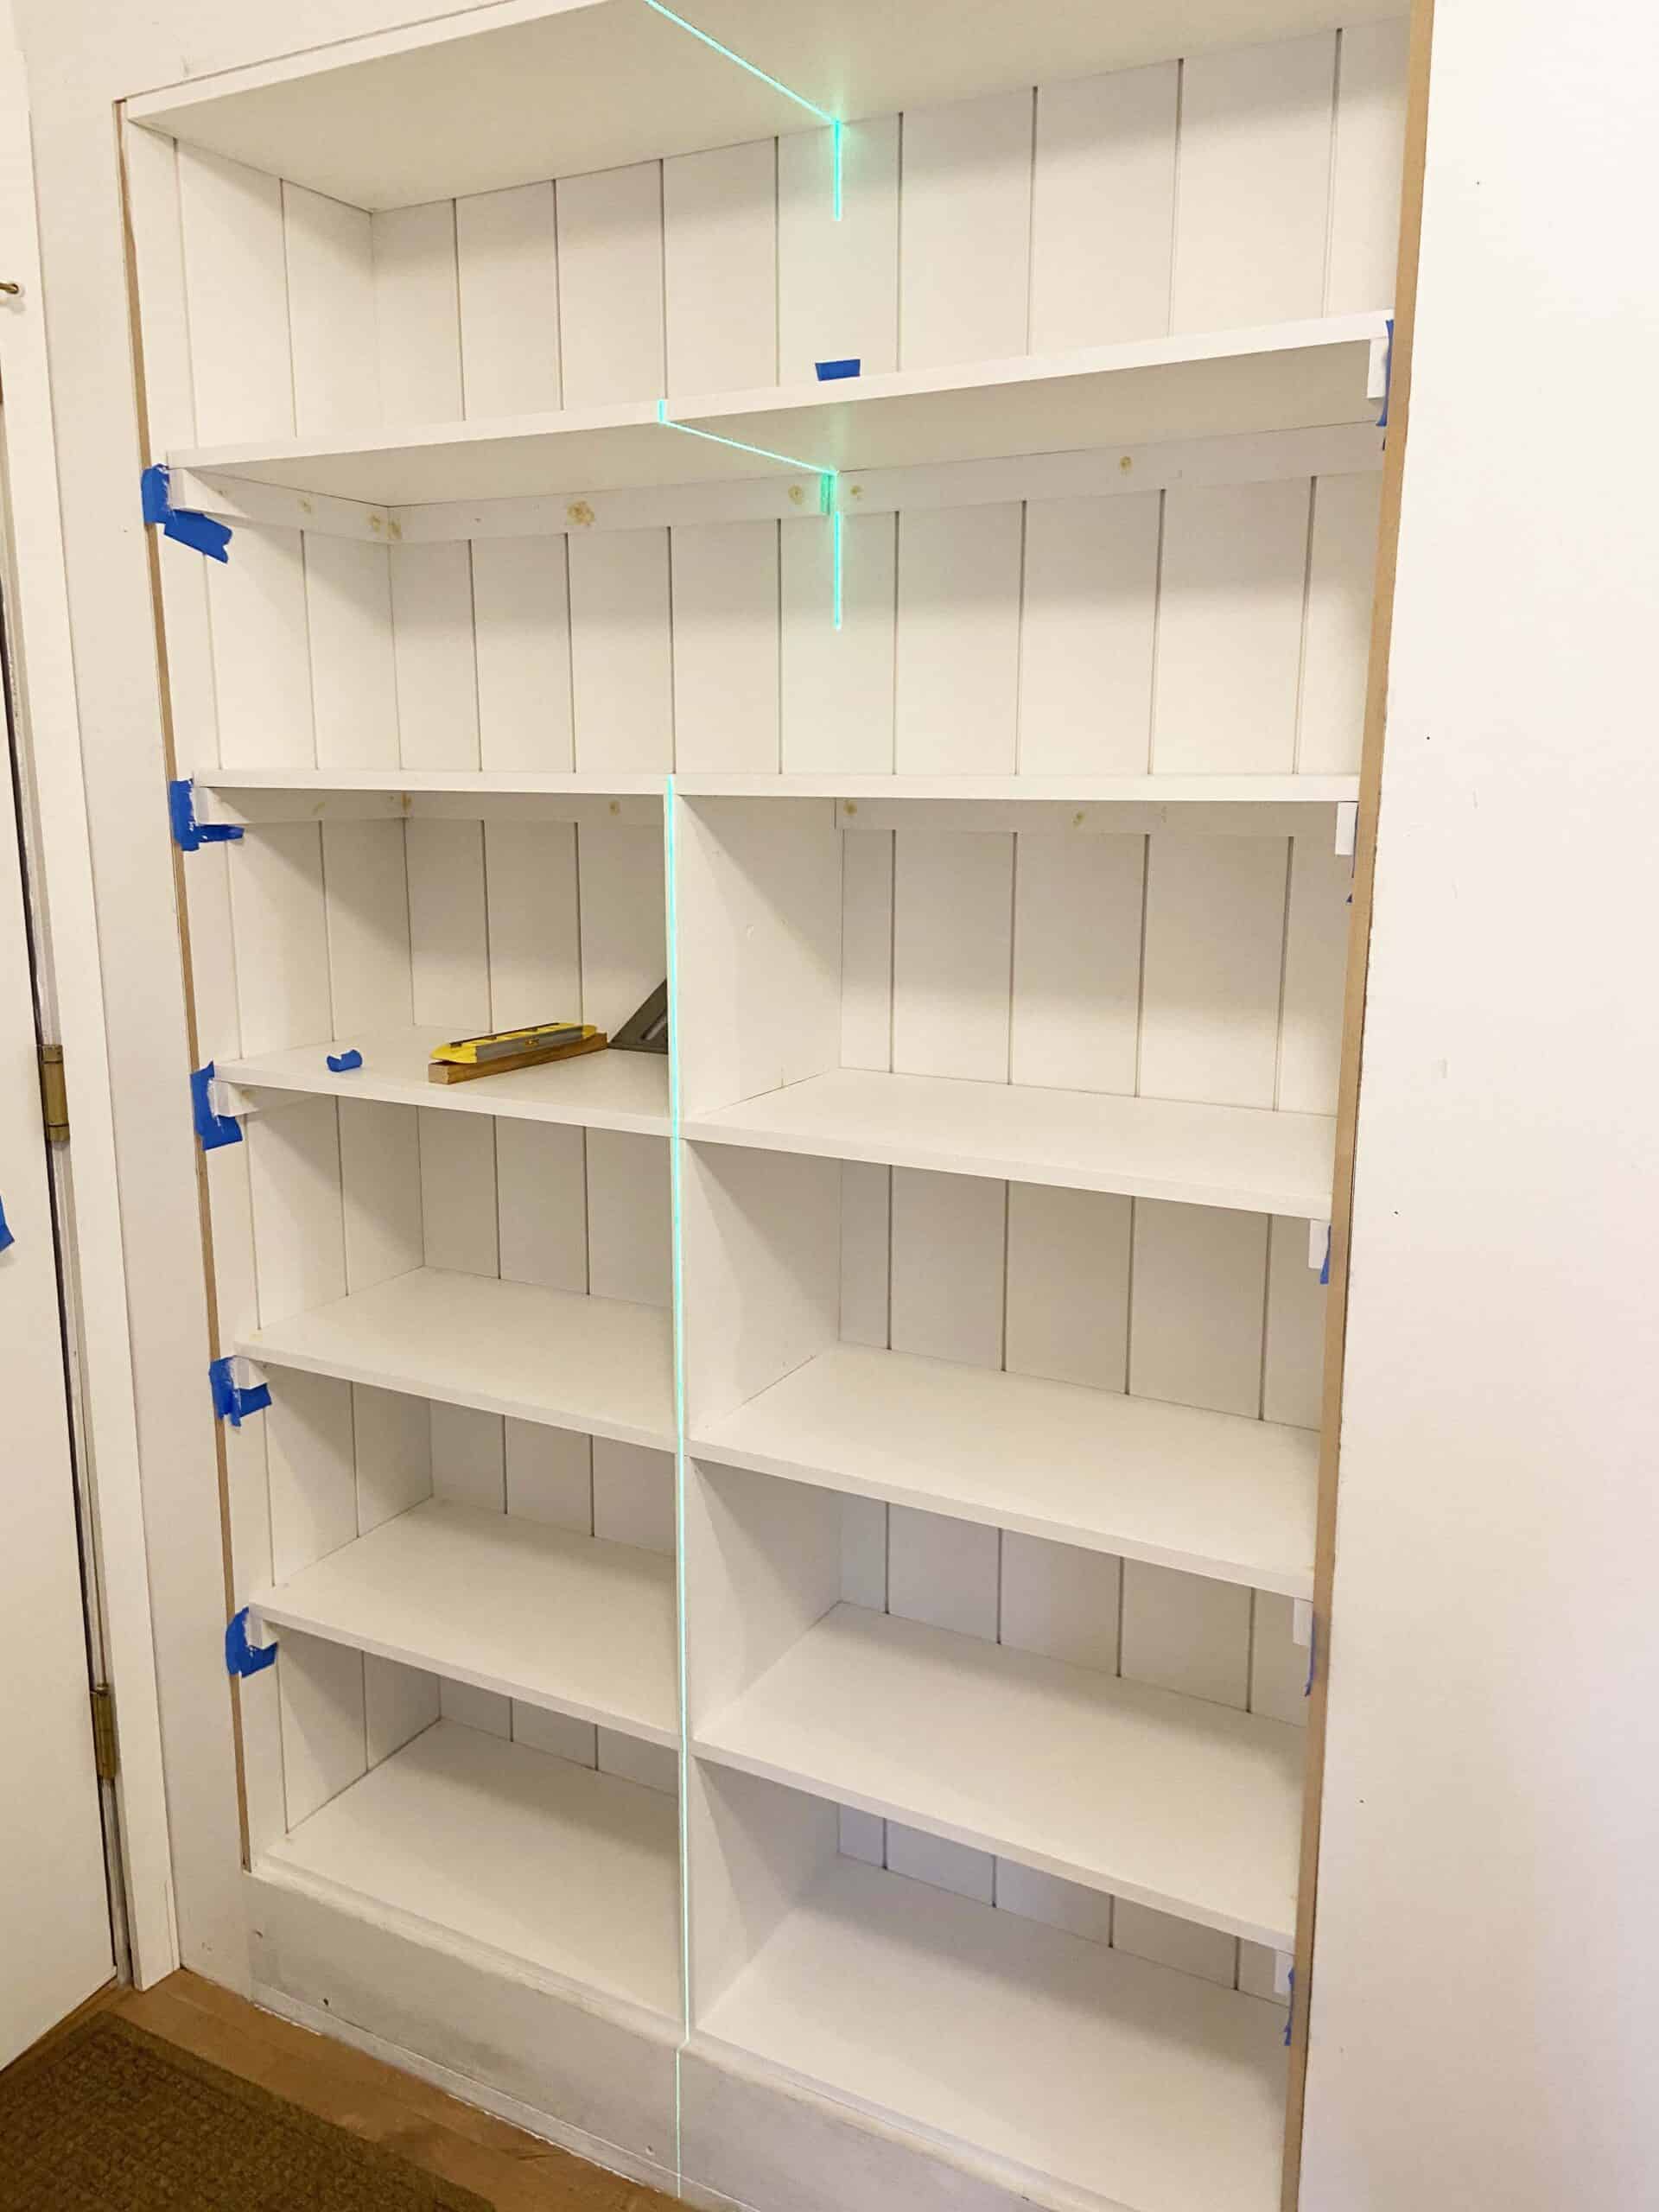
4. Build Shelves To Fit
The shelves were cut length wise according to how wide each shelf needed to be. They sit on 1 x 2″ furring strip boards that are screwed into the horizontal supports seen in step two.
We added extra support by installing middle supports centered on each shelf.
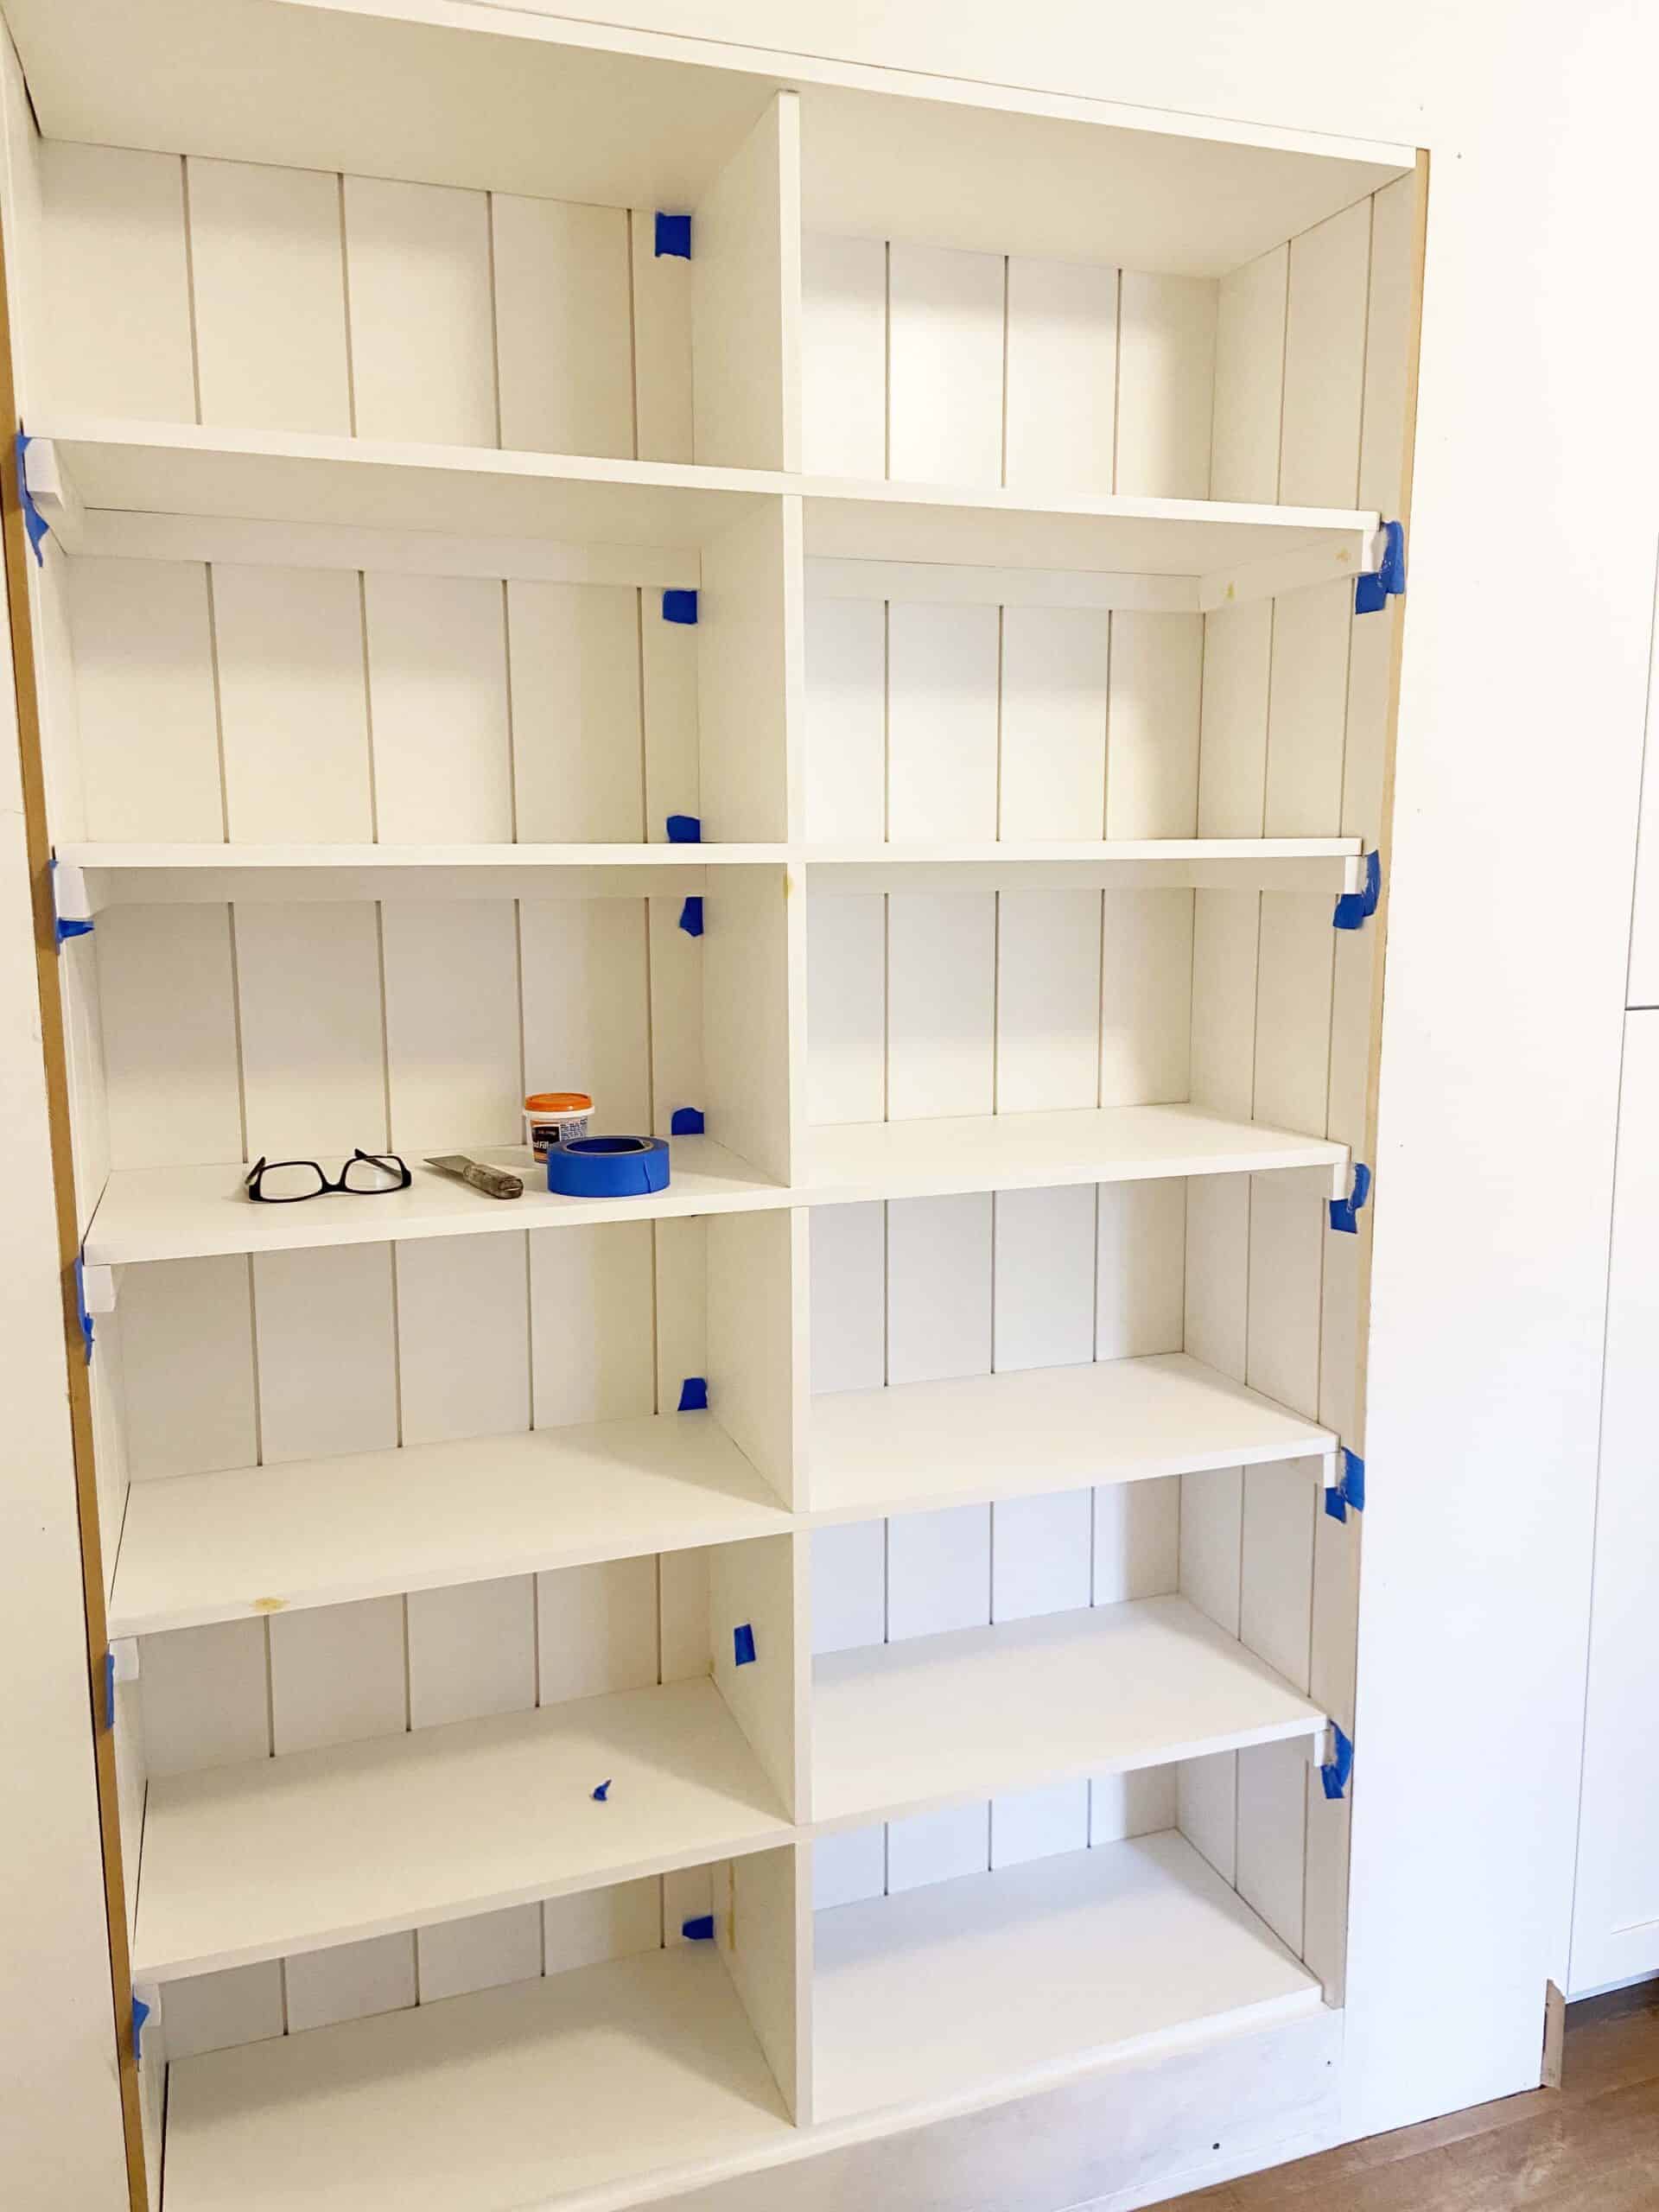
5. Caulk & Finish Work
The finish work always seems to take the longest, but it’s so worth it! We trimmed out the bookshelf and base with the same trim and baseboard used throughout the rest of our home. Caulking all the seams and shelves, and touching them up with paint made a huge difference in the finished product.
On a side note, I waited a full week before placing any books on the shelves to make sure all the paint had fully cured (SO HARD!)

We’re so please with how it turned out! All of our children books now have a home and it has turned into such a happy, cozy part of our home! And if you’d like to see more pictures of the finished reveal, you can check them out in this post.
I hope this tutorial helps you if you’re thinking about doing something similar. 🙂
Want to save this post? Pin it here!





Leave a Reply
You must be logged in to post a comment.